This blog post will show you how to show active menu marker Power Portals and enhance the user experience on your Power Portal.
The problem
Out of the box – for some unknown reason – there is no menu marker on the primary menu. A menu marker is a visual queue that let the user know this is the current menu item. Usually, we alter the appearance of links that you hover over as well as implement a menu marker. It can look something like this:

The Solution
To add this functionality to your Power Portal you need to add a small javascript and some CSS styling.
Javascript
We add this script to the bottom of the footer. This is where Power Portals has some global scripts already, the footer is cached and it’s always available.
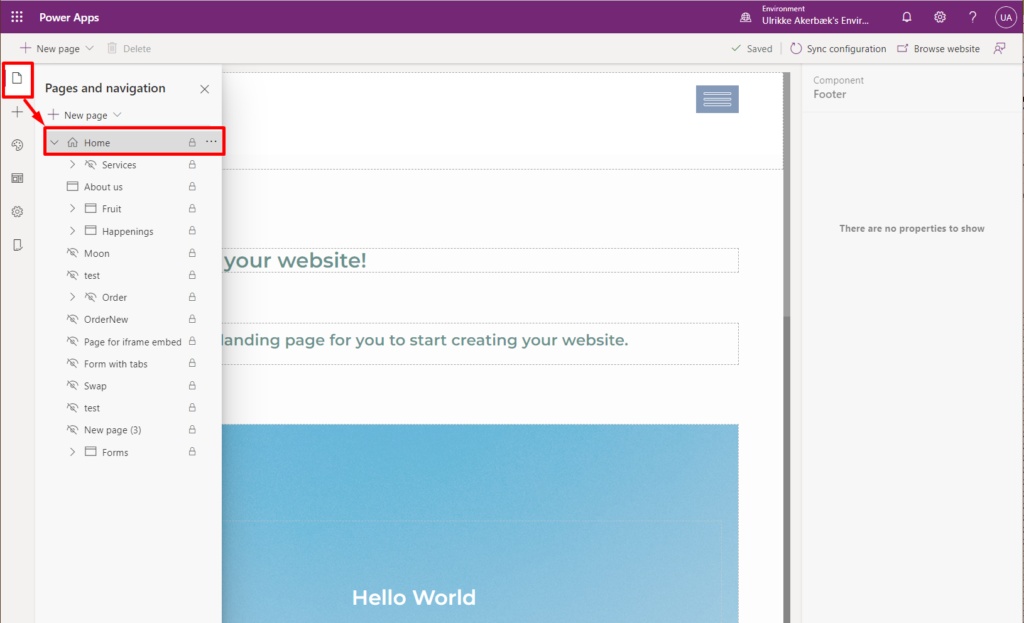
Open your portal in Portals Design Studio. By default, you should be directed directly to the “Pages and Navigation” section and the “Home” page should be opened.
Need help finding your way around all the different admin panels for Power Portals? Have a look at one of my previous blog posts that provide a "Map to configuring Power App Portals"
Scroll down to the bottom of the home page and locate the “Footer” element. Click it to select it, and then select the “code” button at the bottom of the page:

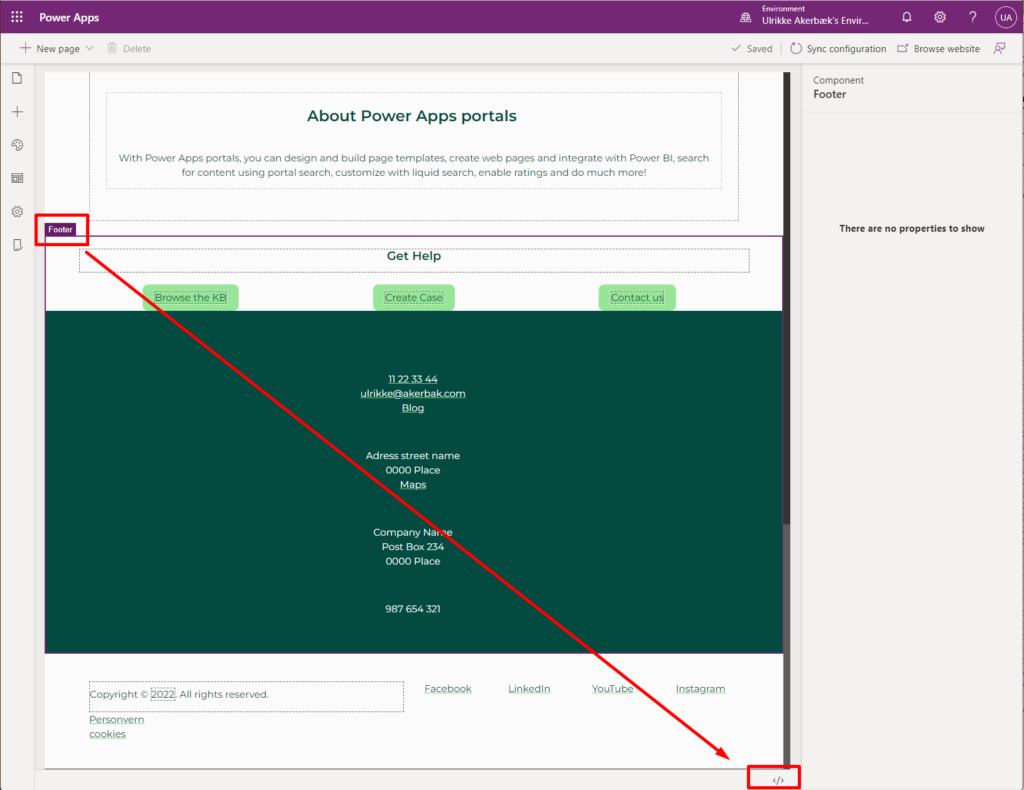
This will display the code editor and allow you to make changes to the web template code.
Scroll all the way down to the bottom of the code. After the end </footer> tag there should be a script tag that contains a jQuery document ready function and a script for dropdown-submenu.
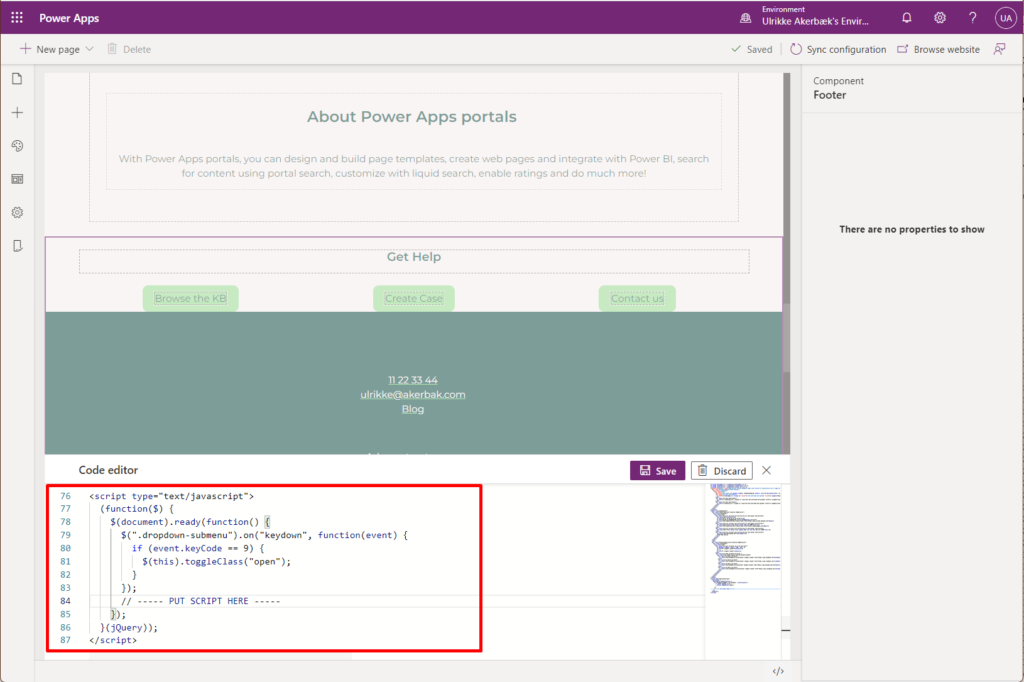
You will add our script just below the dropdown-submenu function, still inside the document ready.
Paste this code into the editor:
 // Set Primary Menu Marker for Current
      var pathname = $(location).attr('pathname');
      $(".navbar-nav li.weblink a").each(function() {
        $(this).removeClass('active');
        var lokalurl = $(this).attr("href");
        if (lokalurl == "/") {
          if (pathname == lokalurl) {
            $(this).addClass('active');
          }
        } else {
          if (pathname.indexOf(lokalurl) == 0) {
            $(this).addClass('active');
            $(this).closest('.weblink.dropdown').find('a.dropdown-toggle').addClass('dropdown-toggle active');
          }
        }
      });Code language: JavaScript (javascript)
Your code should now look like this:
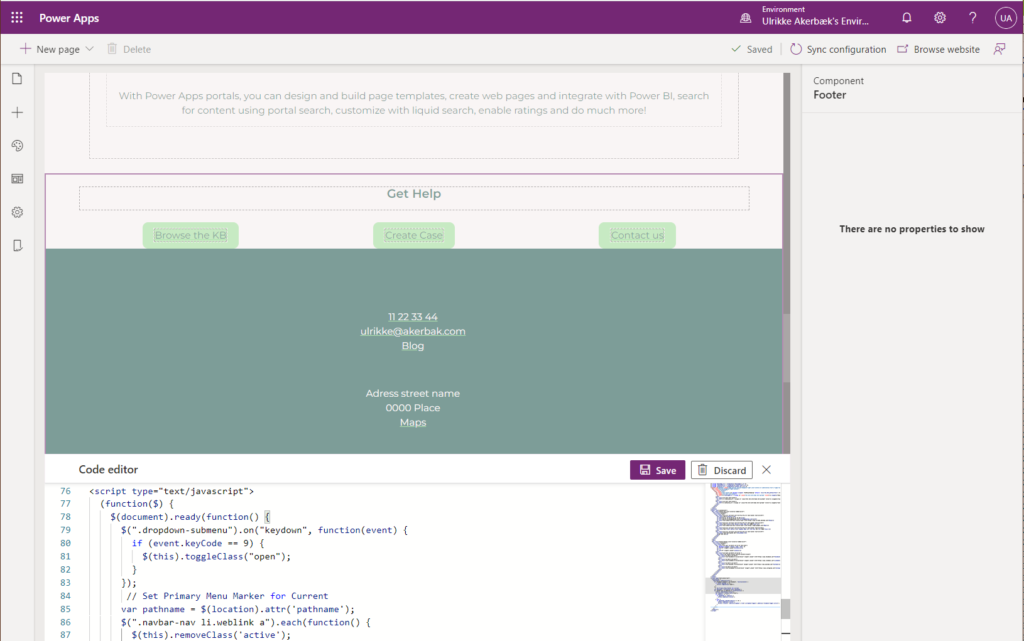
The code editor window is a little small for my taste, and I can’t show you all the code at once – but this gives you an idea of where the code should be placed.
Hit the “Save” button to make sure your changes are complete.
Styling
The script checks if the URL on the button matches the URL in the browser and adds the class “active” to the elements that match. Now we need to apply some styling to the “active” class to make this a visible change.
Navigate to the “Themes” section in Portals Design Studio and click the “Edit CSS” tab.
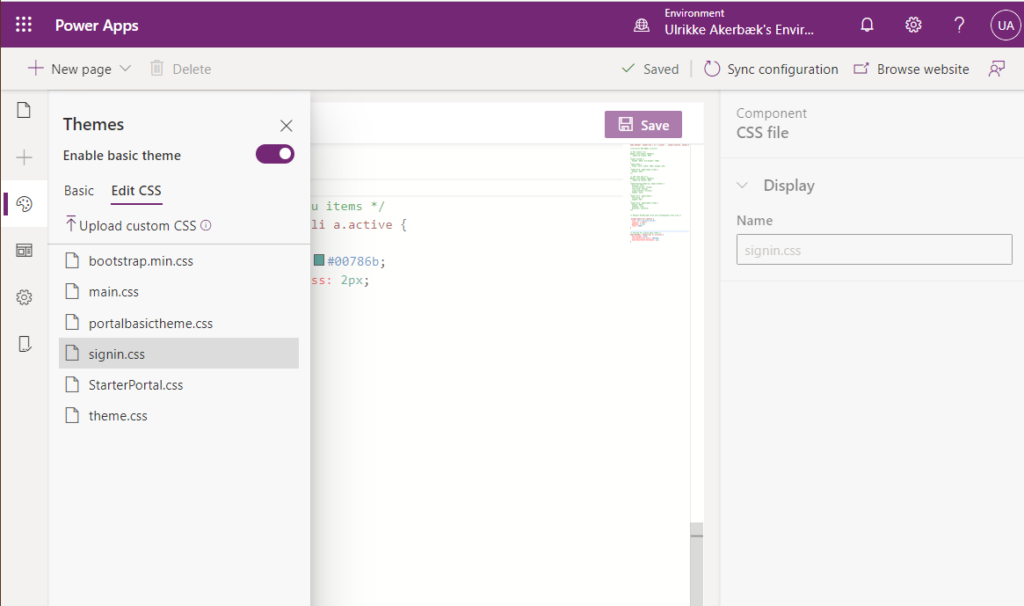
Open your stylesheet and paste in this styling:
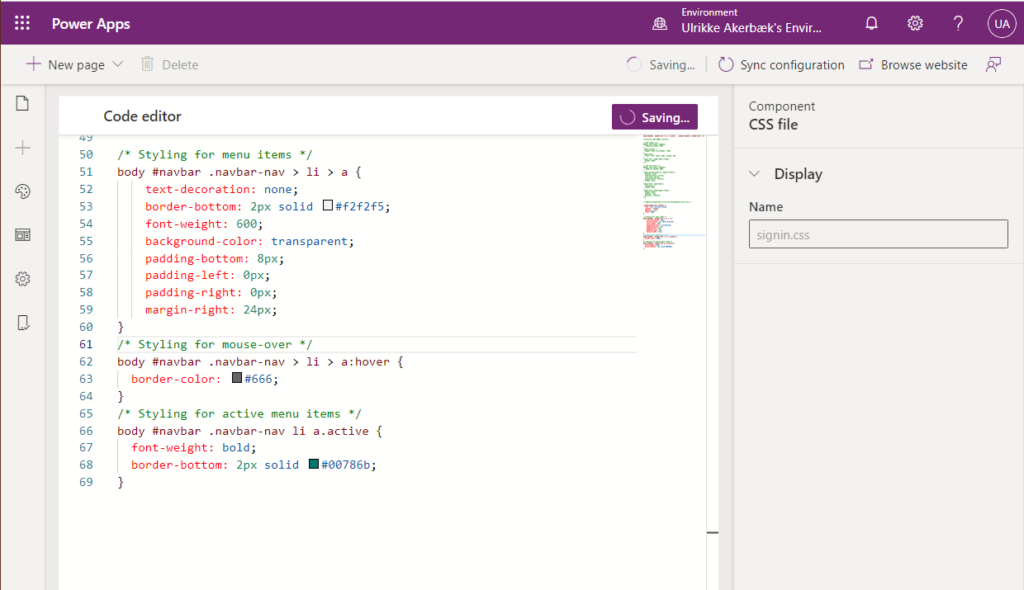
/* Styling for menu items */
body #navbar .navbar-nav > li > a {
    text-decoration: none;
    border-bottom: 2px solid #f2f2f5;
    font-weight: 600;
    background-color: transparent;
    padding-bottom: 8px;
    padding-left: 0px;
    padding-right: 0px;
    margin-right: 24px;
}
/* Styling for mouse-over */
body #navbar .navbar-nav > li > a:hover {
  border-color: #666;
}
/* Styling for active menu items */
body #navbar .navbar-nav li a.active {
  font-weight: bold;
  border-bottom: 2px solid #00786b;
}Code language: CSS (css)
Your file should look like this:
Hit the “Save” button to save your changes.
The result
To view your result click the “Browse website” button right on the top right corner. This will open your portal in a new tab and refresh the cache so you can see your latest changes applied.
When we’re on the home page the “Home” menu item is visually enhanced by having a coloured border below the menu item.
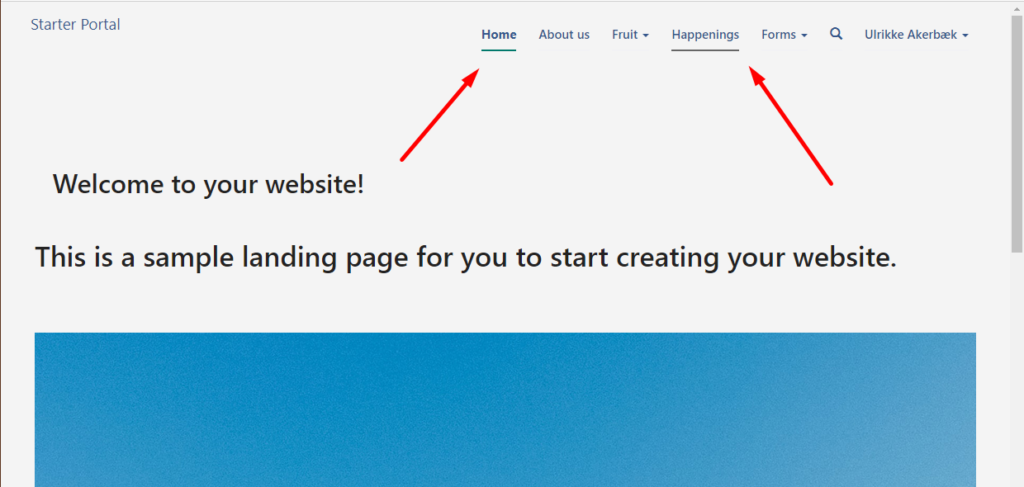
If we hover over a menu item it gets a dark grey border.
It also works for drop-down menus. This is a portal with some more styling.
Hope this was helpful and that you can apply this solution to your next Power Portals project.
Happy portal’ing! 😀
[…] Active Menu Marker in Power Portals […]
Great! Thx!
Now I have a portal were .sidepanel-left .nav is active or .nav.nav-pills>li.weblink>a. Seems like this is not working up there. Sould I change something in the footer Javascript?
Hello Robin. Yes, you would have to change the Script to apply the “active” class to your .sidepanel-left .nav elements.