Last updated on 11/11/2023
This blog post will show you how to add a browser icon, or favicon, as it is really called, to your Power Pages or Power Apps Portal.
This small, smart, and fabulous free tool that I use in every project.
This website might look unsafe and old, but I have used it for over 15 years and have never experienced anything bad related to it.
Well – when you have used a tool for 15 years it’s probably a good idea to do quick search to fid out is anything has changed. And changed it has. It is no longer as simple as uploading a single .ico file to your root directory and let the browser handle it. We now need to consider mobile users that add a shortcut your site to their home screen, people installing your website as an webapp and loads more. To make sure this looks good and work on all devices and browsers, we need to add a bit more then the humble 16×16 px image.
I found this blog post useful:
https://medium.com/web-dev-survey-from-kyoto/favicon-nightmare-how-to-maintain-sanity-7628bfc39918
The optimal favicon is:
- 16×16 pixels (or at least square)
- Transparent
- Single colour
- Simplistic
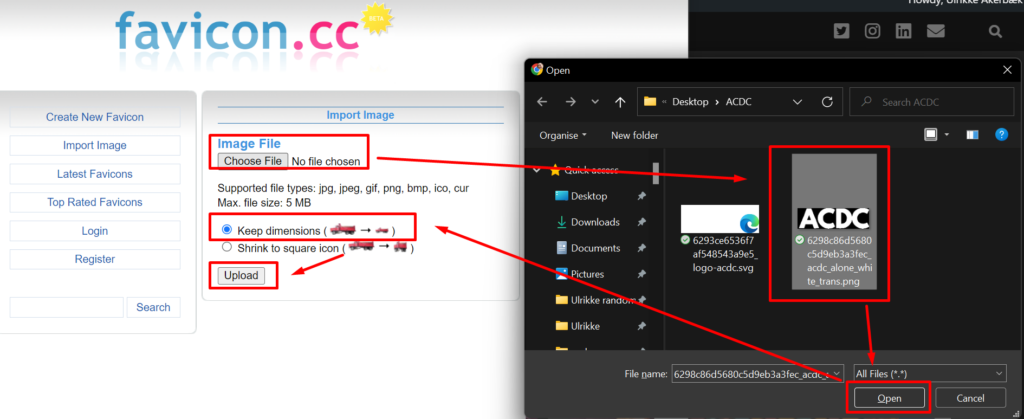
Upload your image, select “keep dimensions” and hit the “Upload” button.
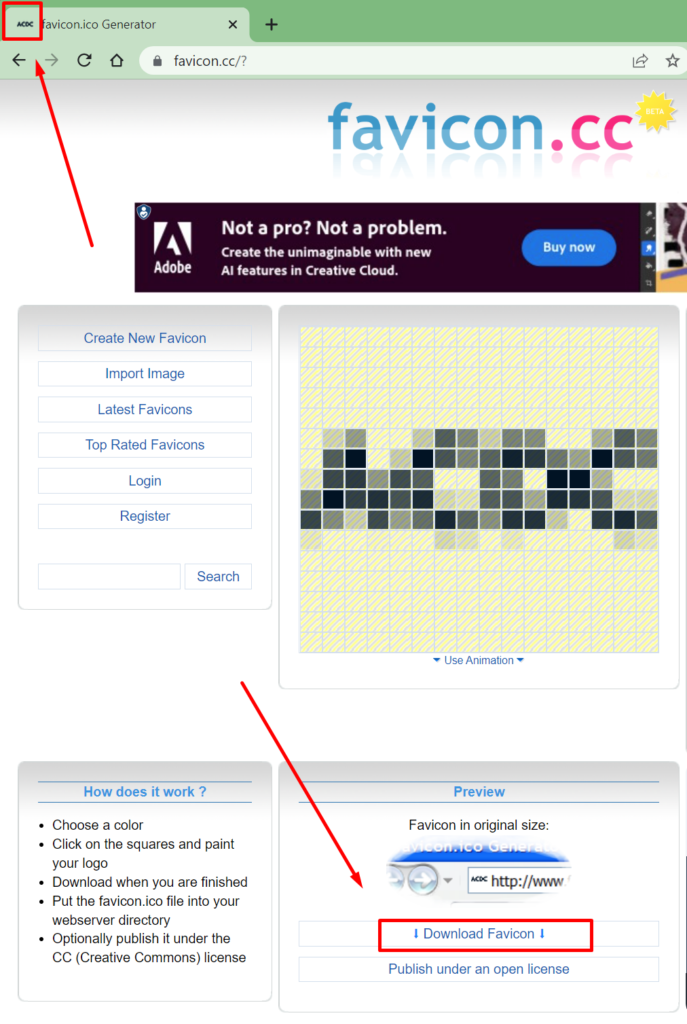
You will be able to see a preview of the favicon in the browser itself, and if you are happy with what you see then you can download the favicon file.
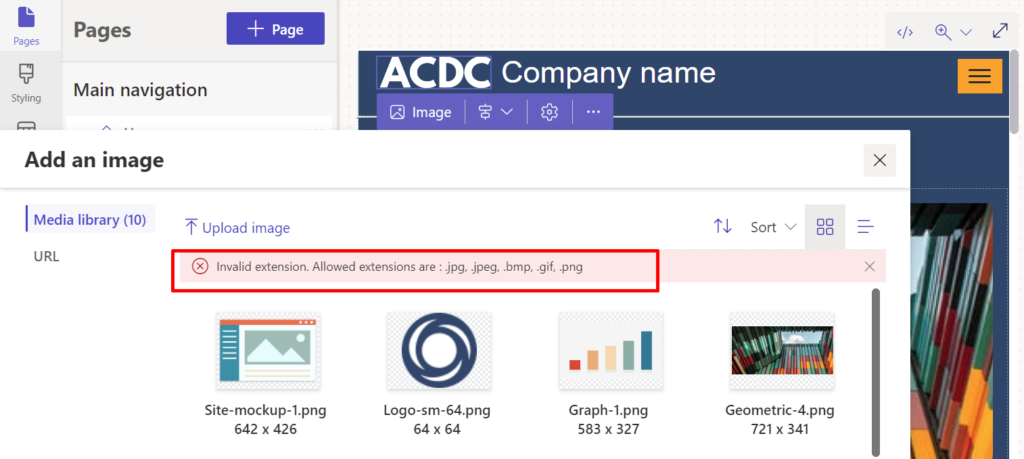
You would think that we could simply upload the favicon to the Power Pages Media Library, but no. The library doesn’t accept other files then .jpg, .jpeg, .bmp, .gif and .png.
We will have to do this the old-fashioned way; create a web file in the Portal Management App.
Create a web file
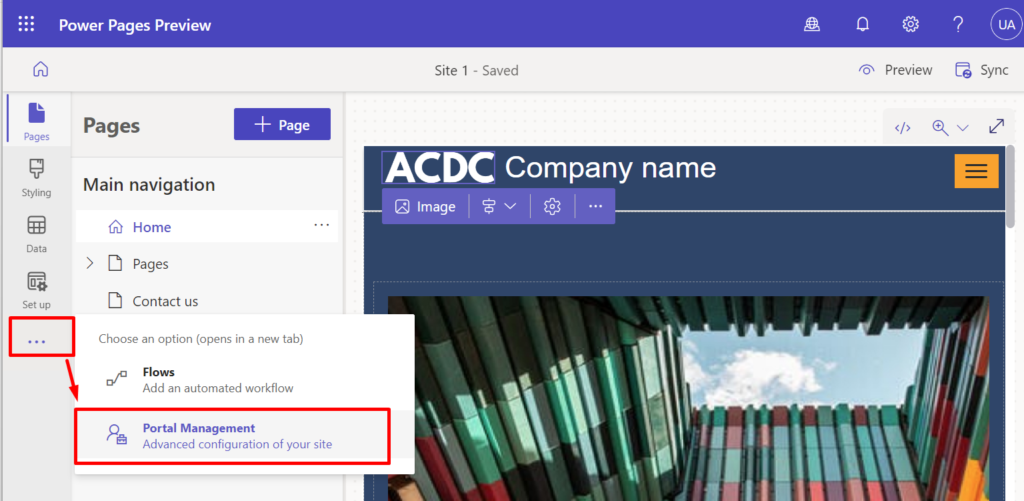
From Power Pages Studio, click the three dots at the bottom of the left-hand menu, and choose “Portal Management App”.
In the new tab that opens
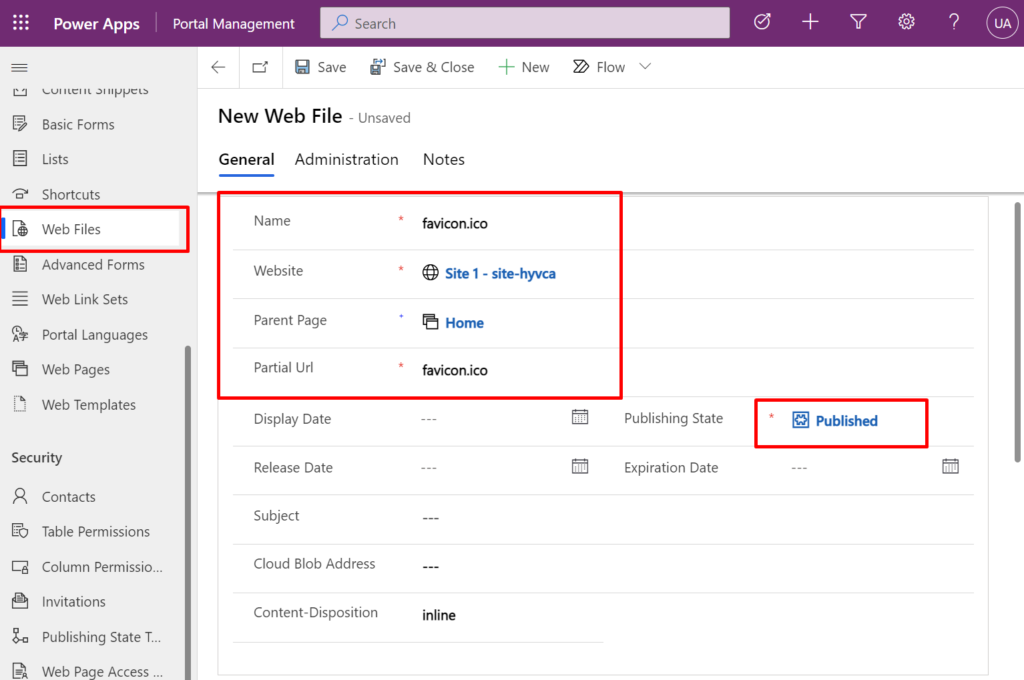
- Find “Web files” in the left menu.
- Click “New” to create a new web file
- Fill in the form. Make sure you enter the correct portal in “Website”.
- Open the “Notes” tab
- Click the “+”
- Choose “Note”
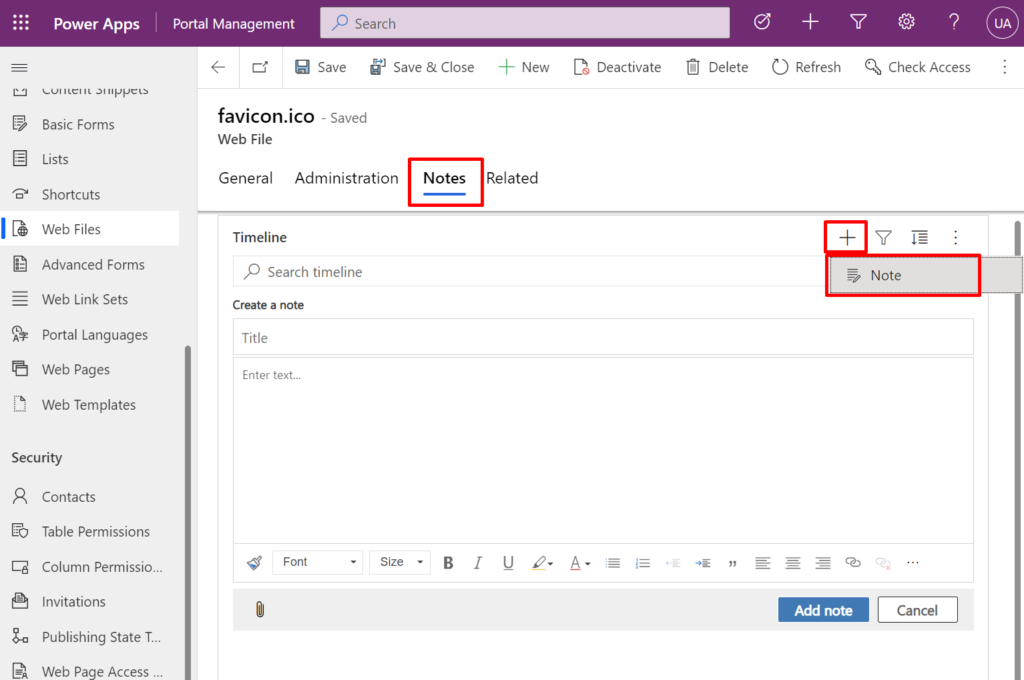
Select the favicon.ico you downloaded
Click the “Add note” button at the bottom of the field.
Save the web file
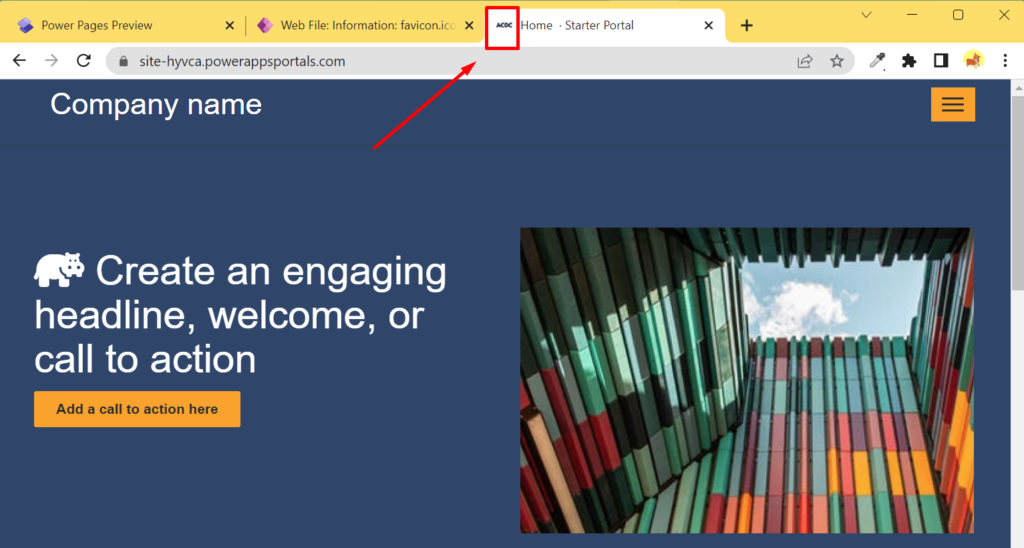
Refresh your portal cache and refresh the portal in the browser to see your changes. It might take a minute or two before you see the change.
Nice job!
Hope you are satisfied with that. Good luck! Happy Portaling!
[…] Add browser icon (favicon) to Power Pages […]
I followed your step and In Notes table I click on + icon and then new notes. I provided the notes name and click on attachment icon to upload the ico file. I also drag and drop the file inside notes section and i clock in the image icon to upload the file but on my power page it is not showing the icon. Is there something I am missing?
Hi. Have you made sure to sync the changes in the Design Studio, and then Publish? It might take some time before it appears. Please report back if it is still not working and I’ll help you out.
Hi.. I believe the UI has changed and cannot see “Notes” when I create a web file. I uploaded the favicon.ico as a file content and had to do a “Clear cache and Hard refresh” to see it.
Hi Jaco. Thank you for pointing this out. You are right, it’s no longer needed to add a note; you can simply upload the favicon as a file on the webfile. Neat, right?! Killing the cache and a hard refresh is always the way to go with Power Pages Portals. Great job, and thank you for your comment.