Last updated on 16/02/2020
This blog post will show you how to create navigation on an entity form using a combination of entity lists and liquid code.
If you’re using the old legacy Dynamics interface you are probably familiar with the extremely handy and extremely tiny arrows that allow you to navigate to the next and previous records.
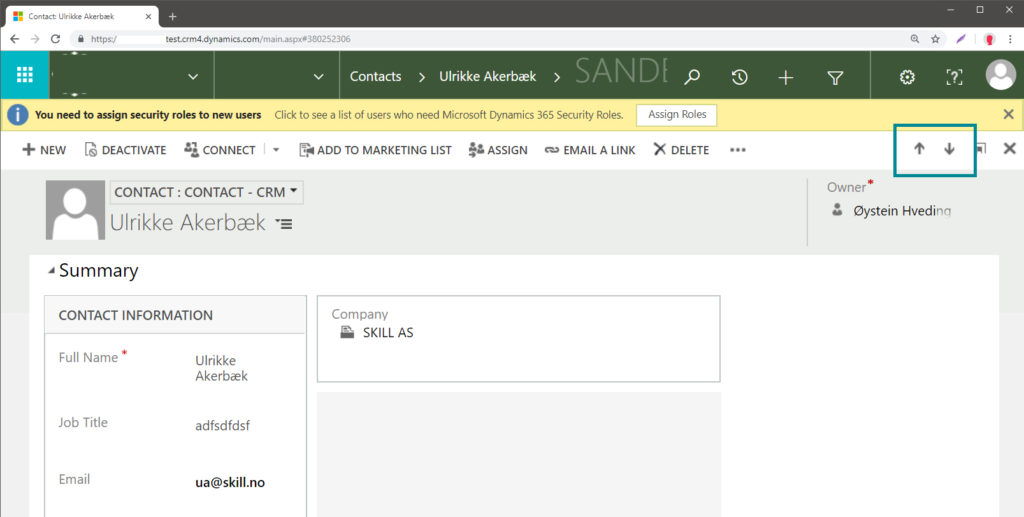
When working with records in a portal this option if nowhere to be found. It cannot be configured in any way. It’s impossible.. Did you say impossible? Challenge accepted!
Solution
Portal black belt and master mind Nick Doelman was the one to set me on the path to this solution. Cheers, Nick.
For the system to know ID’s for previous and next records I create an entity list that get all contacts. I render the list using liquid behind the scenes in a custom entity list web template. I also create an entity form to display the current contact, and connect entity list, entity form and web template to my web page. When the page display the current contact I get the contact ID from the URL and match with a record in the entity list. When I find a match I use the forloop index to get the ID of the next and previous contact in the list. I then apply the ID’s to buttons for next and previous using liquid. Head spinning yet? Let me clarify:
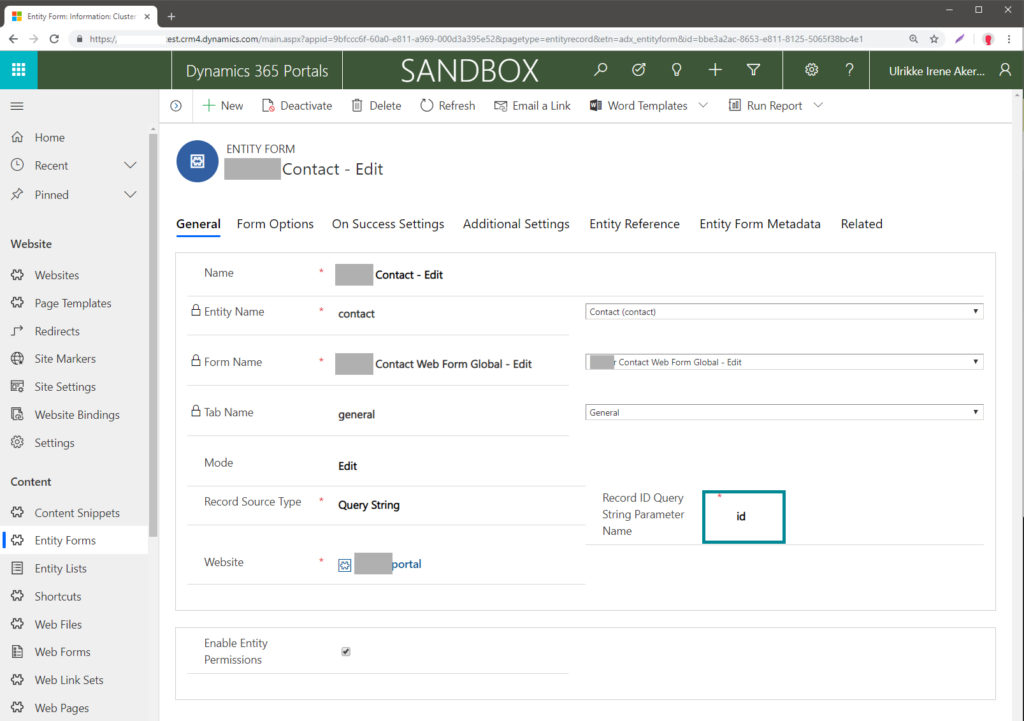
Entity Form
I create an entity form that display a single contact by ID from the URL, like so:
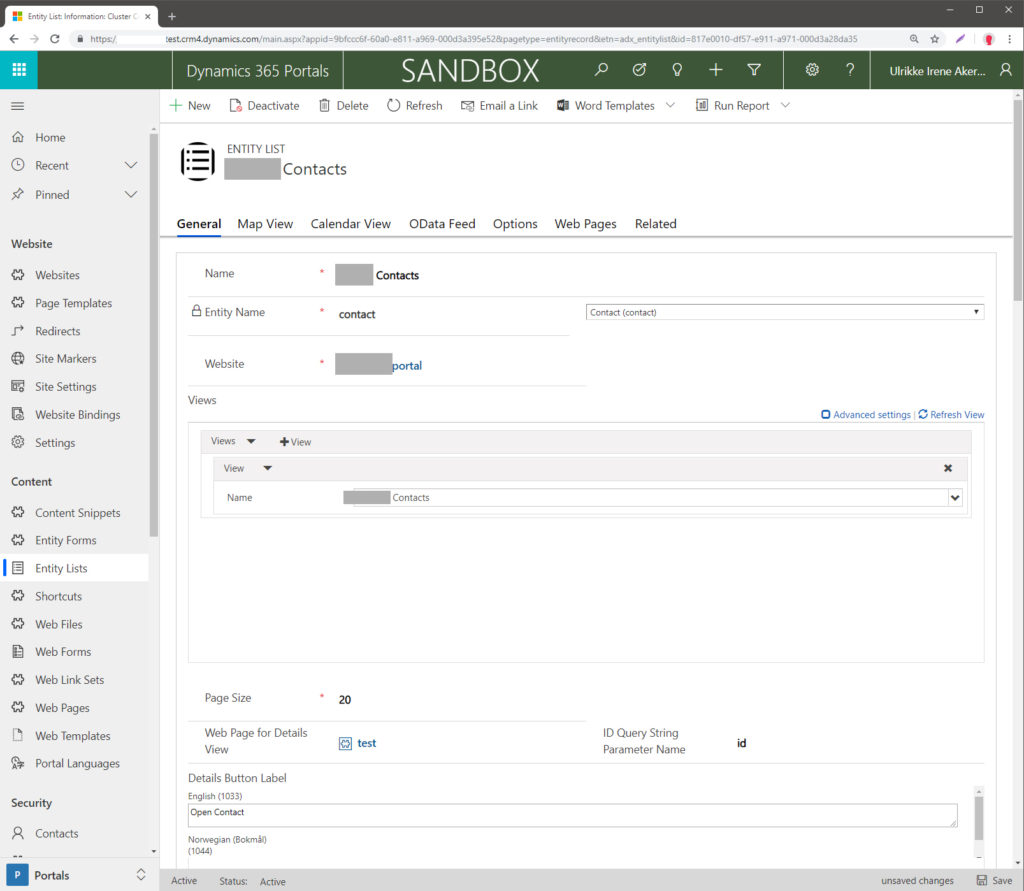
Entity List
I create an entity list that get all contacts, like so:
Web Template
This is where the magic happens. Create a new web template. You might want to start from scratch or extend an existing template.
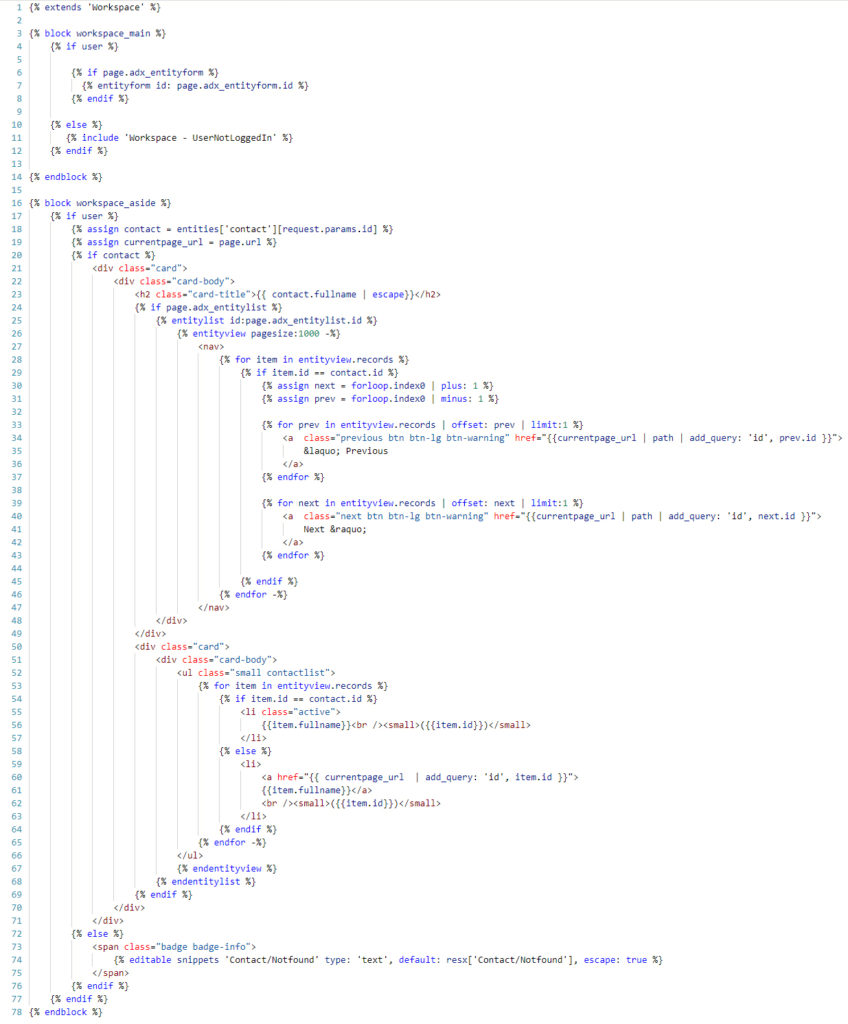
Template base
First of all I create the framework for my template by extending my base template “Workspace”. I check if user is logged in and render the entity form related to the page (the one I just created).
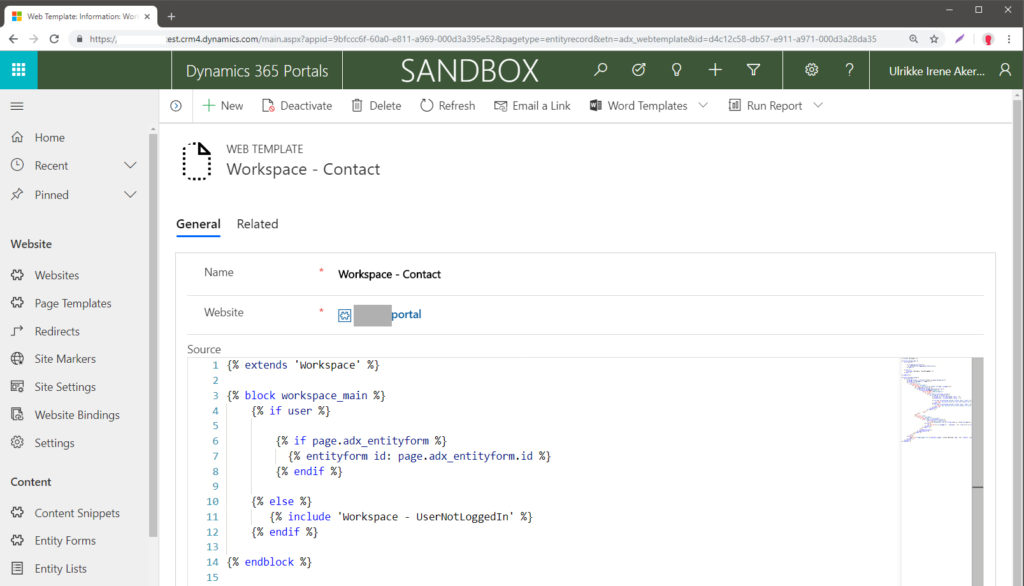
TIP: If user is not logged in render a message that user need to log in and a link to the login page. This is my way of working around the default error message thrown in the users face when trying to reach a page with restricted access.
Side panel
Then build the side panel that will hold the previous and next navigation buttons. First establish some base data, then render the entity list and then populate the buttons with the right ID’s.
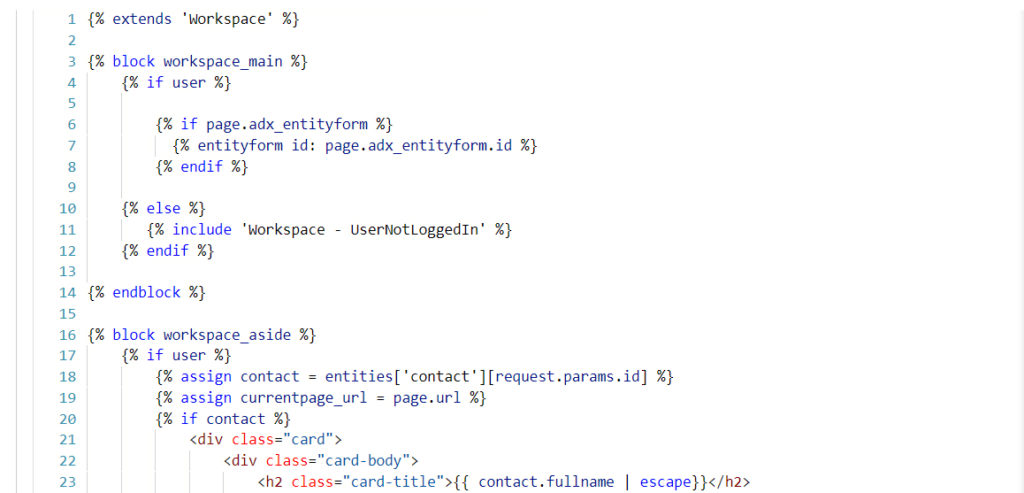
At line 18 get contact record from CRM by getting ID from URL and storing it in the “contact” variable. Use this later to get a match in the entity list. Then get the current page URL. Use this later to generate the link for the next/prev buttons.
Alt line 20 do a check if there is in fact a current contact to be found. Then some Bootstrap HTML for appearances and display current contact name as a header for the side panel.
Entity List
Now it’s time to render the entity list. Get the entity list associated with the web page by getting the ID and set up an entity view.
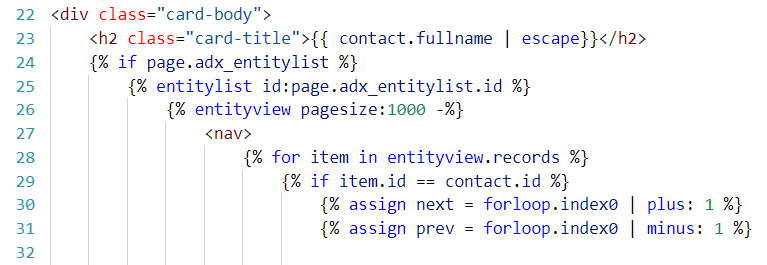
If pagesize attribute is not specified it will use the page size from the entity list config. This is normally set to 10 or 20 and require paging to get to all records. To view all records at once without paging set the pagesize to a high number that exceed the normal number of records expected. In this example I set the pagesize to 1000.
Inside the <nav> loop trough entityview records. When there is a match for current ID and an ID from the list you got the current contacts position in the list. By using the for-loop position (forloop.index) the previous (forloop.index minus 1) and the next (forloop.index plus 1) are easy to find with simple mathematics and assign to variables “prev” and “next”.
Create buttons
Loop trough the list again two times to get the previous and next items in the list using the new variables.
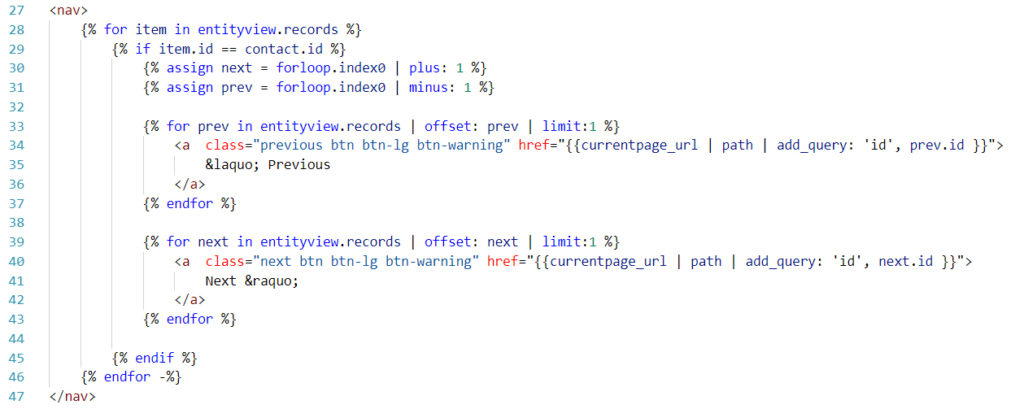
First (line 33-37) loop is set to start at the “prev” variable value (offset: prev) and limit results to one item (limit:1). For this one result render a <a> element and make it look like a button. Construct the link using the current page url and add the ID for the “next” item.
Do the same to create the “next” button (line 39-43) and wrap up if’s and for loop’s.
Complete list of contacts
Now, I’m a control freak; I’ll admit it. So to see what’s going on behind the scenes I rendered the list as well to see with my own eyes that the buttons actually work. I realized that this might be nice for the end user as well.
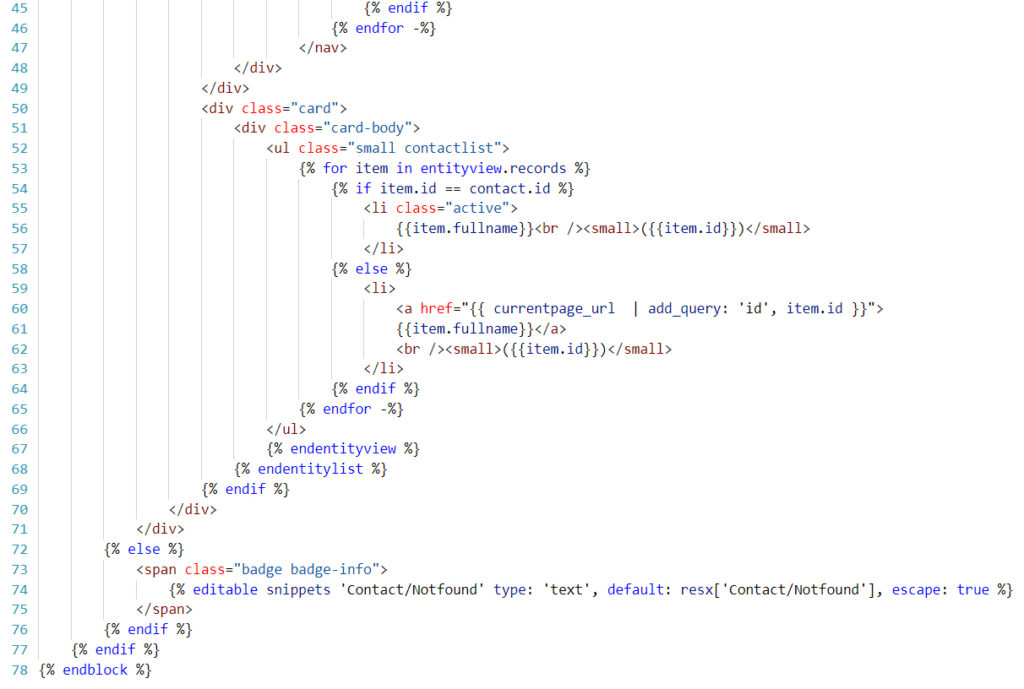
After wrapping up the if’s and for’s, the <nav> and the card elements create another card (line 50) with appropriate HTML. Inside the card create a list and loop trough the list as before letting all items trough (line 53).
TIP: I use Bootstrap elements. Check out Bootstrap Cards here.
If item ID in list matches with current contact ID I want to highlight it in the list. Render <li> with class “active”.
For all other items render <li> with <a> inside. Construct the link using the current page url and add the items ID. This way if you click the item in the list you will open that contact.
After the link display the ID in plain text to be able to compare ID’s and make sure you get the correct results. This is only for development purposes and I’ll hide this in production.
Wrap everything up and close all open elements. The entire web template look like this:
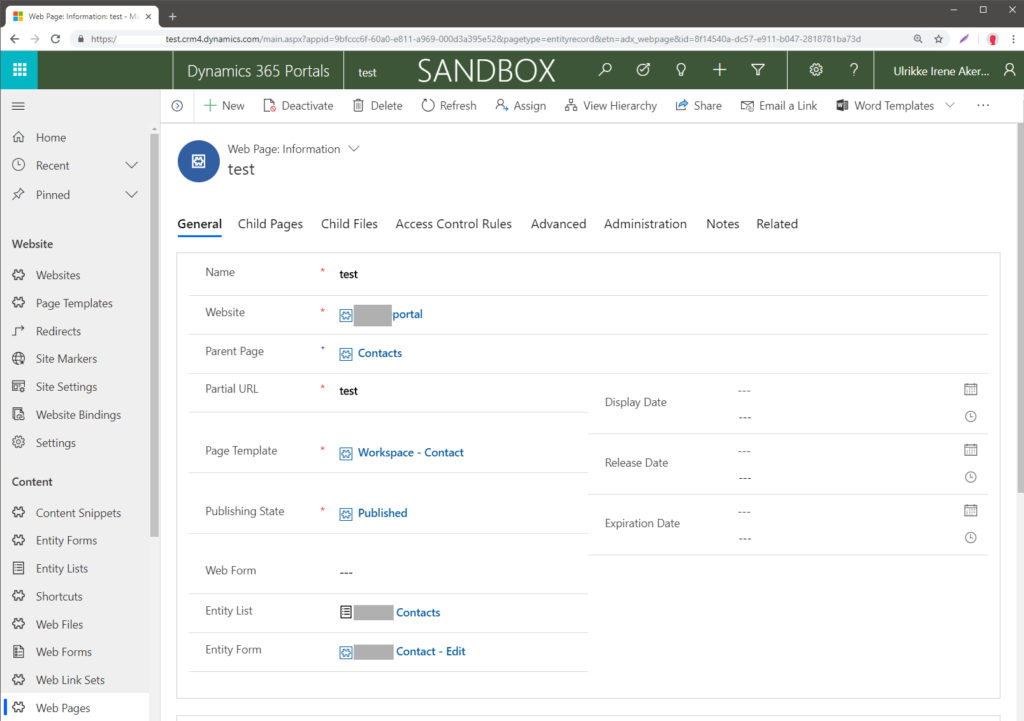
Web page
Finally lets tie the whole thing together. Create a web page and connect it to the entity form, entity list and web template (create a page template holding the web template).
Navigate to the page and make sure you include the ID parameter, like this:
https://[portalname].microsoftcrmportals.com/test/?id=6692373f-8354-e911-a96d-000d3a28d891
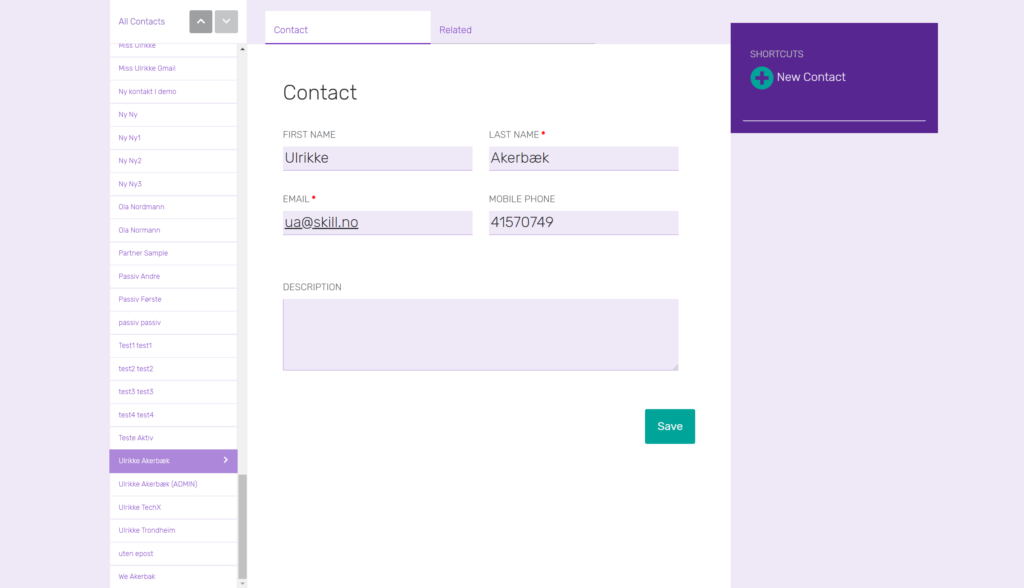
The result look like this:
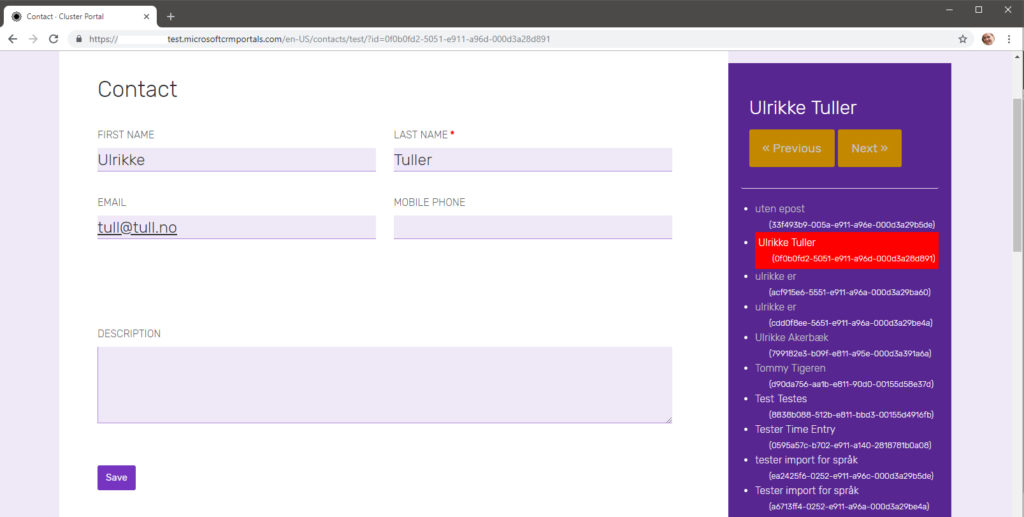
Take note and compare the ID’s in the list for the current item and the ID in the URL to make sure the buttons navigate to the right element.
This is not complete; I would like to make this generic so that the template can apply to any record type. I don’t like the page size set to 1000 either, so need to figure out how to count the number of items in the list before I render the view. Tricky, tricky.
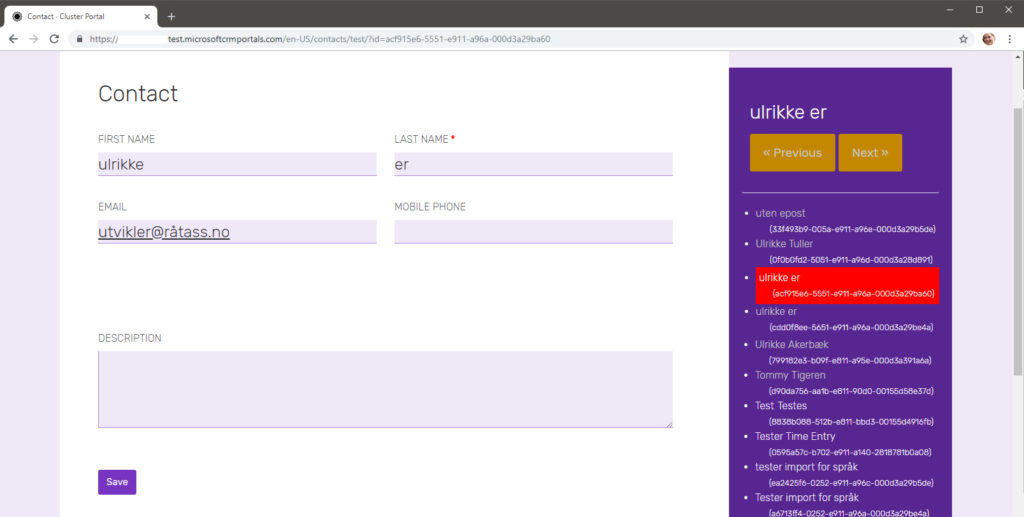
A nice feature that I didn’t expect is the disappearing of the “Previous” button when viewing the first element in the list. Subsequently the “Next” button disappears when you view the last element in the list. Thank you, Portals. You give some you get some I guess.
When deployed to customers environment it looks something like this:
Happy portaling.
All the best, Ulrikke
Cover Photo by me (for once) and the portal we are building for Innovation Norway.
Too bad the screenshot images don’t render on the page.
Hi Dave. Seems LinkedIn has changed the location of the images, as they were originally hosted there. Now I have updated the post with images stored locally. Thank’s for noticing.
[…] Next/Previous record navigation for Power Apps Portals … […]