Last updated on 25/11/2022
This blog post will show you the best practice way to enable Font Awesome icons in Power Pages. By default, the portal has icons from Bootstrap called Glyphicons – but you can change to using Font Awesome icons pretty easily.
I know there are a lot of blog posts about this already – and most of them put his code in the header web template or something like that. Not the best practice. So I wanted to show you how to do it properly and introduce you to two new content snippets as well.
Get Font Awesome
We need to let the Power Pages portal know where to get the Font Awesome icon library from. You can get your hands on the link for free, but you will need to sign up – even for the free version.

At this writing moment Font Awesome version 6 is the new kid on the block. Get started by visiting the link below. The Font Awesome website has an intuitive user experience, and I trust that you will figure this step out without my step-by-step instructions.
Get Font Awesome icons here: https://fontawesome.com/
Enable Font Awesome icons in Power Pages
To use Font Awesome icons on a website the link be placed in the <head> tag in your HTML, as you can see from the Font Awesome documentation:

Link to this documentation page:
https://fontawesome.com/docs/web/setup/use-kit#_3-add-the-kit-code-to-your-project
We cannot access and edit the <head> tag directly in Power Pages, but there are content snippets that allow us to add, replace and expand the content of the <head> tag.
Content snippets that apply to <head> tag:
- Head/Bootstrap
- Head/Fonts
- Head/Bottom
| Head/Bootstrap | Replaces all references to Bootstrap and any other stylesheet. (Not recommended) |
| Head/Fonts | Meant for adding fonts – this is what we’ll use for Font Awesome |
| Head/Bottom | Content will be added to the bottom of the <head> tag |
Note: None of these exists in a portal out-of-the-box, but you can create them yourself.
Head/Fonts
This content snippet will not exist by default, so we need to create it ourselves. Content snippets are only available through the old Portal Management App at this point in time.
- Open your Power Page portal in the new design studio (edit)
- Click the three dots at the bottom of the left menu
- Click the “Portal Management App” button
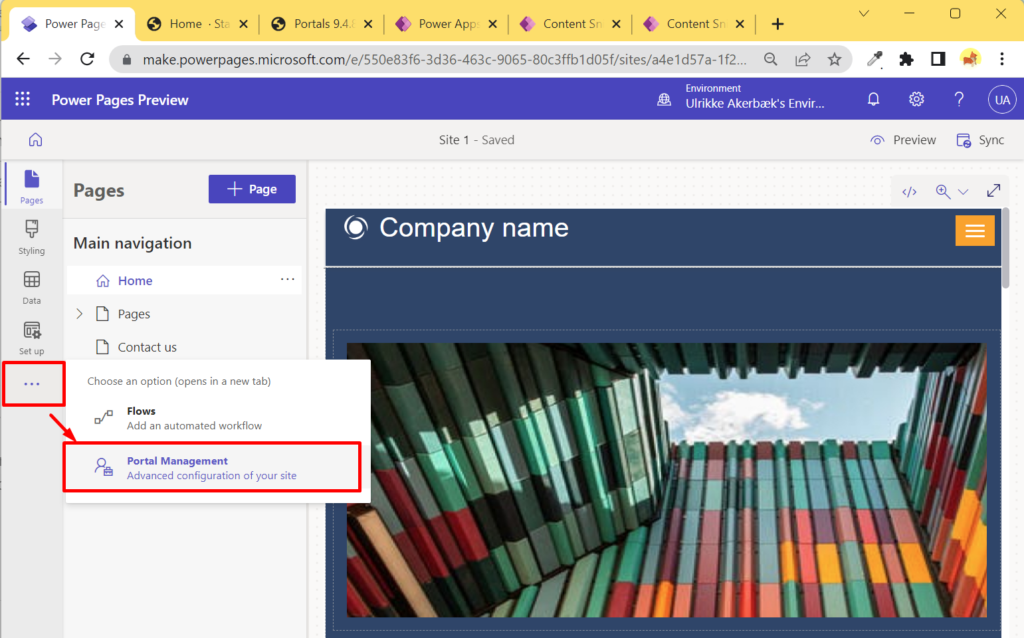
A new tab opens with the Portal Management App. It’s a model-driven app that allows you to configure the Power Pages portal in a much more advanced and old-school way than the modern designer.
You can learn more about all the different interfaces for editing Power Pages in my blog post from the link below:
Locate “Content Snippets” in the left menu and click the “+ New” button from the toolbar:
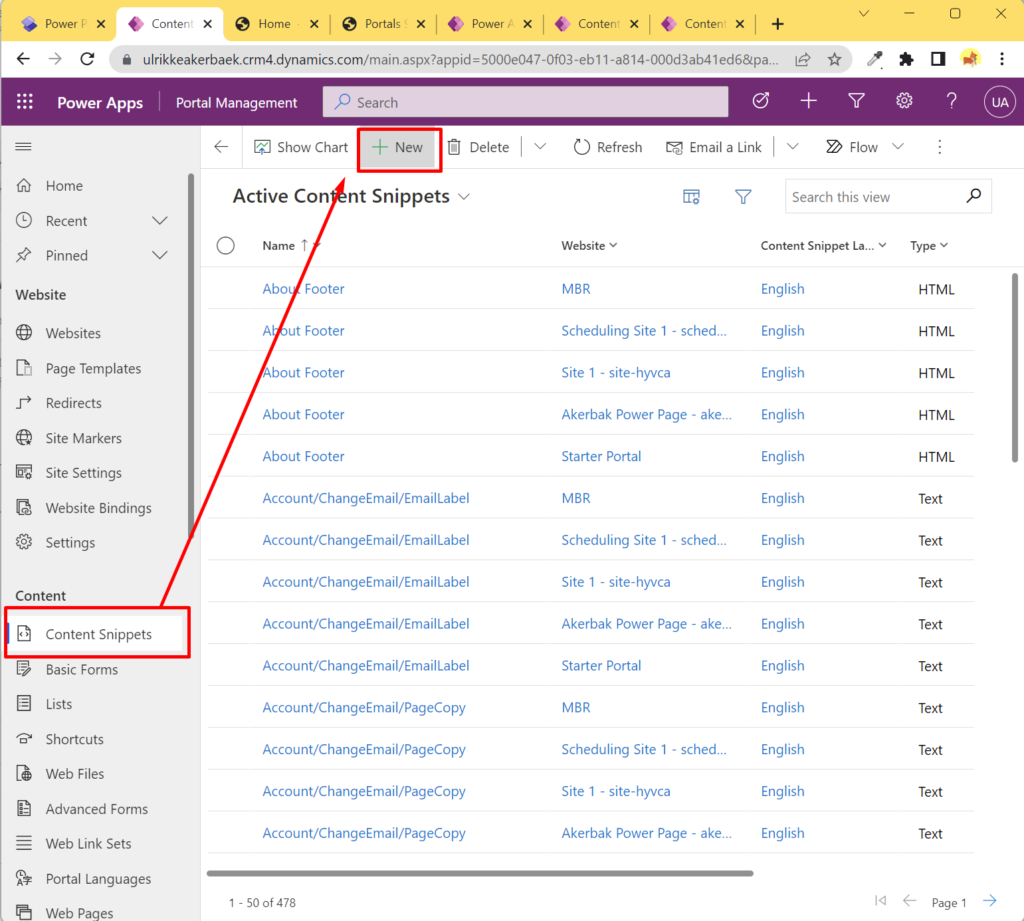
A form will open for you to enter values for the new content snippet.
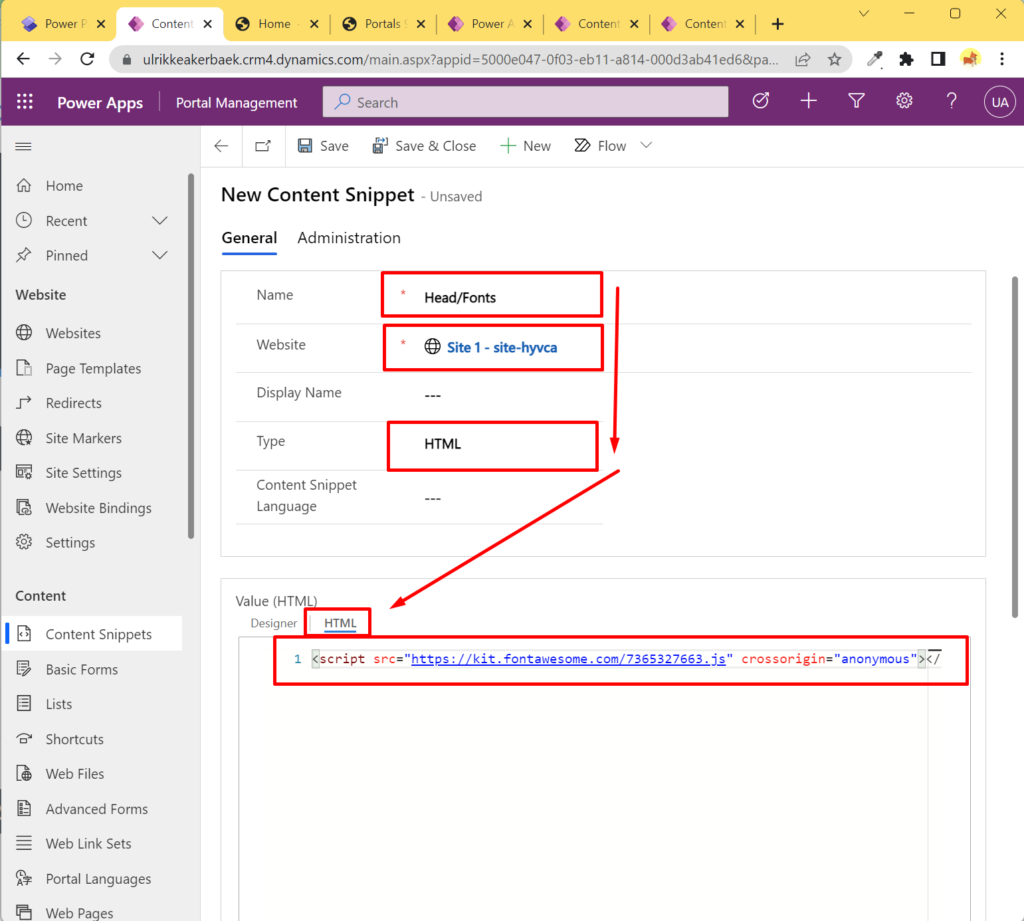
- Set the name to “Head/Fonts”
- Set Website to your Power Page
- Set Type” to HTML
- Select the “HTML” tab in the Value section, and paste the “Kit Code” that you got from the Font Awesome Website.
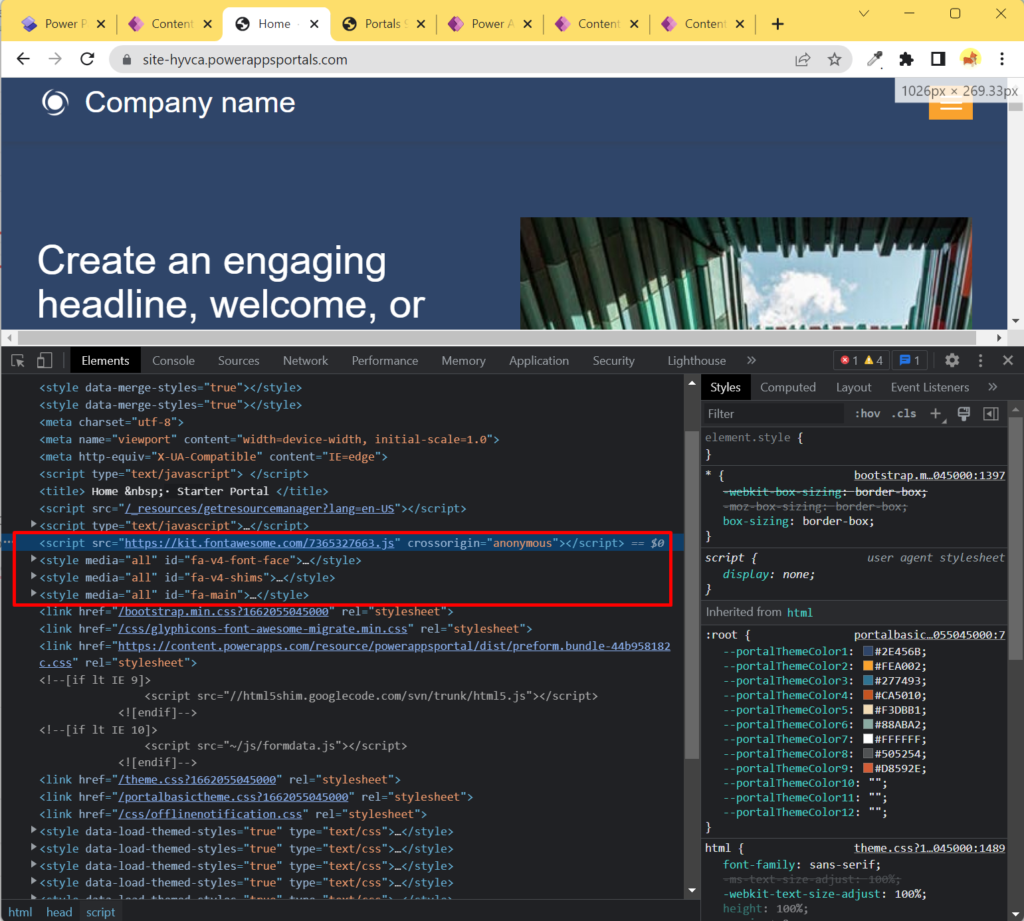
Save the form, delete your portal cache and reload the portal in the browser. To verify that the reference to Font Awesome en enabled you can open the Developer Tool in the browser, open the <head> tag and search for “fontawesome” to see the results.
You can also add regular fonts this way. Thank you Aaliyah for sending me the link to this website with free fonts that we can start using:
https://www.websiteplanet.com/blog/best-free-fonts
At the bottom of this long page, you also find good answers to questions about
royalty-free fonts and other free fonts resources:
https://www.websiteplanet.com/blog/best-free-fonts/#hselect--13
Try it out
You can also verify that Font Awesome icons are available by using them on a page. One way to do this is to simply
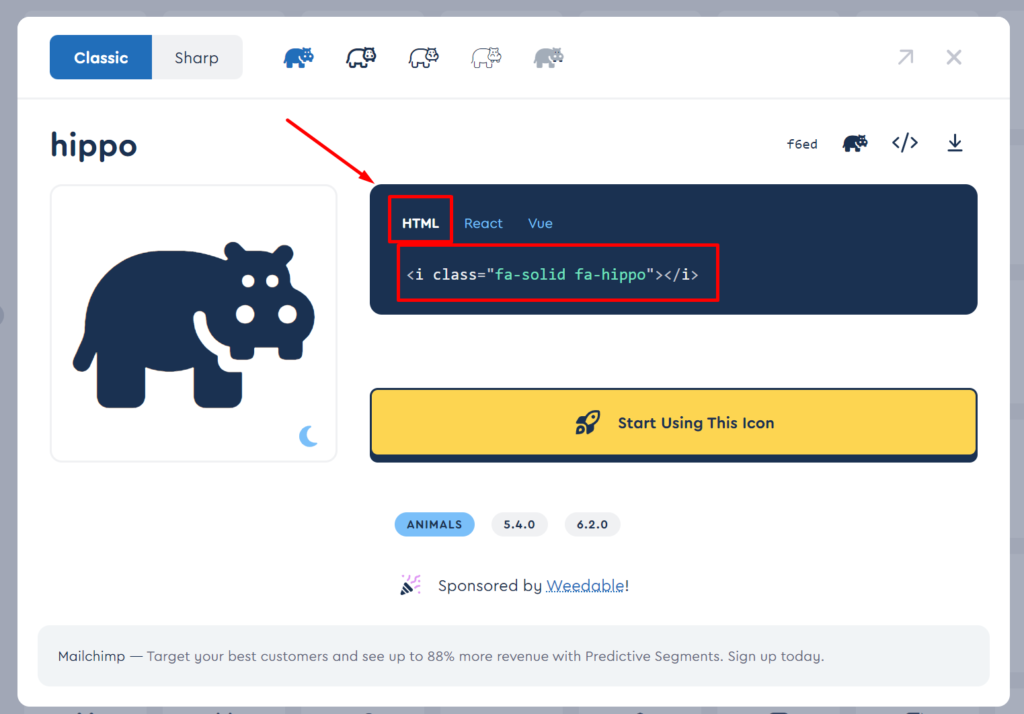
- Find an icon you like in the Font Awesome Icons library
- Copy the HTML code for that icon
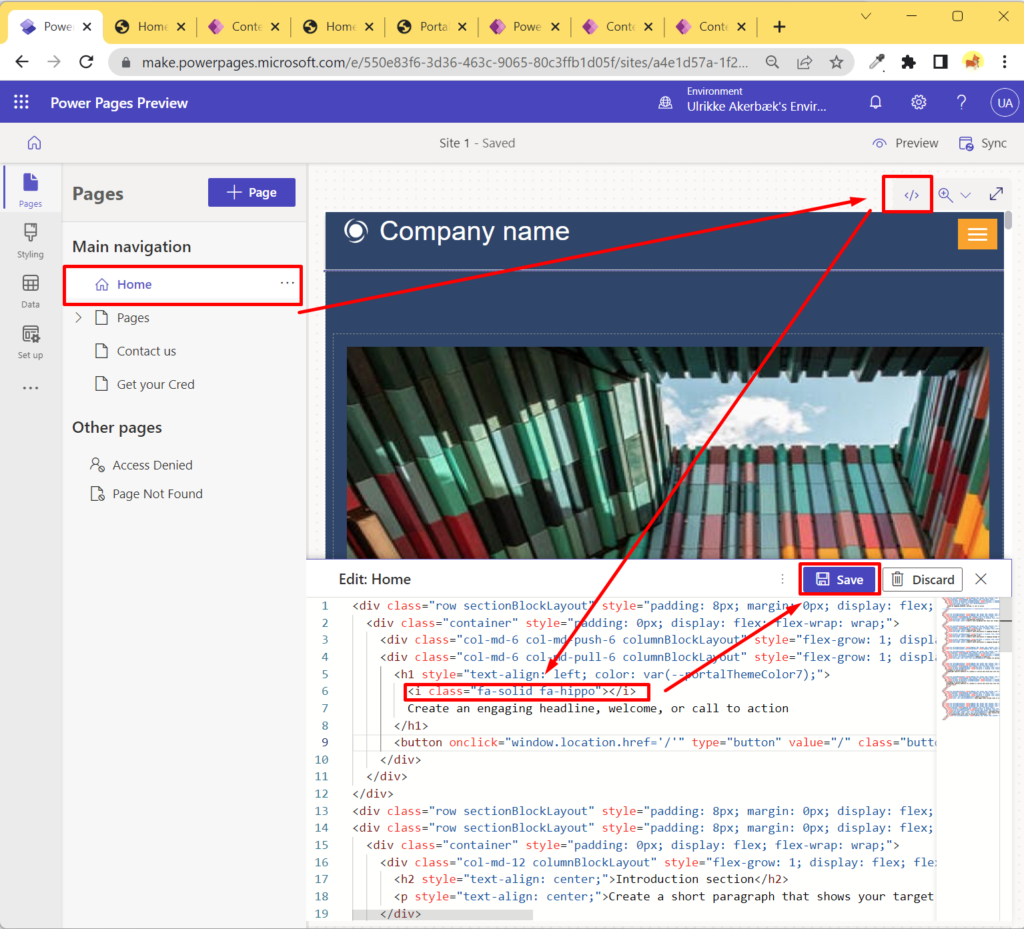
- Open a page in Power Pages Design Studio
- Open the inline editor
- Paste the HTML code in a logical place
- Save
Preview the portal to see the changes, and it might look something like this:

You also might want to replace the old-looking Glyphicons with more modern icons. For instance, I replaced the arrow in the breadcrumb with a Font Awesome icon. You can learn how I did that in this blog post:
Tip
Make sure that you choose icons that are free and that are on the same version as your kit – unless you pay the full license of course. Whenever an icon isn’t showing correctly that’s usually the reason.
Hope this was helpful! Happy portaling! 😀
[…] Font Awesome icons in Power Pages portals […]
[…] Font Awesome icons in Power Pages portals […]
Hi, thank you for the great write up for importing web kits into portals. Quick question we run into an issue where internal icons break after we import the webkit. Based on the included font awesome icons no fa-solid / fa-regular icons are included so when the web kit is imported things like the calendar icon breaks for date pickers. Do you happen to know any work around for this?
Hi, and thank you for your question. I mitigate this by identifying the icons that are missing and replace the icon with CSS:
For instance:
.add-chevron-right::after {font-family: "FontAwesome";
content: "\f054";
}
You can find the value to use in “content” from the fond awesome-library when you open up an icon.
Hope it works! 😀