This blog post will show you how to create a new environment where you can explore and play with Power Pages lots more in Power Platform than beyond. We will create a new Microsoft account, a Microsoft Developer Tenant and a Power Apps Developer Plan environment.
The steps we will go through:
- Create a new Profile in Chrome
- Create a new Microsoft account that is not tied to your work- or school account
- Create a Developer Tenant
- Create a Power Apps Developer Plan environment
- Open Power Pages Home
The reason why I write this blog post is that I have struggled with this myself lately. I have also received questions from multiple community members who struggle to get started, get strange error messages and find themselves confused with all their different Microsoft Accounts.
In addition – Power Pages are not yet available in all geographical regions (https://learn.microsoft.com/en-us/power-pages/getting-started/trial-faq#is-power-pages-available-in-my-location). This means that in order to try Power Pages many of us require access to a tenant in a different region than the one our employee organisation tenant is in.
The end result
When you have followed the steps in this blog post you will have a browser profile in chrome dedicated to your new play area. You will have a new Microsoft account that you use solely for this purpose and is not confused or used for other purposes – not tied to your employer. This means that even if you switch jobs you still got this environment. You will also have a Power Platform environment to play with and try new features with.
The best part – this is not a trial – hence it has no expiration date!
Let’s go!
1. Create a new profile in Chrome
If you don’t have Chrome installed do that here:
Google Chrome – Download the Fast, Secure Browser from Google
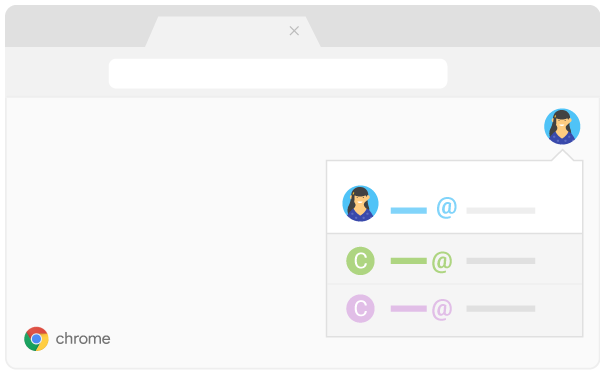
- Open Chrome browser and at the top right corner click the “Profile” icon
- Click “Manage people”
- Click “Add person”
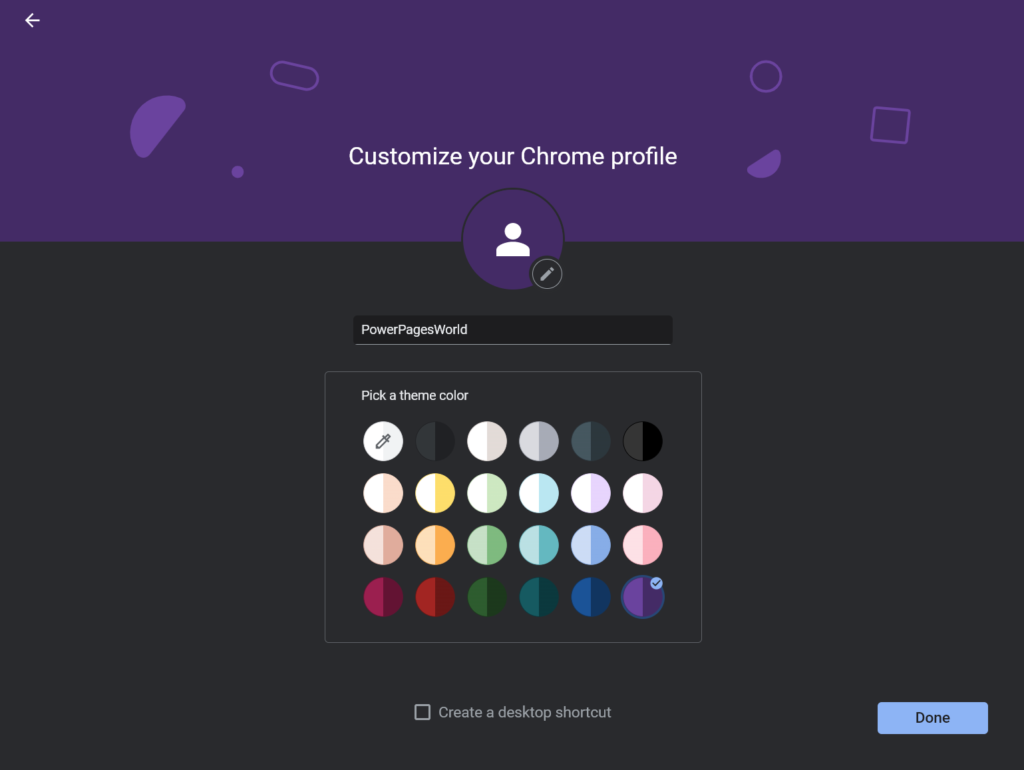
- Choose a name and photo.
- Click Save. A new window will open and ask you to “sign in” or “Continue without an account”. For this purpose, you can continue without an account.
While still in this new window click the three dots in the top right corner and choose “Settings” from the menu. Select “On Startup” from the left menu and choose the “Continue where you left off” option. This is automatically saved.
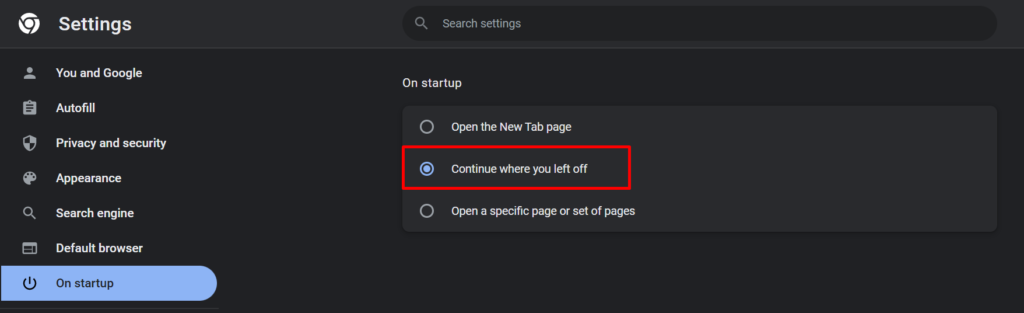
You are good to go with your new Chrome Profile. Think of it as your sandbox bobble. Whenever you want to play in the sandbox you open Chrome and select this profile, and then you will start where you left off the last time you played with it.
2. Create a Microsoft Account
If you try to create a trial or community plan tenant it will automatically ask you to sign in with your work or school account. There is no way around it. And it will connect this environment to your employer’s organisation.
To avoid this we create a new account for you that is totally your own.
Visit https://signup.live.com
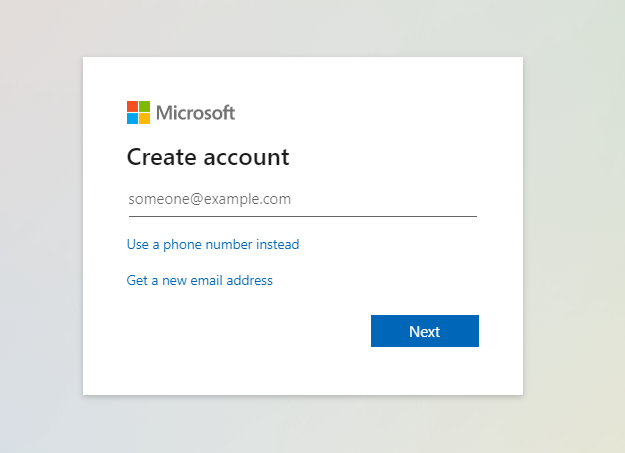
Here you can choose to create a completely new Microsoft account that has no connection to your organisation or other accounts.
Click “Get a new email address”
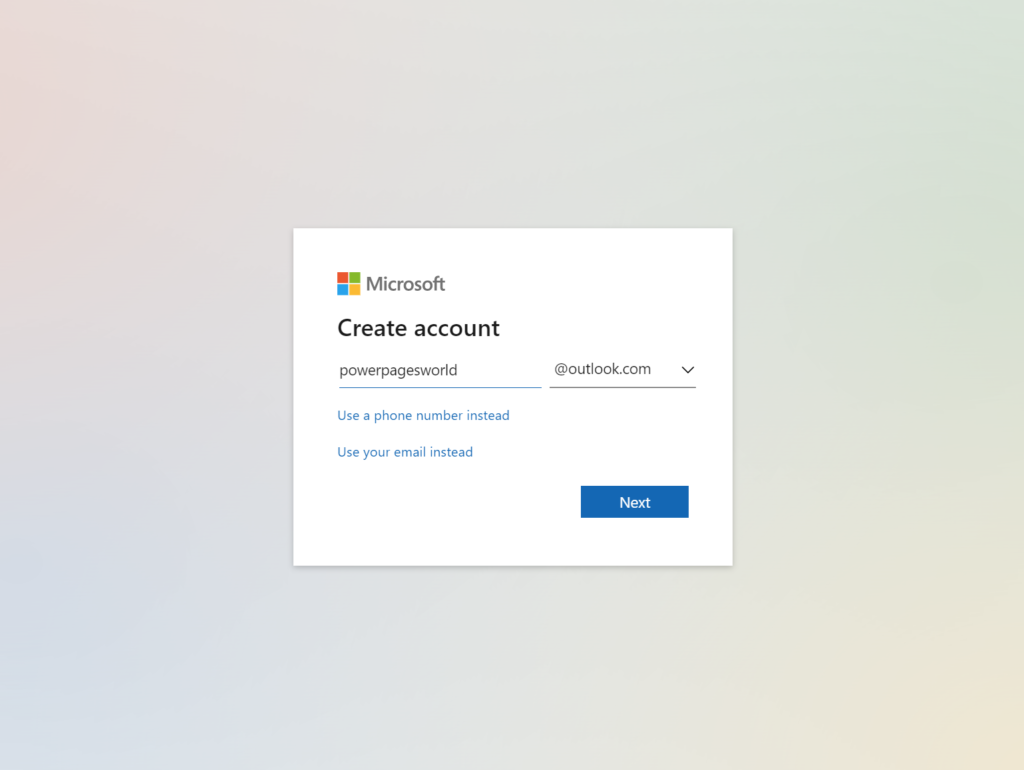
I enter a user name that I will remember and select “Next”.
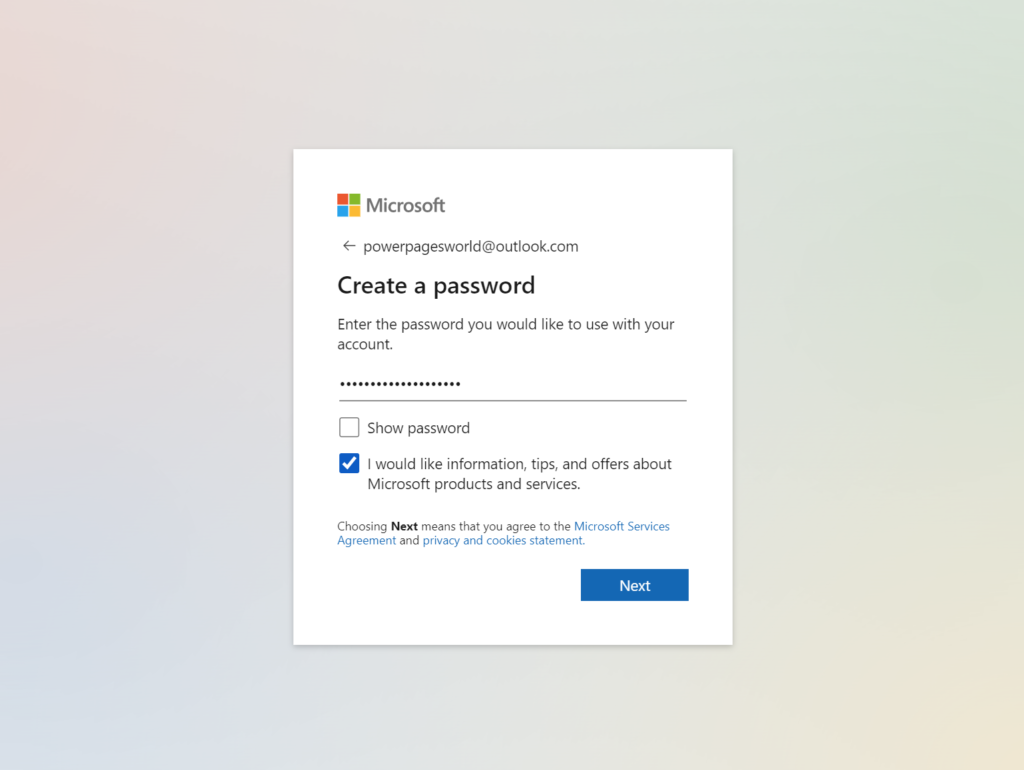
Enter a password and save it for later.
TIP! If your browser offers to save this information for later you can allow it! This makes it way easier the next time you want to log in.
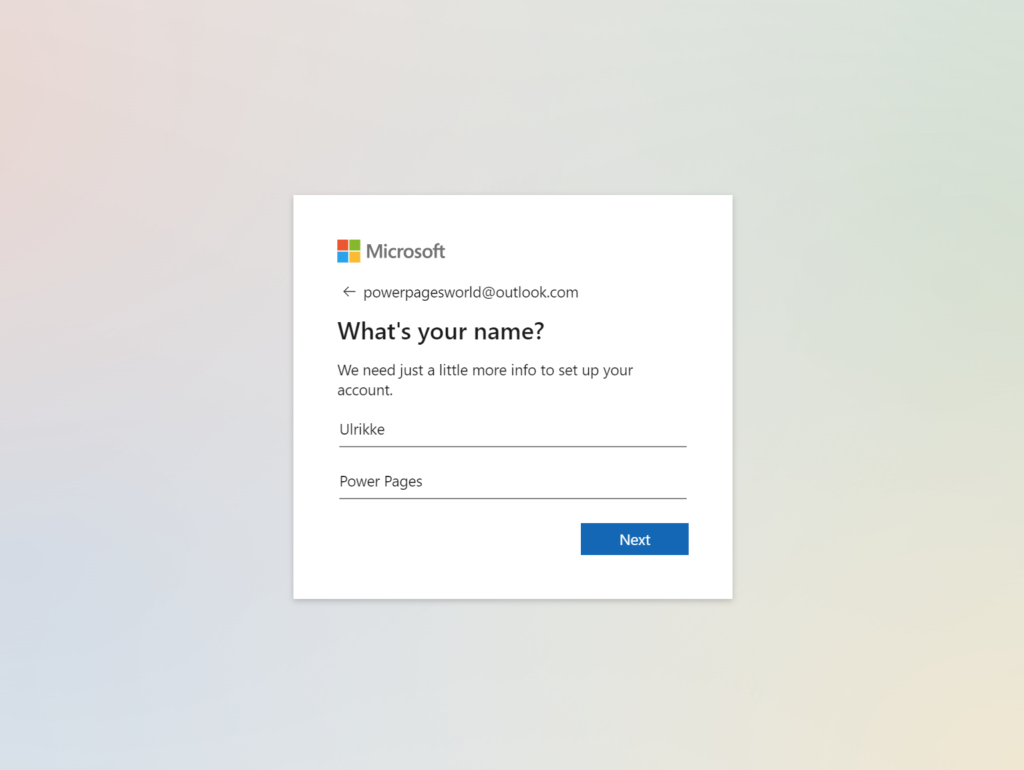
Enter a name – you can use your real name or something else to set it apart from the other accounts that you may have.
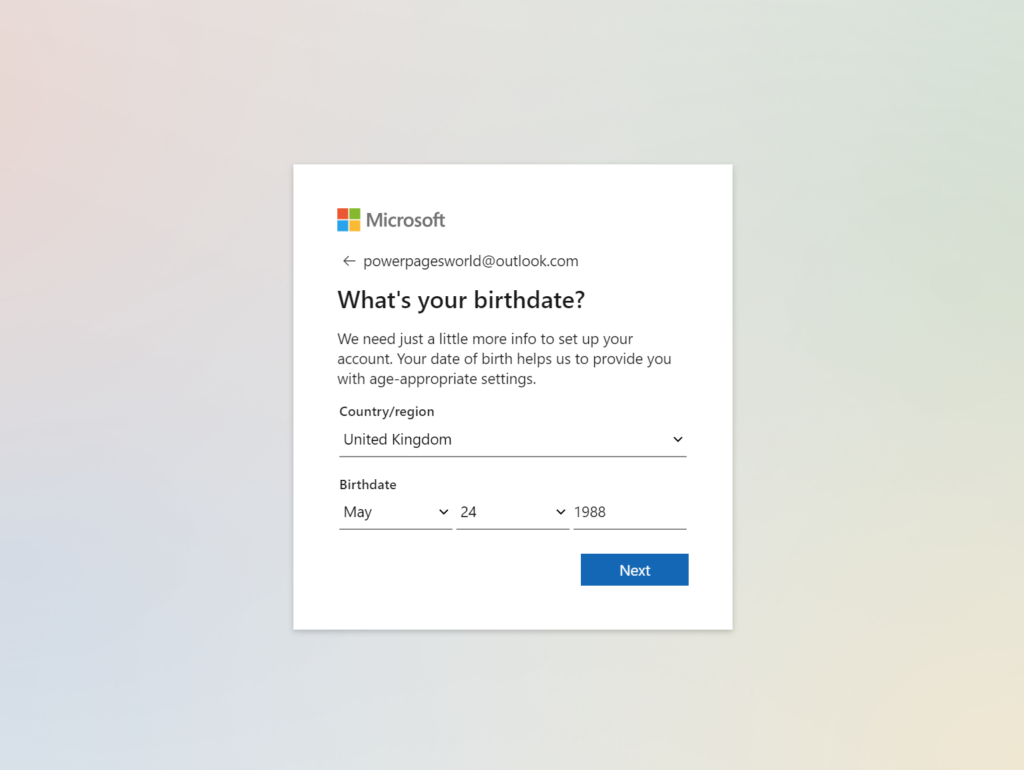
Never ask a woman her age?! Well, what the heck, I’ll go with it 😉
Just to be sure I select “United Kingdom” as Country/region. I don’t think this is used for anything else than local user settings – but you never know.
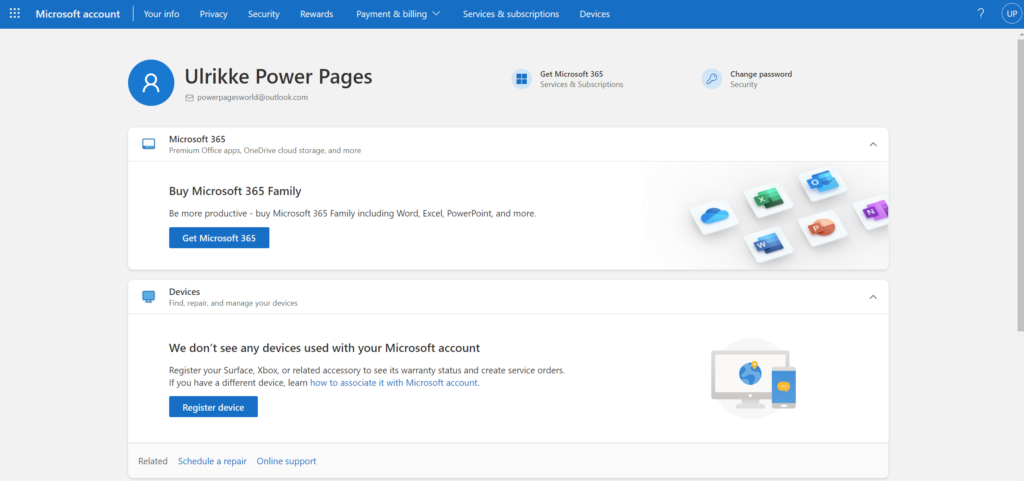
Finally, this is what it looks like when I have completed creating a new account.
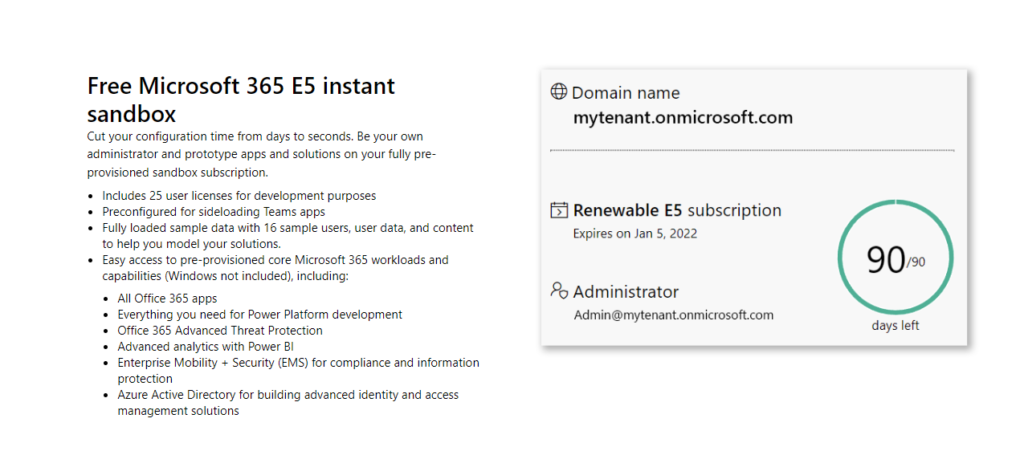
3. Create a Developer Tenant
The Developer tenant will be the home for our sandbox.
This is what’s included in the tenant:
Open Developer Program | Microsoft 365 Dev Center in a new tab with the same chrome browser profile.
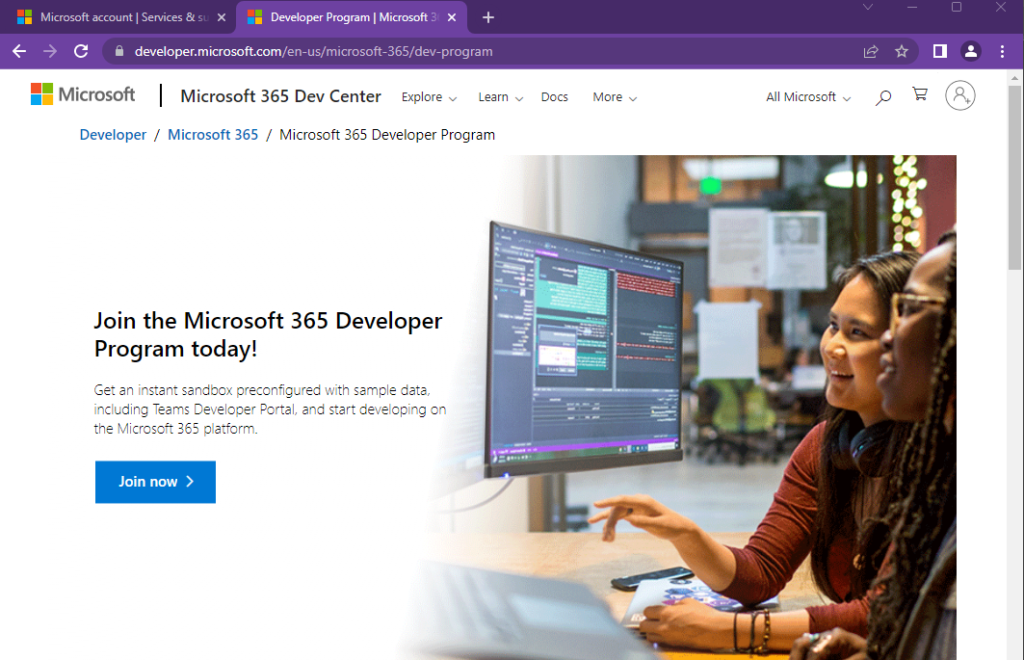
Click the “Join Now” button
If you allowed the browser to remember your credentials then you will automatically be redirected to the registration form. If not – then log in with the new Microsoft account you just created.
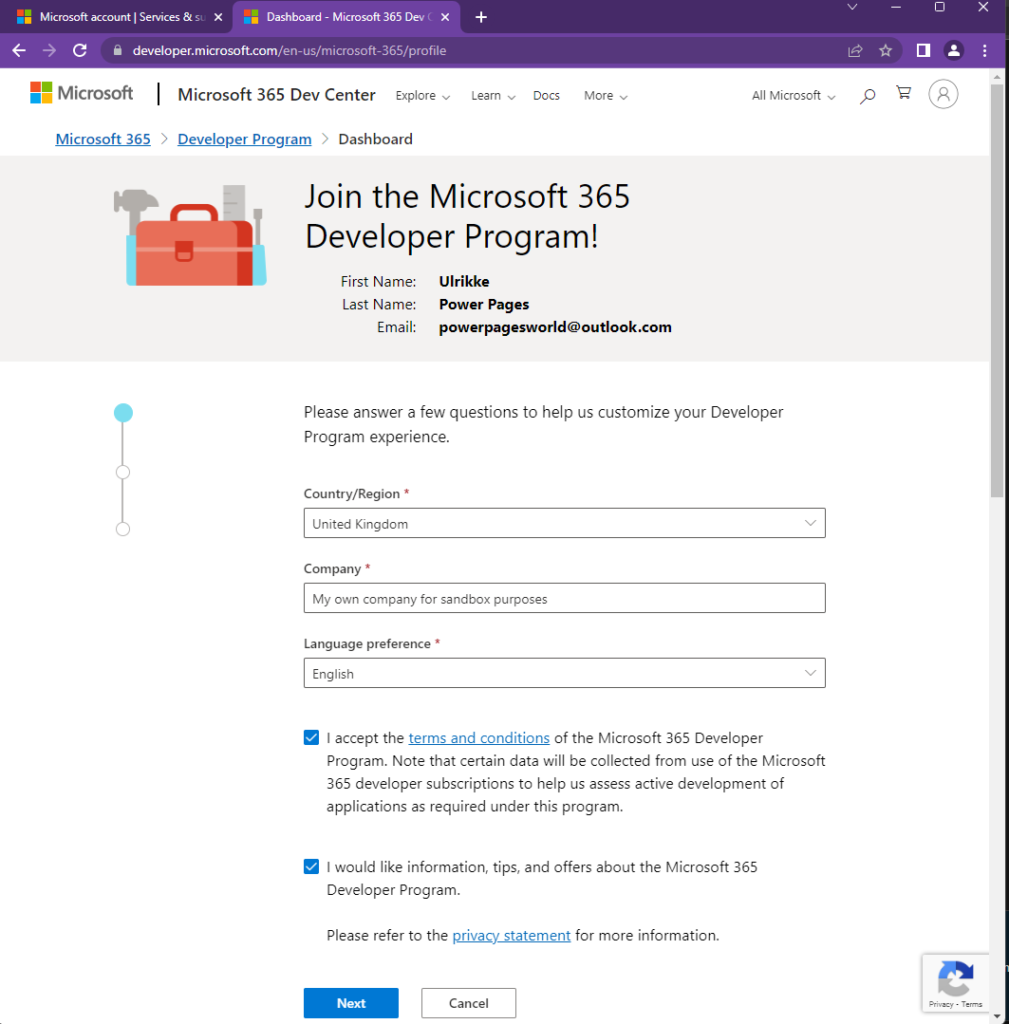
I stick to “United Kingdom” and try to show Microsoft that this tenant is for my own personal experimentation and testing purposes in the “Company” input field.
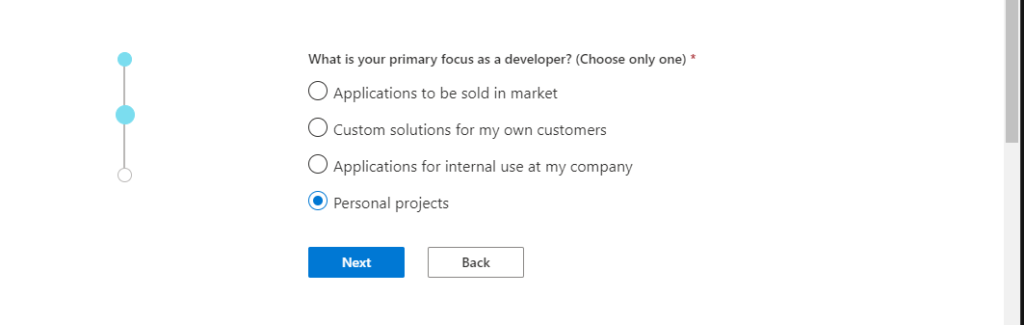
I choose the “Personal projects” option, but you may choose otherwise.
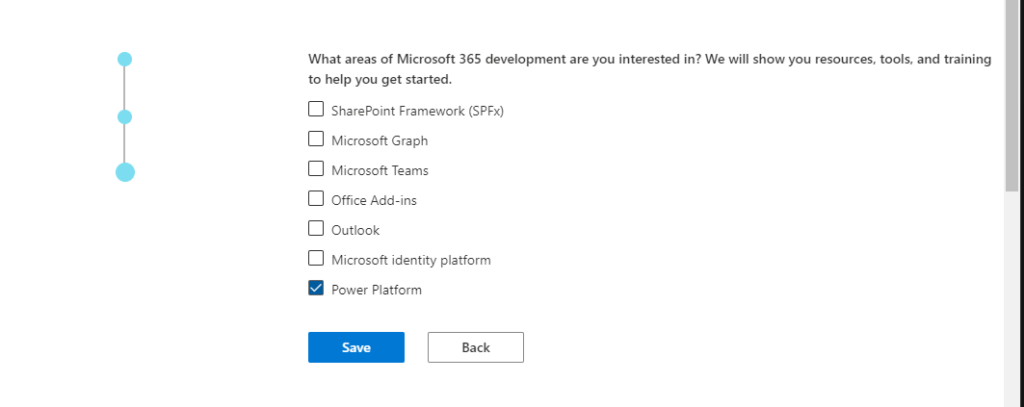
And then “Power Platform, but you may choose otherwise.
At this point, I think it’s important to note that this is completely free of charge and that it doesn’t require you to leave any card information. This is completely for your own personal exploration and testing of the products. It does however cost Microsoft a lot of money.
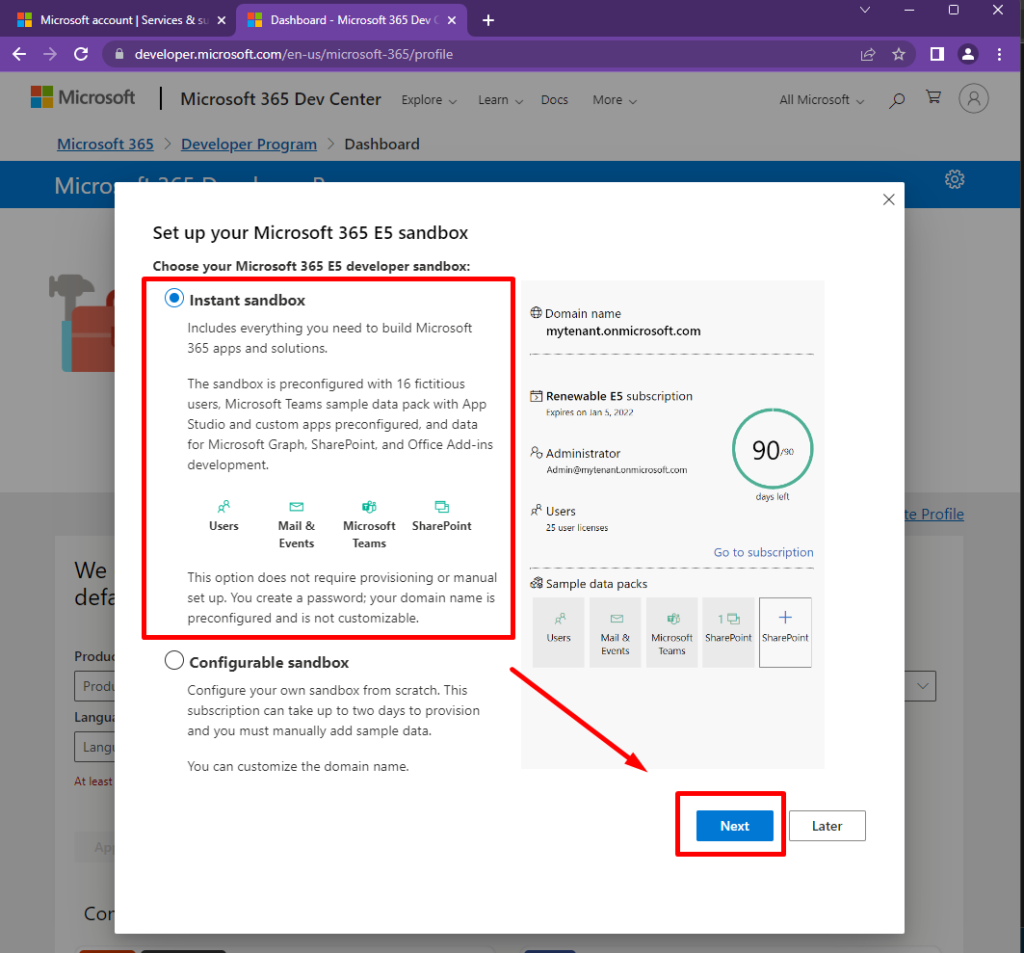
I choose the “Instant Sandbox” option.
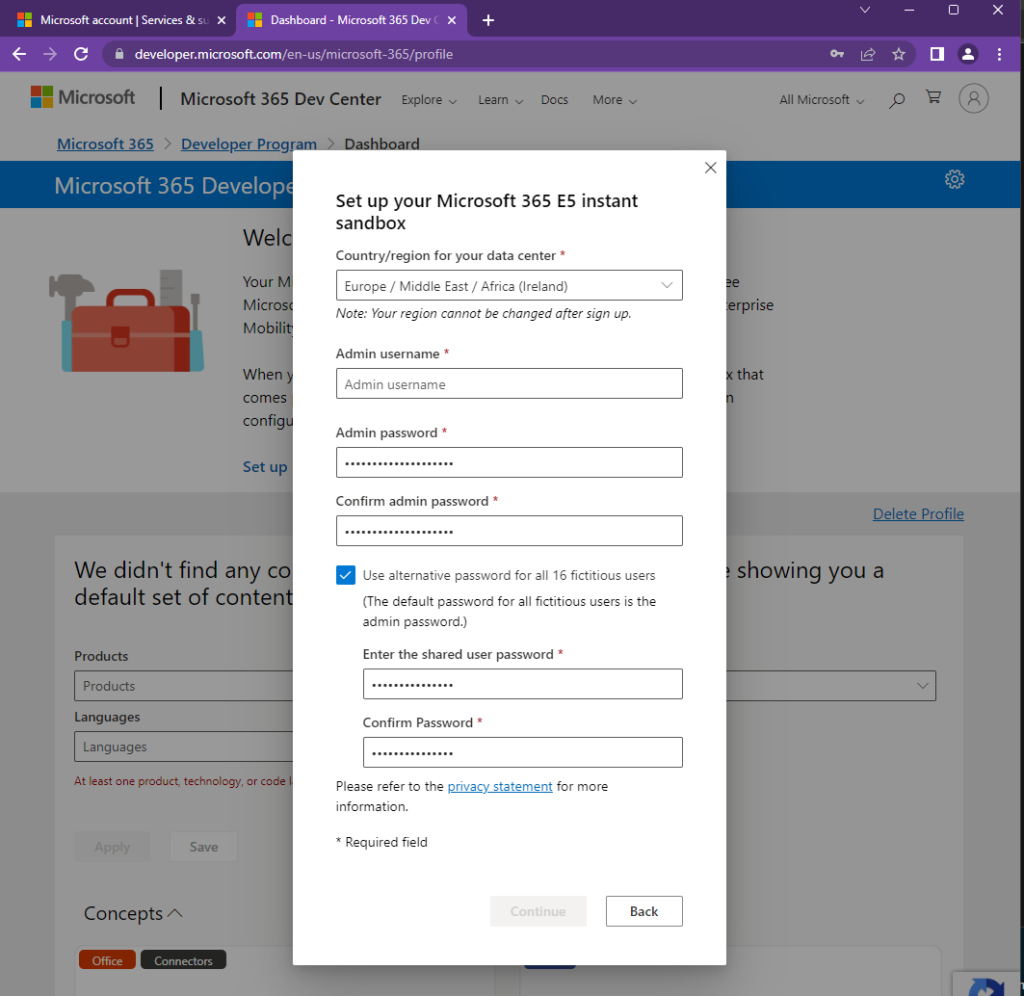
I entered a user name and password for my admin user. This can be anything you want, but it’s a good idea to enter something you will remember for later.
TIP! I use a password manager where I store all my usernames and passwords. The one I use also generates passwords for me and keeps them secure. This way I can create unique passwords each time and not worry about remembering any of them.
You also have the option to set another password for the sample users that will be created in your tenant. These are fictive users that you can use for different test scenarios.

Now it’s finally time to validate your account with your phone. This is now the only way for Microsoft to identify you as you. You will need to enter your own valid phone number here.
Once you do you receive a code by text message that you enter into the form.
OOPS!
Sometimes things don’t go as planned. I wanted to include this in my blog post as well to let you know that you are not alone in hitting your heads against the Microsoft wall from time to time.
It is frustrating, but the first thing I do when running into an error like this is to go a quick search across the web to see if this is a known issue and if there are any workarounds. See for yourself:
sandbox provisioning is currently disabled – Google Search
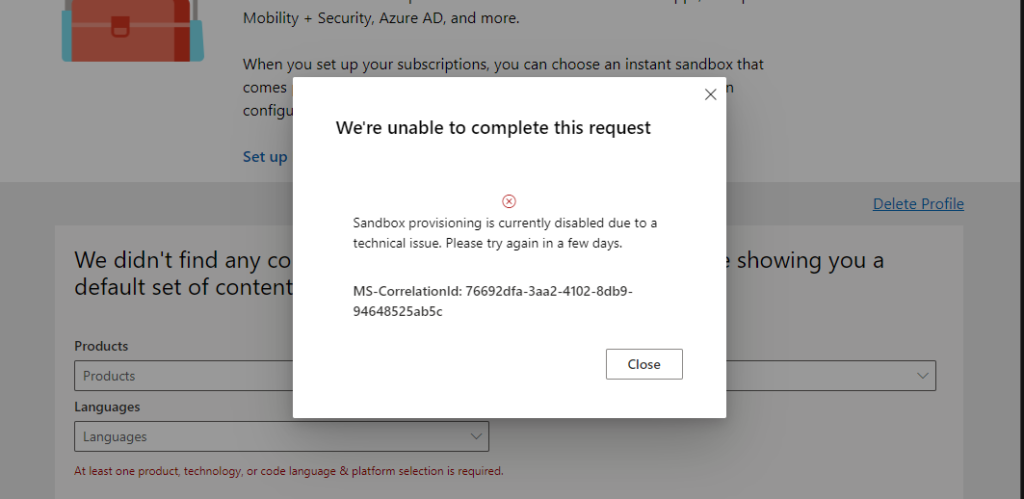
Unfortunately, I got this error today. This is due to a well-known issue at Microsoft that they are trying to figure out.
I will save this URL (https://developer.microsoft.com/en-us/microsoft-365/profile) and leave this tab open in my Chrome Browser Profile to try “Set up E5 subscription” again at a later time.
4. Create a Power Apps Developer Plan
Regardless of the E5 subscription, we can still enable what we really need to get started with Power Platform.
Open another tab and visit Power Apps Developer Plan | Microsoft Power Apps
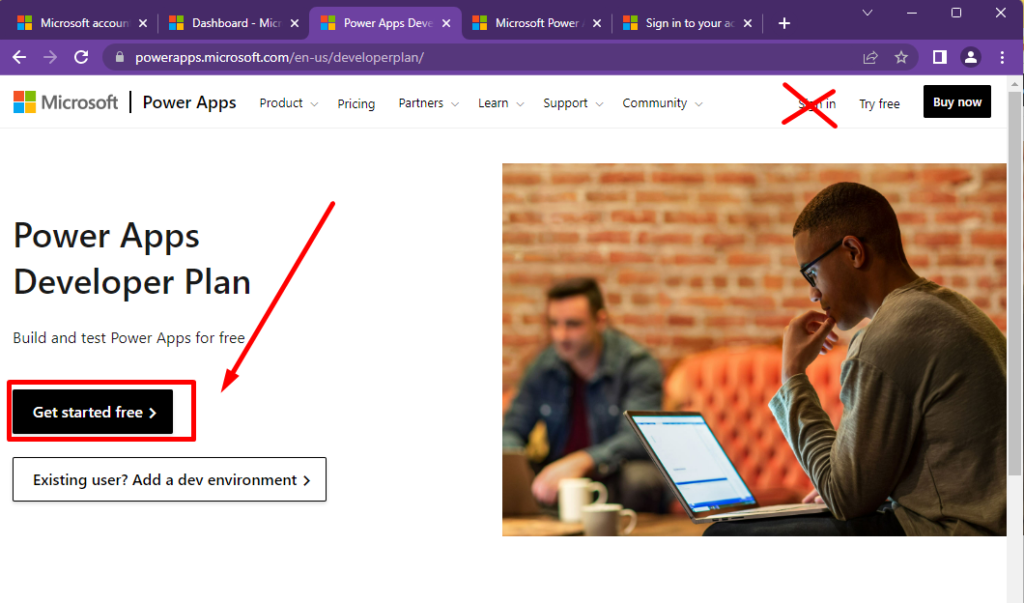
DON’T sign in!!
Just click the “Get started Free” button to the left.
A new tab will open and you will need to fill out yet another form.
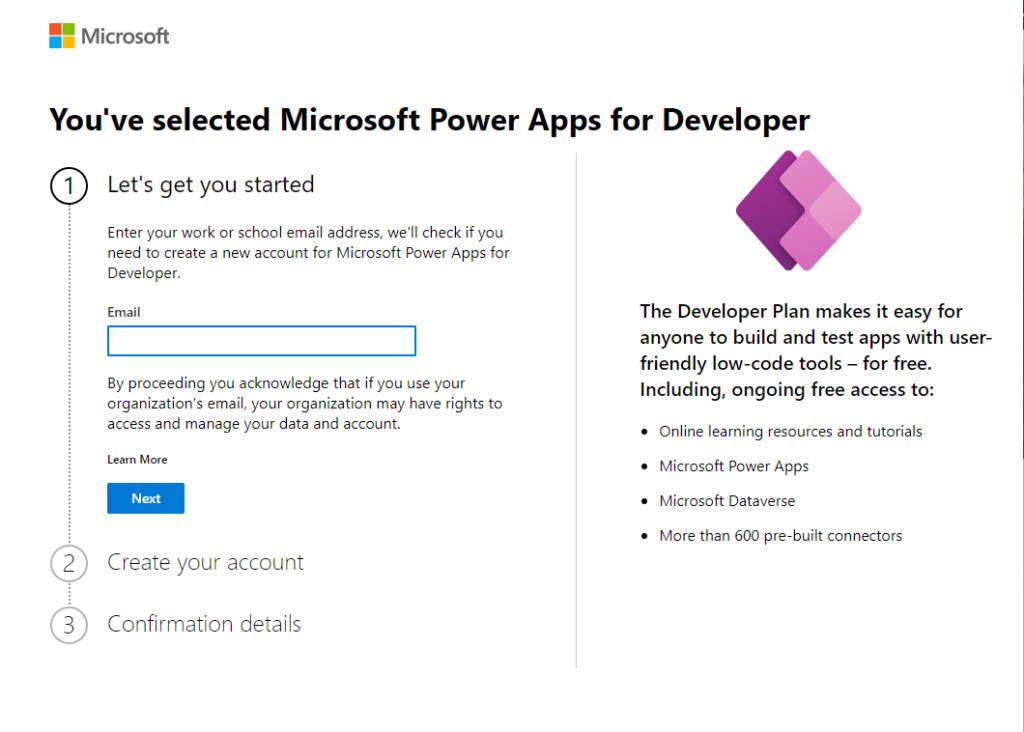
First I tried to enter the email and password for the new Microsoft account I just created – but that didn’t work:
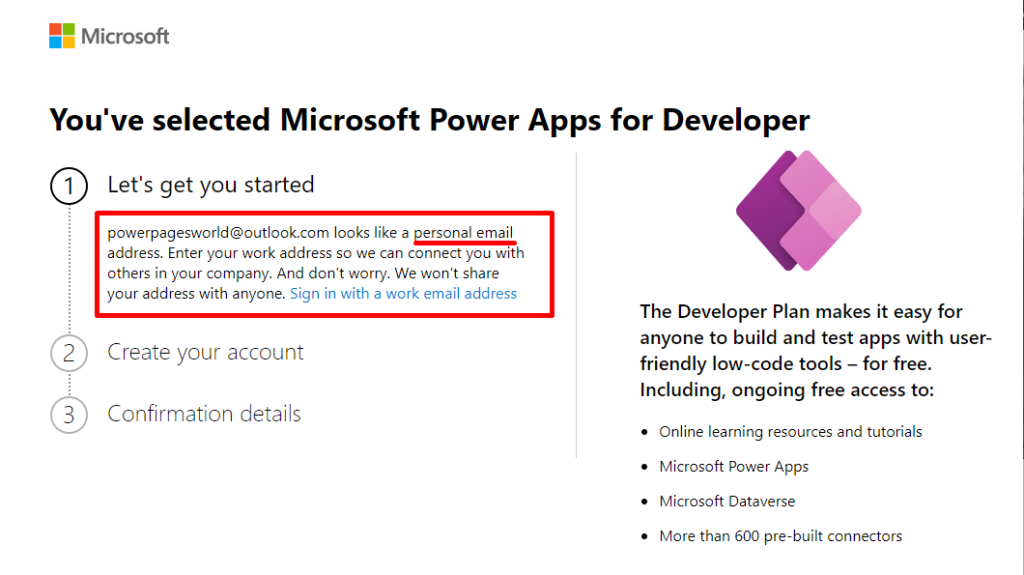
Then I remembered the admin user that we created a username and password for earlier.
Let’s go back to the Microsoft 365 Dev Center-tab.
If you closed it use this URL: https://developer.microsoft.com/en-us/microsoft-365/profile
Navigate to the “Dashboard”-page. This is where you find the email address for your admin user.
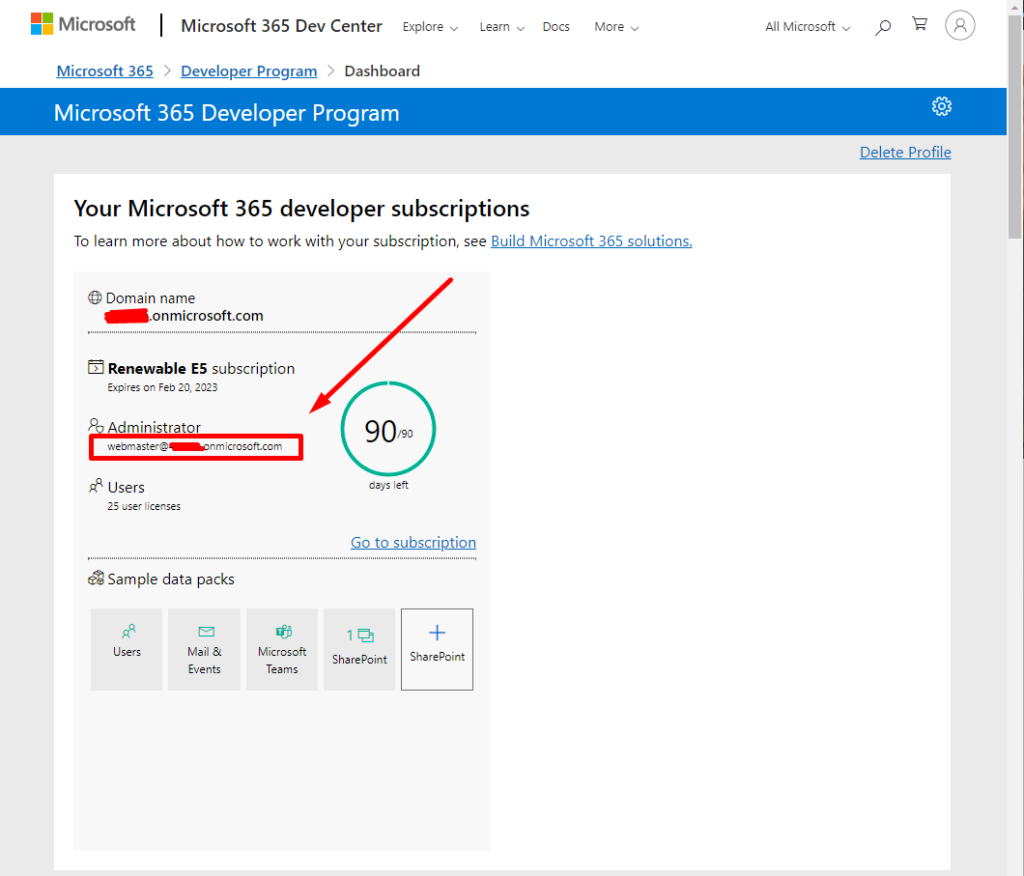
Copy the email address to the clipboard and then go back to the previous tab where we tried to log in with our private account.
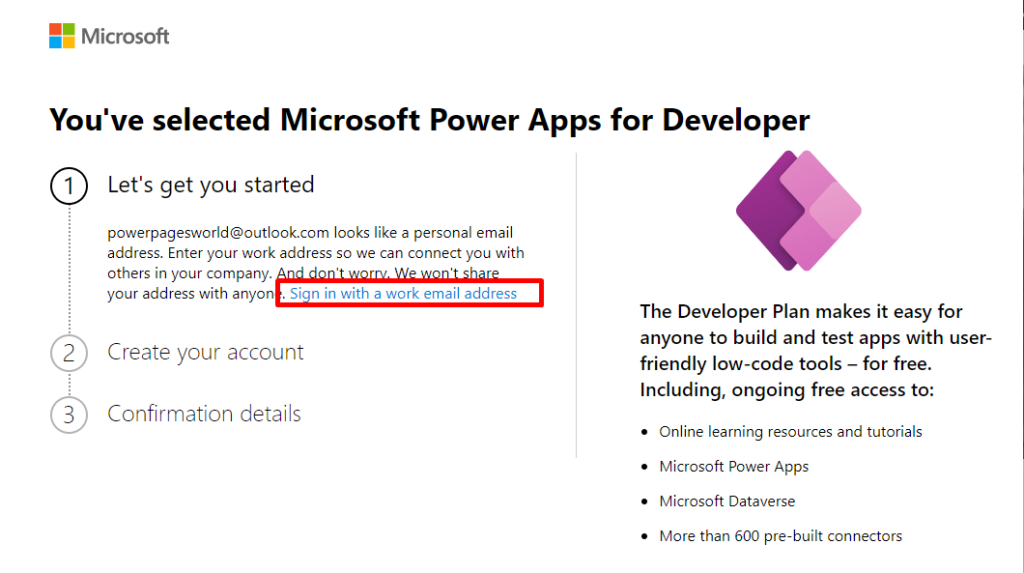
Here I click the link “Sign in with a work or email address” and paste the admin email address into the Email input field.

Click “Next” and the system will recognize the email address as an existing Microsoft customer. You need to sign in to this admin account by using the password you entered in the setup.
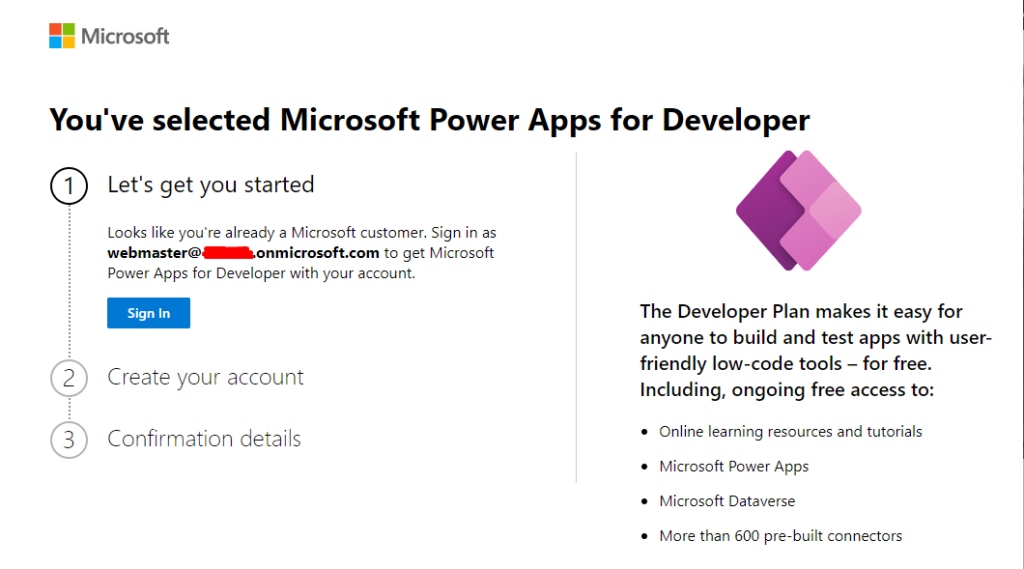
Click the “Sign in” button and a modal box will appear where you can sign in.
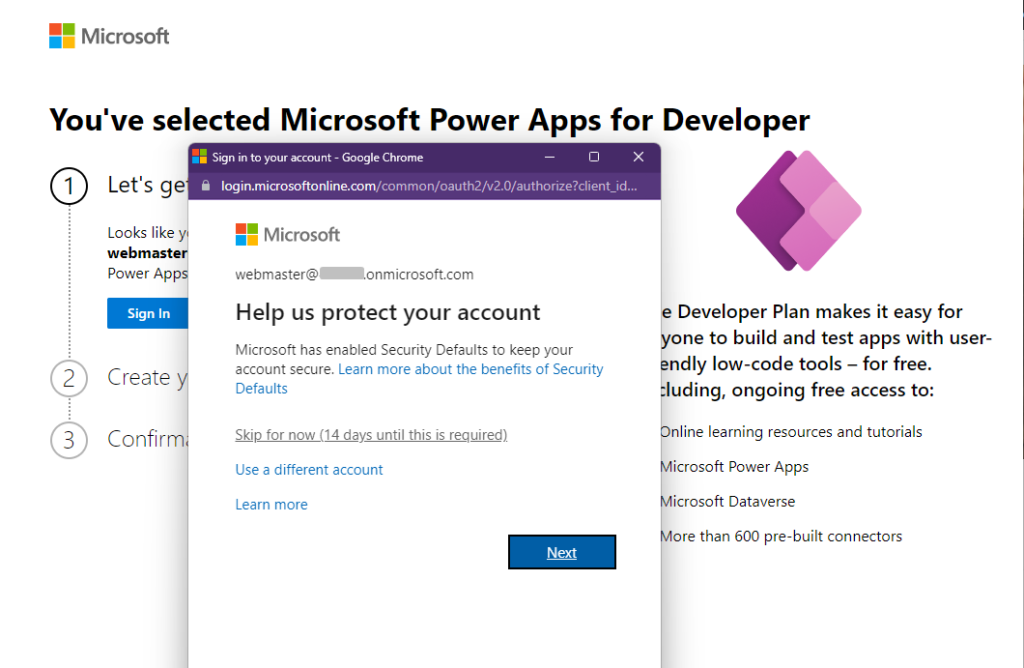
If you want you can set up additional protection, but for now I just say “Skip for now” to get ahead with the registration. That being said I do recommend that you set up this additional security by using text message code, email code or authenticator app for your users – even if this is just for play.
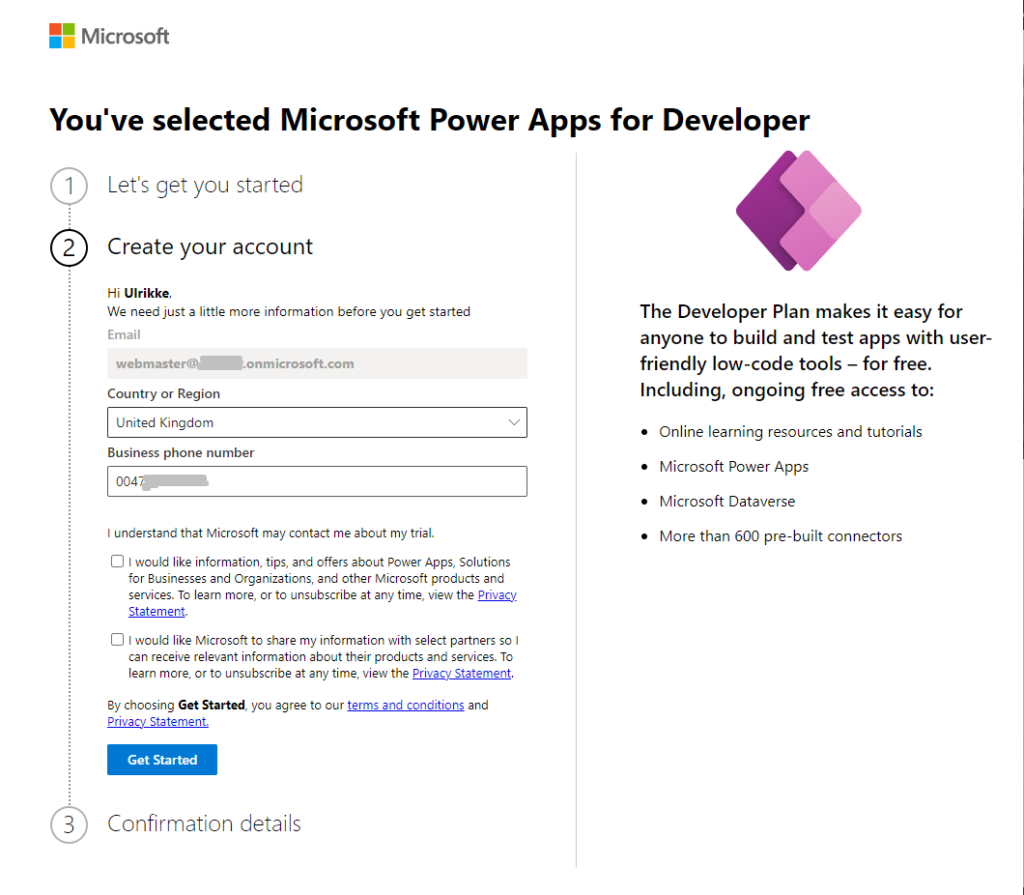
Next you are asked to enter a phone number and a region. I stick with United Kingdrom, but enter my real phone number. Then i click “get started” at the bottom.
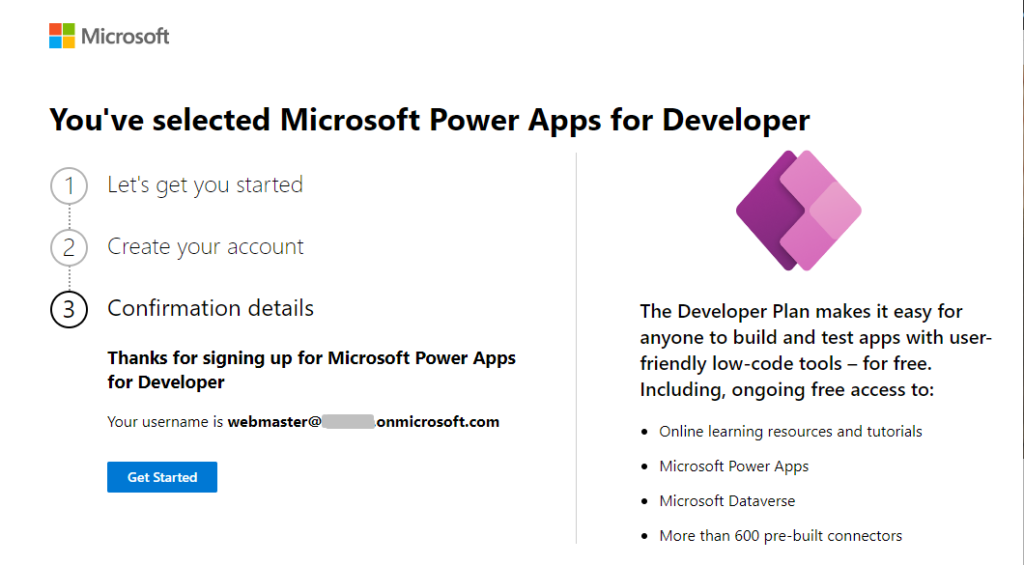
When the confirmation message appears I click “Get started” again.
A new tab will be opened where I need to authenticate again with the admin user email and password.
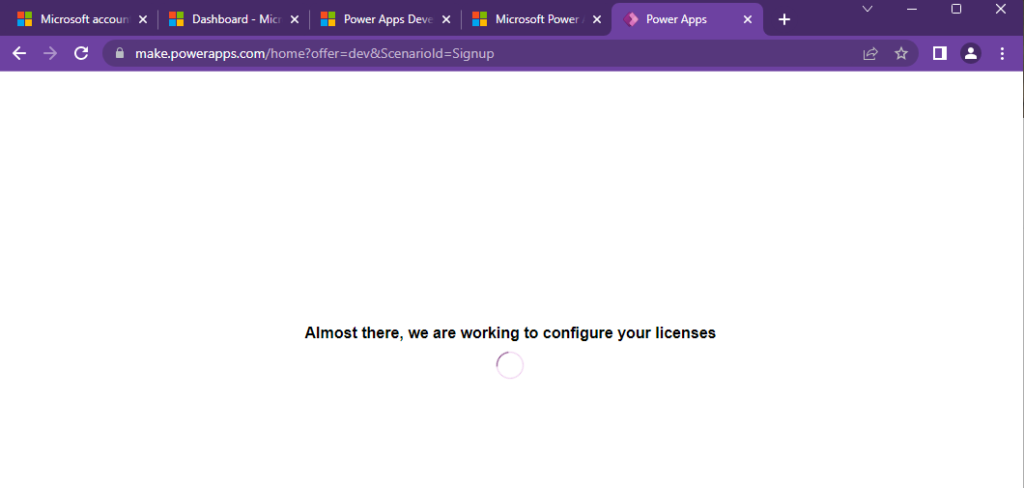
Finally we are looking at our user getting the propper licences applies and Power Platform being prepared for us. When the preparations are done I automatically get redirected to the home of Power Platform: https://make.powerapps.com
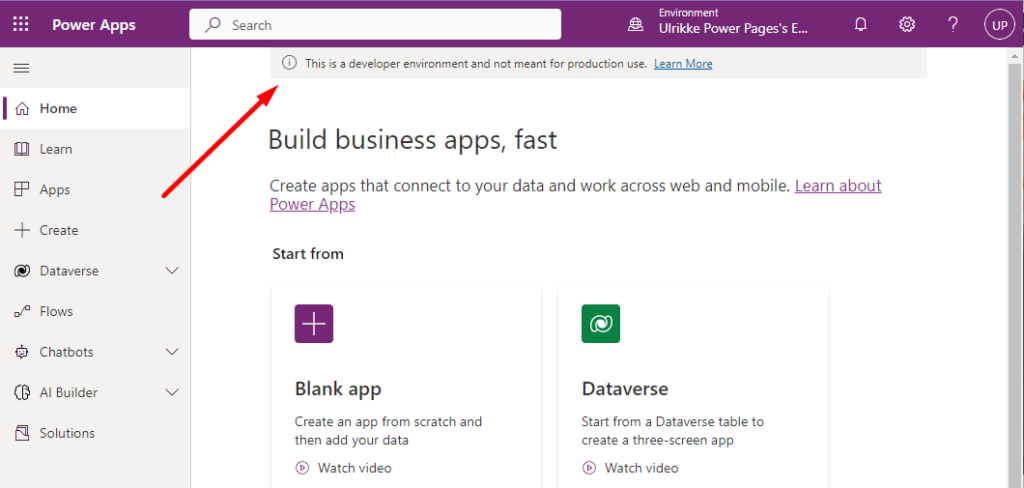
At the top you see a notification that this is a developer environment, That’s great – we made it!
Now try going to https://make.powerpages.microsoft.com. This is the home of Power Pages and the place where you get started.
5. Open Power Pages Home
This being the first time we visit Power Pages Home we go through the “Get Started” experience to create our first Power Page site
https://make.powerpages.microsoft.com/

Make sure you select your new environment – and not the “MSFT (Default)” for Power Pages Sites.
Power Platform Admin
Visit https://admin.powerplatform.microsoft.com/ for a complete overview and admin on the environment level.

Hope this was helpful. Please leave a comment if you have questions.
Good luck, and have fun!
Feature Photo by Ostap Senyuk on Unsplash
[…] Get started with Power Platform in your own sandbox […]