Last updated on 02/10/2023
This blog post will take you through the steps I took when setting up my new computer for working with Power Pages¨; Azure DevOps Repo, VS Code, install .git, clone repo to the local computer, and install Power Platform CLI. This setup is for Windows machines. If you use Mac this might be completely different – I have no idea 😉
Big shout out and thank you to Marius Børresen and Mathias Torgalsbøen for helping me out with this every time I get stuck! <3
First, let me say that it is possibly a million better ways to do this. Probably. I am not a hardcore developer and the tools and methods required to do development these days change much more often than I refresh my knowledge of them. But this works for me. These are the tools I know in a setup I am familiar with, and I’m sticking to them as long as it works.
Getting your toolbox in order.
Like anything on the web these days it’s a bit of an obstacle course to get to “Hello World”, and setting up branding for portals in this way is no exception.
What we’ll cover
- Setup Azure DevOps Repository (repo)
- Install Visual Studio Code (VS Code)
- Install .git
- Clone the repo to your local machine
- Open repo in VS Code
- Install Power Platform CLI
Azure DevOps
We use DevOps for, well, dev ops. Sign up and start using it here: Azure DevOps Services | Microsoft Azure. When you’re up and running create an Azure Repository for your project. This is where you’re files will live. I call my repo “Ulrikkes Community Plan”.
Visual Studio Code
I prefer VS Code as my code editor. It’s Visual Studio’s little brother and it’s free: https://code.visualstudio.com/download
Git
Download GitHub from Git – Downloading Package (git-scm.com) and install it on your computer following the instructions.
Clone your repository to your computer
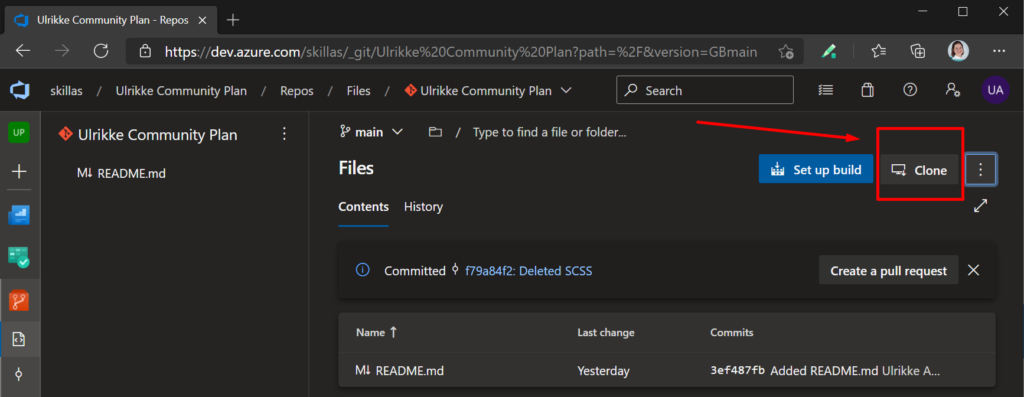
This will connect your local computer to the Azure DevOps repository through VS Code with .git. Open DevOps and your repository. Choose “Clone” in the far right corner:
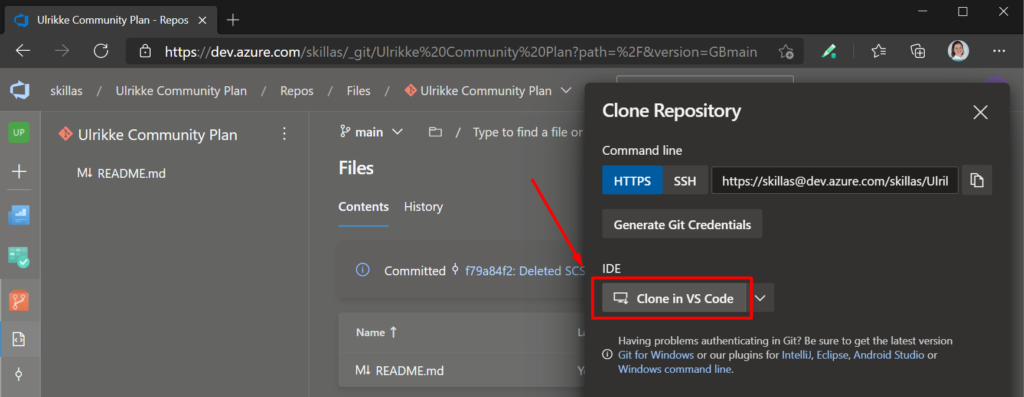
Then hit the “Clone in VS Code” button.
Now we choose where to store the files we will work on. Where you store the files locally on your computer is up to you. Navigate to where you want to store the files. I choose to store my files in a “Code” folder that I created in the “C:” directory on my local machine.
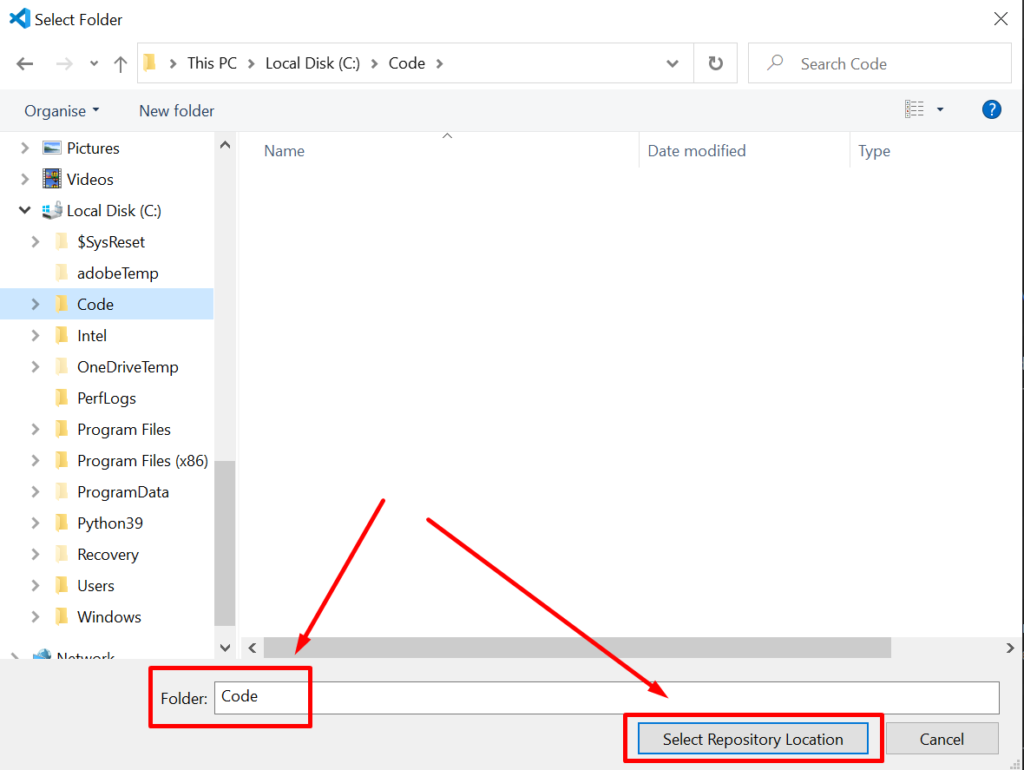
I select the “Code” folder I created on my local computer and select the “Select Repository Location” button.
You will be prompted for credentials, login, and then you’re set.
Open Repository in VS Studio
If VS Code doesn’t automatically open with the cloned repository you open VS Code and chooses “Open Folder”.

Then select the folder in the location where you cloned it:
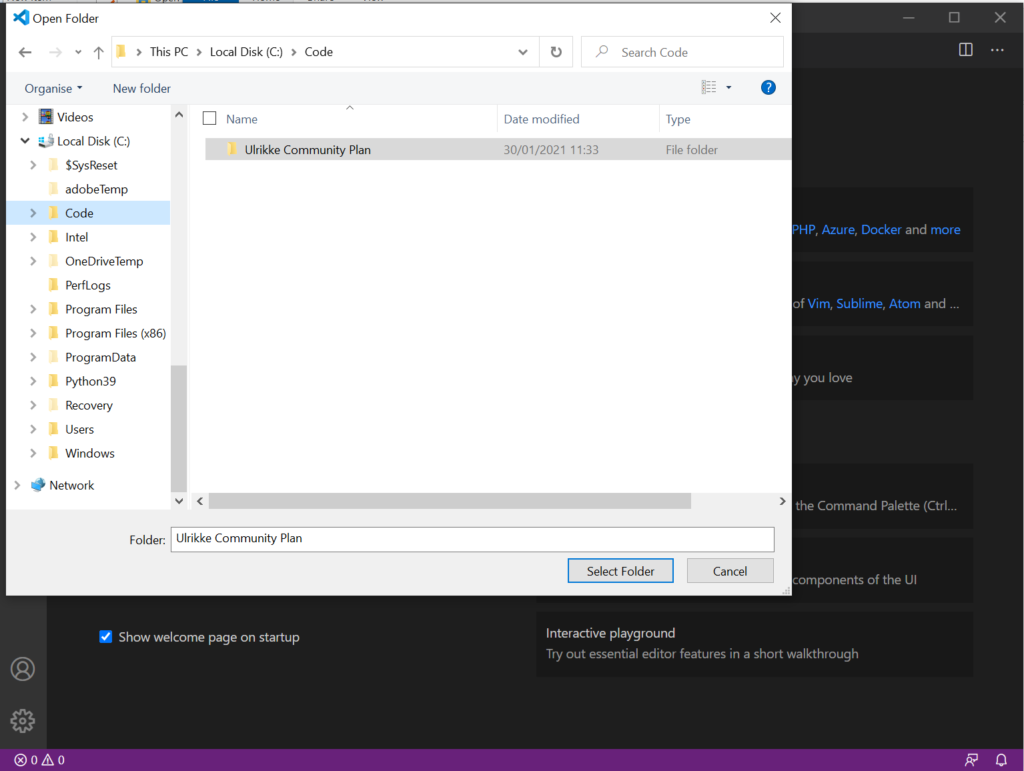
There are no files there at the moment as your repository is empty, but that’s where we’ll put the portal files.
Troubleshooting
Did you get an error like in the screenshot below when trying to commit your changes?
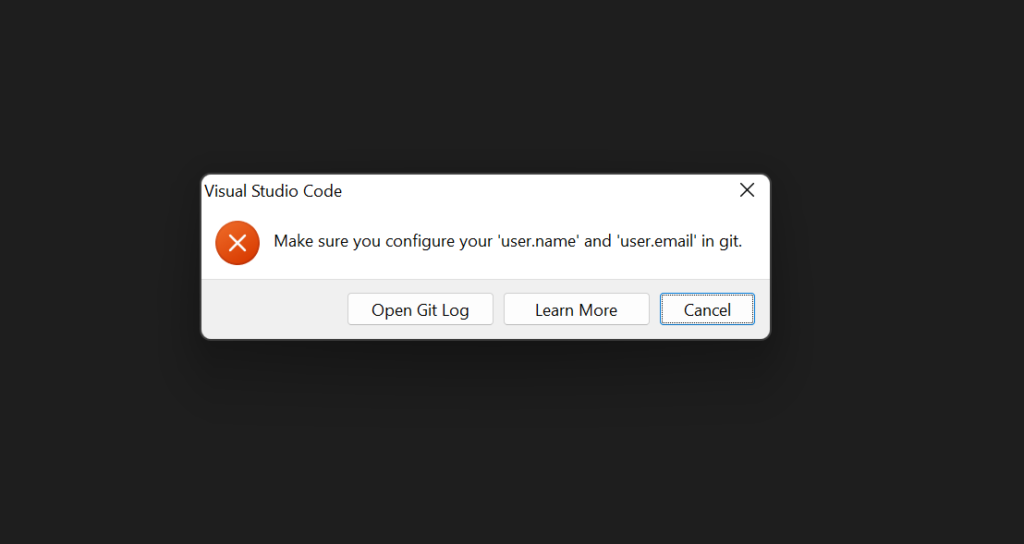
Click “Cancel” and Open PowerShell and write this:
git config --global user.name "ulrikke akerbak" Code language: PHP (php)You can check if it works by writing
git config --global user.nameCode language: CSS (css)It will return the name you entered
ulrikke akerbaekThen set the email for your .git user account
git config --global user.email "ulrikke@akerbak.com"Code language: CSS (css)This solved the problem for me at least.
More information on this in git documentation: https://docs.github.com/en/get-started/getting-started-with-git/setting-your-username-in-git
Install Power Platform CLI
In order to use the Power Platform CLI you need to install it. Follow the instructions here:
If you get stuck and get errors along the way - try to close VS code and Windows PowerShell and open it again. This you might need to do multiple times during the install and setup process.
And – ACTION!
First and foremost – close and reopen Open VS Code (took me a while to get that it needs a restart to identify that .git, Grunt and Node.js are installed) and open the folder with your repository clone.
You’ll see your files in the Azure DevOps repository after you have synchronized the changes. This way you have source control, can share and collaborate on your files and develop the brand for your portal.
These are the prerequisite needed to start working with Portal code, and also working smart with branding portals with SCSS. Now, let’s move on to setting up the project to work with SCSS.
Now it’s time to get started developing and setting up your environment for working with styling:
Hope this was helpful. If you have any questions please leave them as comments on this blog post or send them to me directly on any social media platform or via email. I will try to answer as soon as I can.
Big shout out and thank you to Marius Børresen and Mathias Torgalsbøen for helping me out with this every time I get stuck! <3
Have fun!
Feature Photo by Karl Pawlowicz on Unsplash
[…] Pro Dev Setup for Power Pages […]