This blog post describes how to create a SharePoint list for storing participants for an event as a part of a solution for “Attendee Check-In” using components of the low-code Power Platform and SharePoint.
Depending on the overall infrastructure and already exciting licences it might be more natural to use Dataverse for storing the participants than using a SharePoint List.
This blog post is part of the “Attendee check-in” solution series
Tag: “Attendee Check-in” (See all blog posts in this series)- Storing participants in SharePoint (YOU ARE HERE)
- Register participants with Microsoft Forms and SharePoint
- Build Canvas App for scanning QR-code
Create a SharePoint list
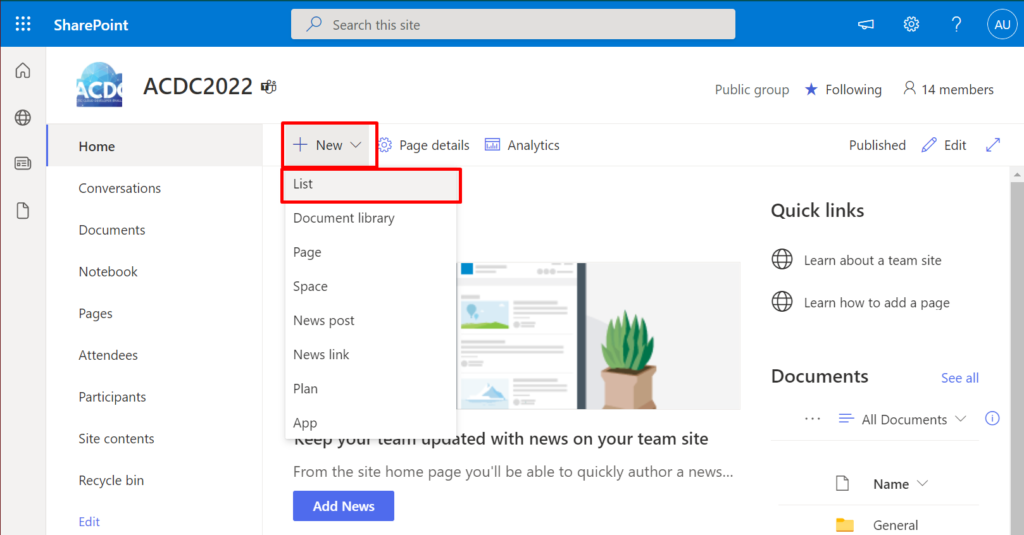
Navigate to the SharePoint site where you want to create your SharePoint List. Open the home page and select “New” from the toolbar. Select “List” from the drop-down menu:
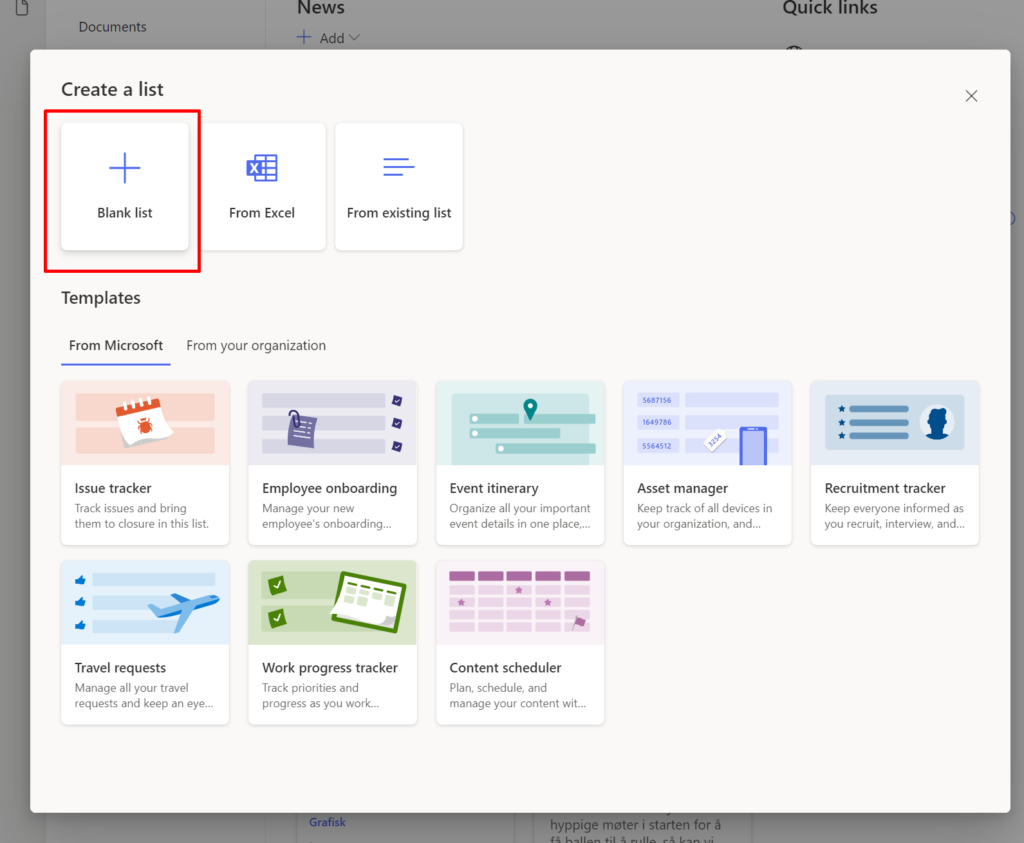
Create a “Blank list”
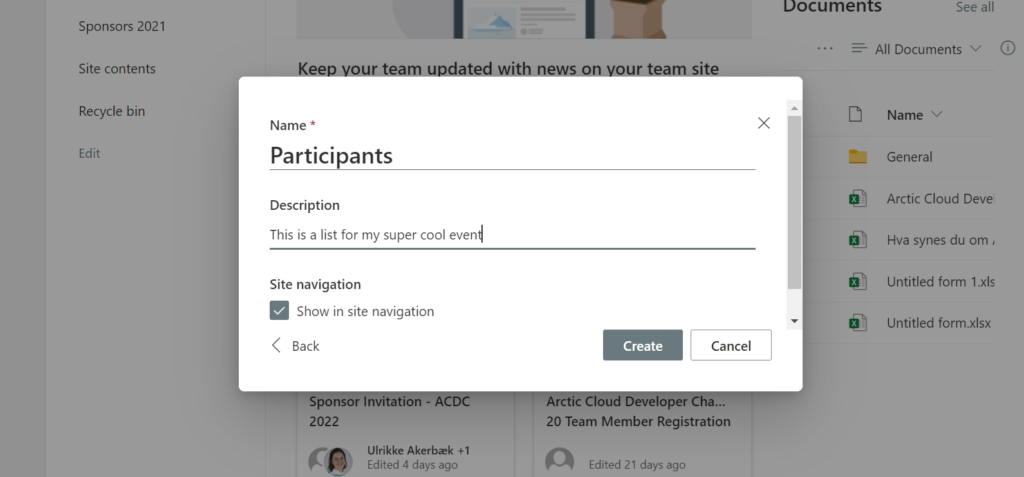
Give your list a name and a description. Names have to be unique.
Your list will open – and it will be empty.
Create columns
Now let’s create the columns we need. Think in terms of what input fields you will need on your registration form. What information do you need in your system about your participants?
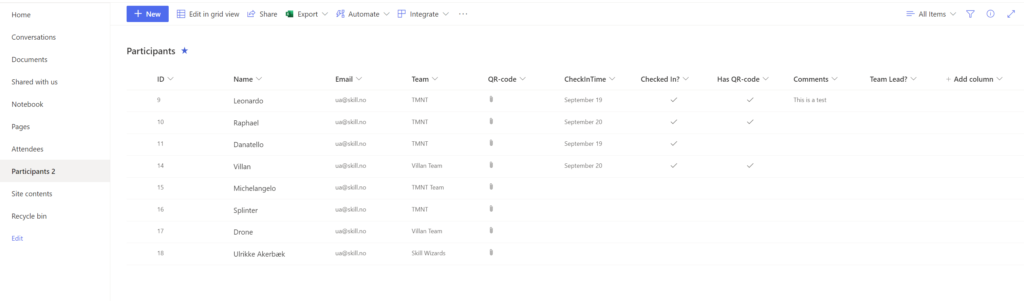
I need these columns:
- Email (Singe line of text)
- Team (Singe line of text)
- CheckInTime (date and time)
- Checked In (Yes/No)
- Has QR-code (Yes/No)
- Comments (Multiple lines of text)
- QR-code (Image)
- Team Lead (Yes/No)
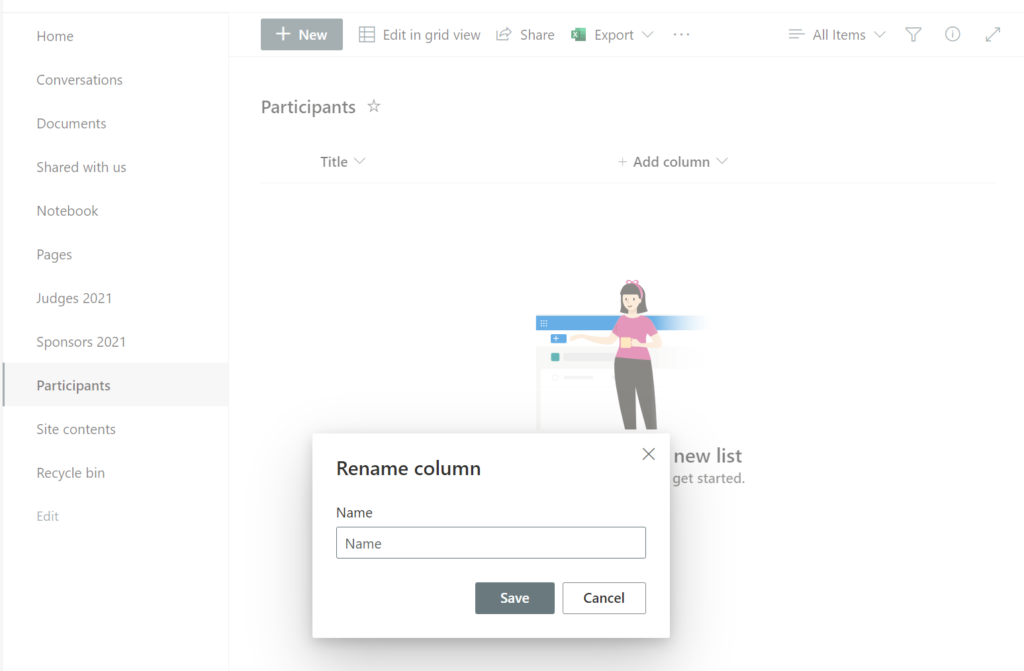
First we will rename the “Title” column to “Name” and store the participants name in this column.
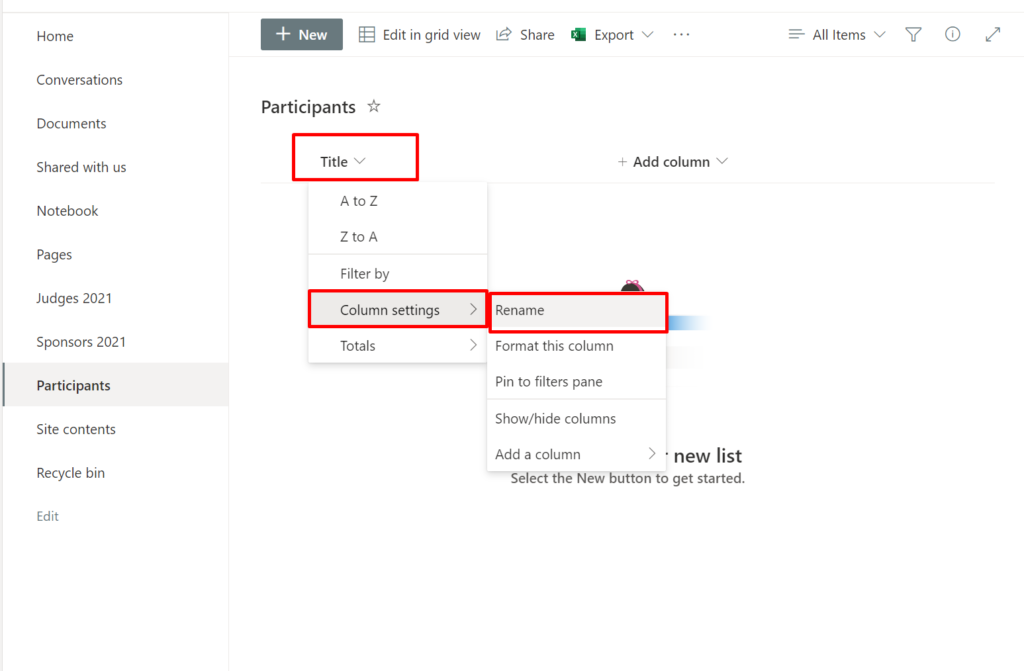
Give the column a new name and save.
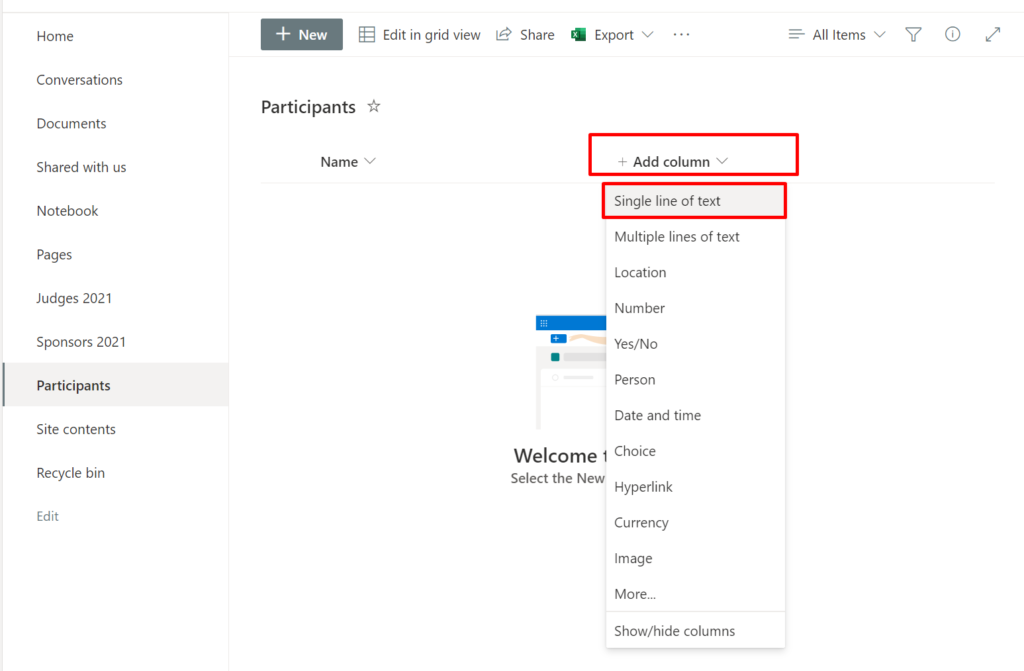
To add a new column simply click the “+ Add column” column header and select the columns type you need. For email I use “Single line of text”.
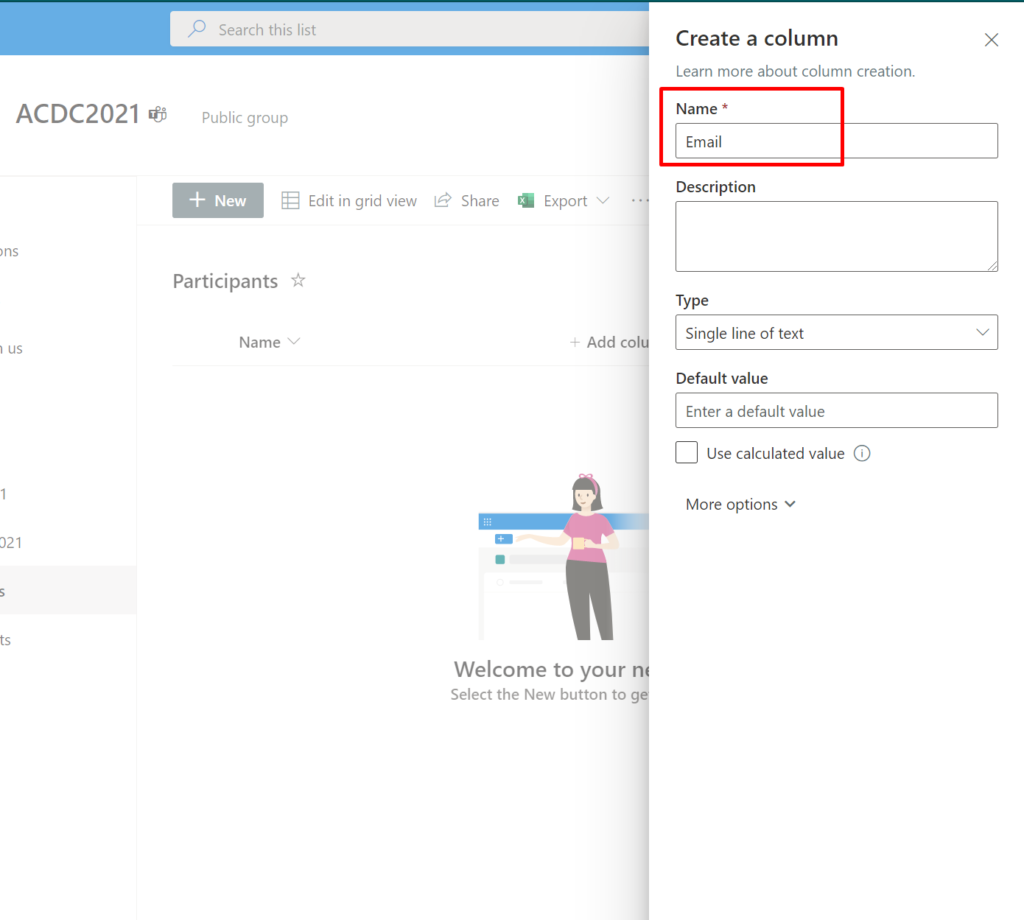
In the right panel, set the name of the column and hit save. Do this for the other columns as well.
When you are done adding all columns to the list it look like this:
Now what you need is a place for participants to register to your event.
You can do this by using a Microsoft Form. It is included in most Office 365 licenses for free. Combine that with a power automate flow that automatically add registered participants as lines in your SharePoint list. How do I do that, you ask? Look no further – the next blog post in this series will show you exactly how:
Hope this was helpful and that you have fun setting up this simple SharePoint list.
[…] Storing participants in SharePoint […]
[…] Storing participants in SharePoint […]
[…] Storing participants in SharePoint […]