Last updated on 29/09/2021
This blog post describes how to create a Power Automate Cloud Flow that automatically creates a QR-code as part of a solution for “Attendee Check-In” using components of the low-code Power Platform.
Initially, this “Attendee Check-in” solution used SharePoint List to store information about participants and the QR-code. Depending on the overall infrastructure and already exciting licences it might be more natural to use Dataverse for storing this data.
This blog post is part of the “Attendee check-in” solution series
Tag: “Attendee Check-in” (See all blog posts in this series)- Storing participants in Dataverse
- Registration form using Power Apps Portals
- Create QR-code with Flow (YOU ARE HERE)
- Build Canvas App for scanning QR-code
Create an automated Power Automate Cloud Flow
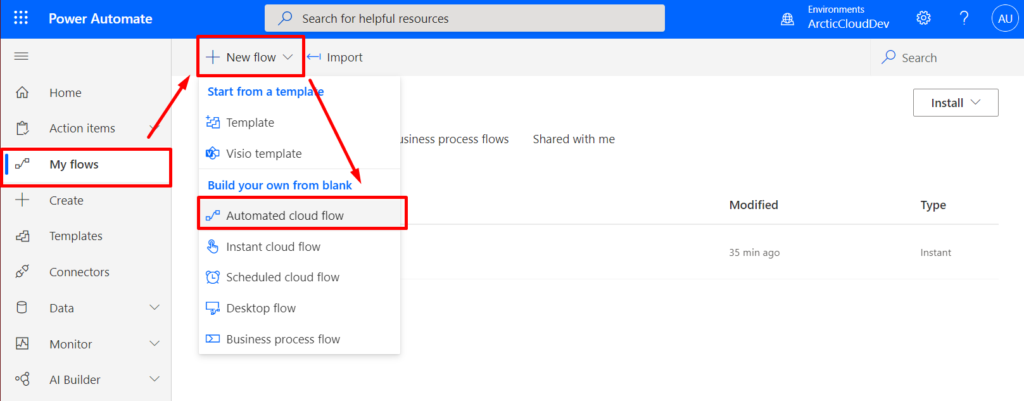
Open flow.microsoft.com and make sure you are in the correct environment. Navigate to “My Flows” and Choose “+ New flow” from the toolbar.
Create a new Automatic Cloud Flow
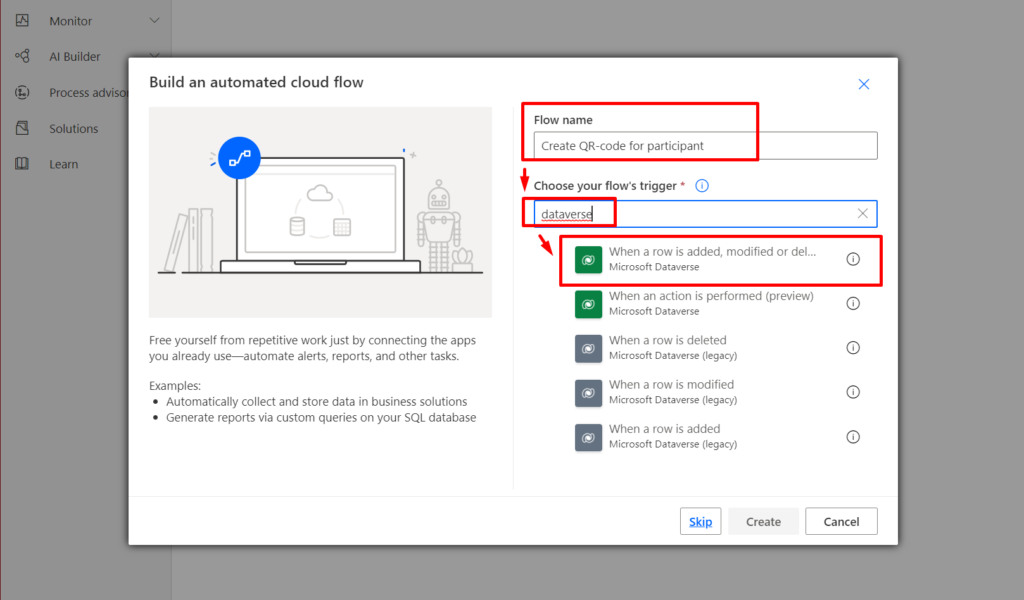
Search for and select the Dataverse trigger “When a row is added, modified or deleted”
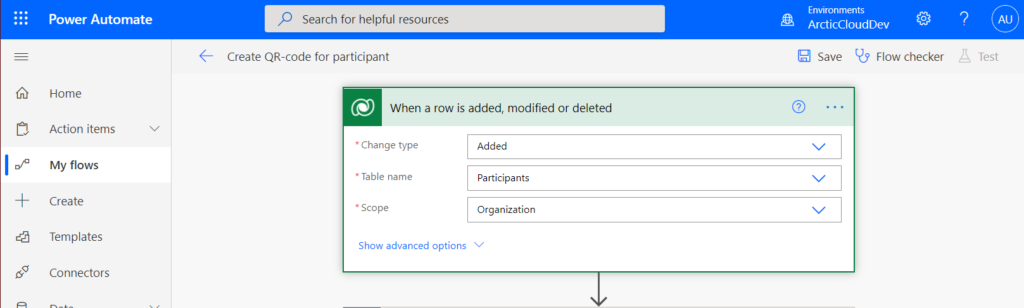
Set Change type to “Added”, select the “Participant” table and set Scope to “Organisation”.
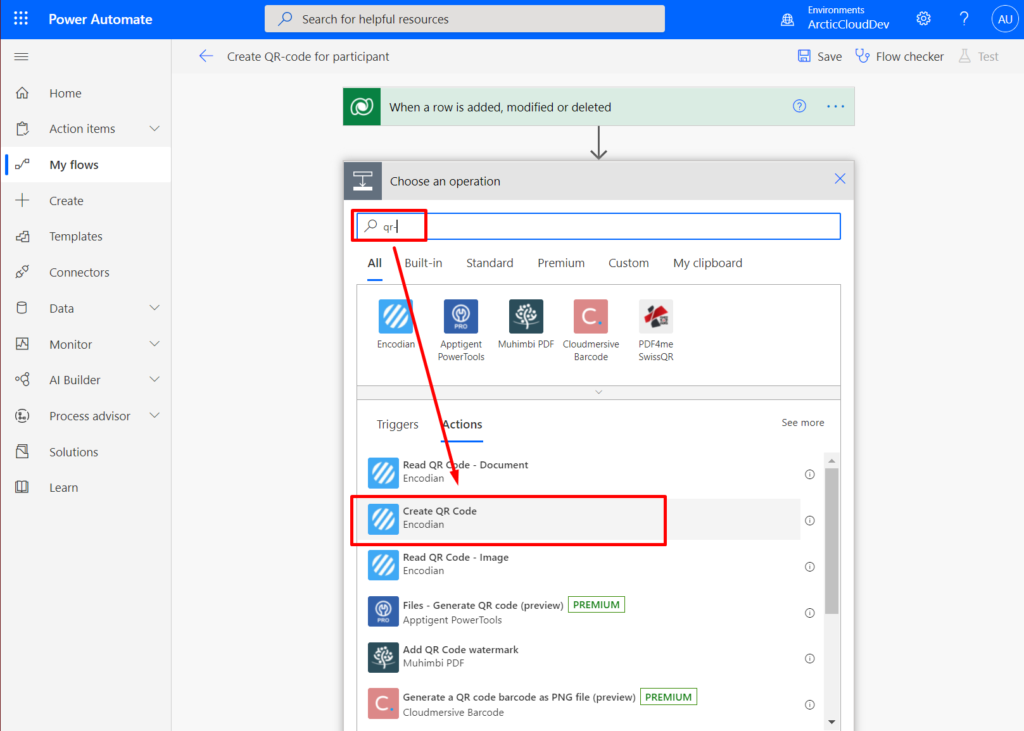
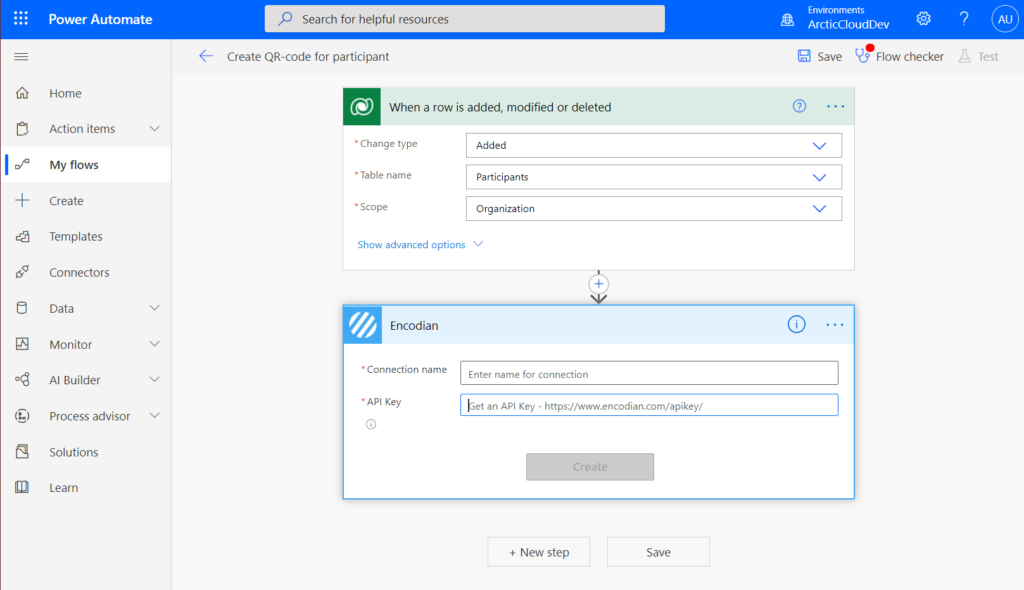
Add a new action “Create QR-code” using the “Encodian” connector.
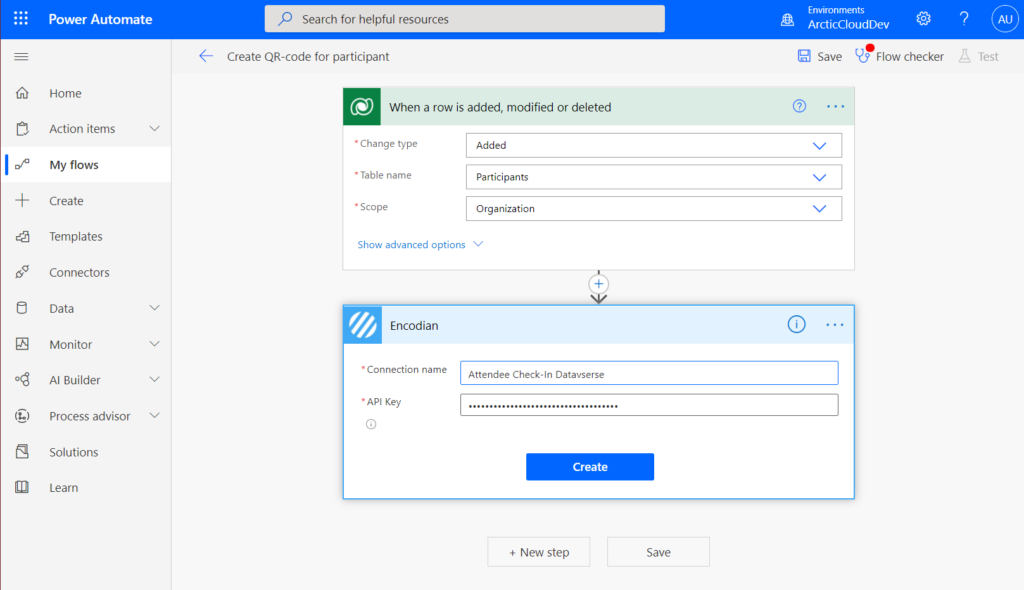
The action step needs a connection name and an API key. You can get this by visiting “https://www.encodian.com/apikey” and filling out the form. Then you will get access to a trial api key for Encodian.
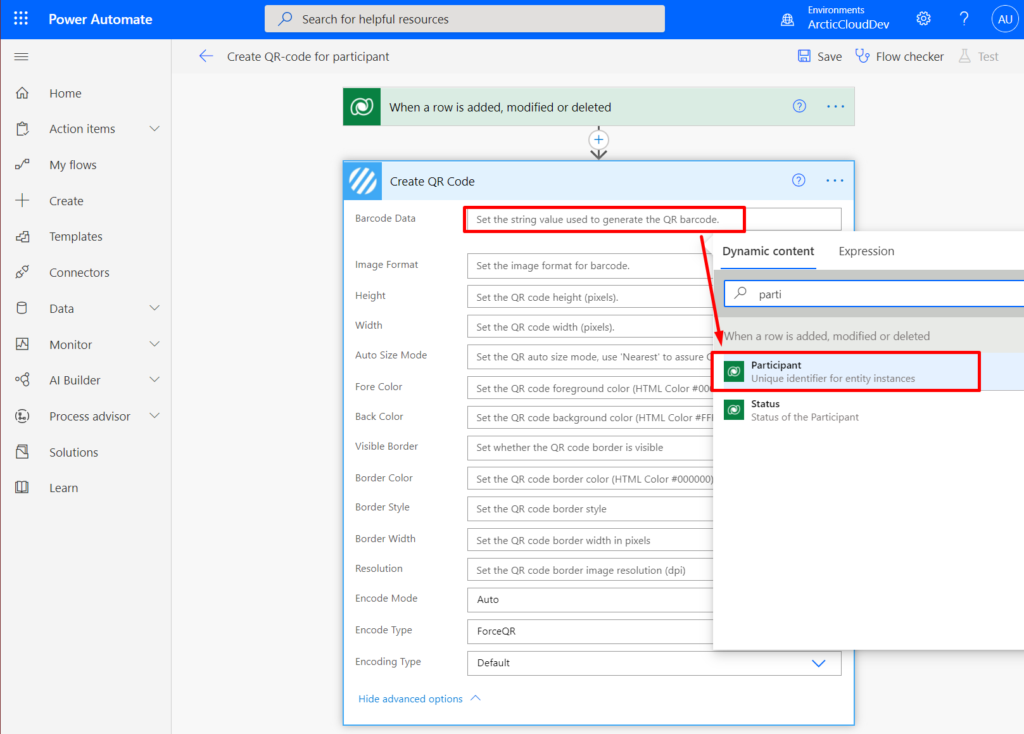
When you add your API key to the action and click “Create” the connector action form will allow you to configure this step further. Make sure to add the “Partipant (Unique identifier for entity instances)” as value to the Barcode Data input field. This way the barcode scanner will get this value when scanning the code.
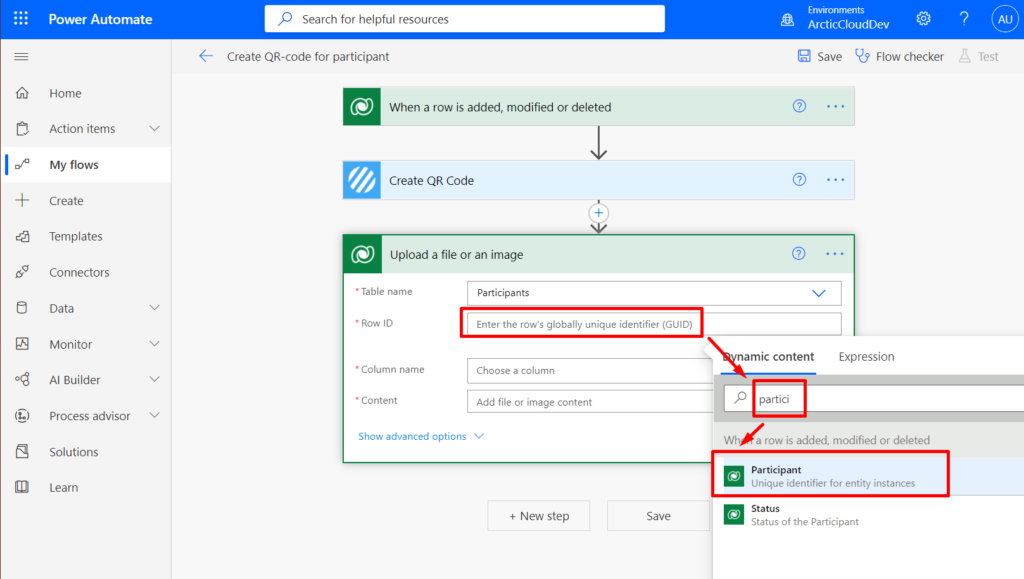
Add a new step and select the “Upload a file or an image” action for the Dataverse connector.
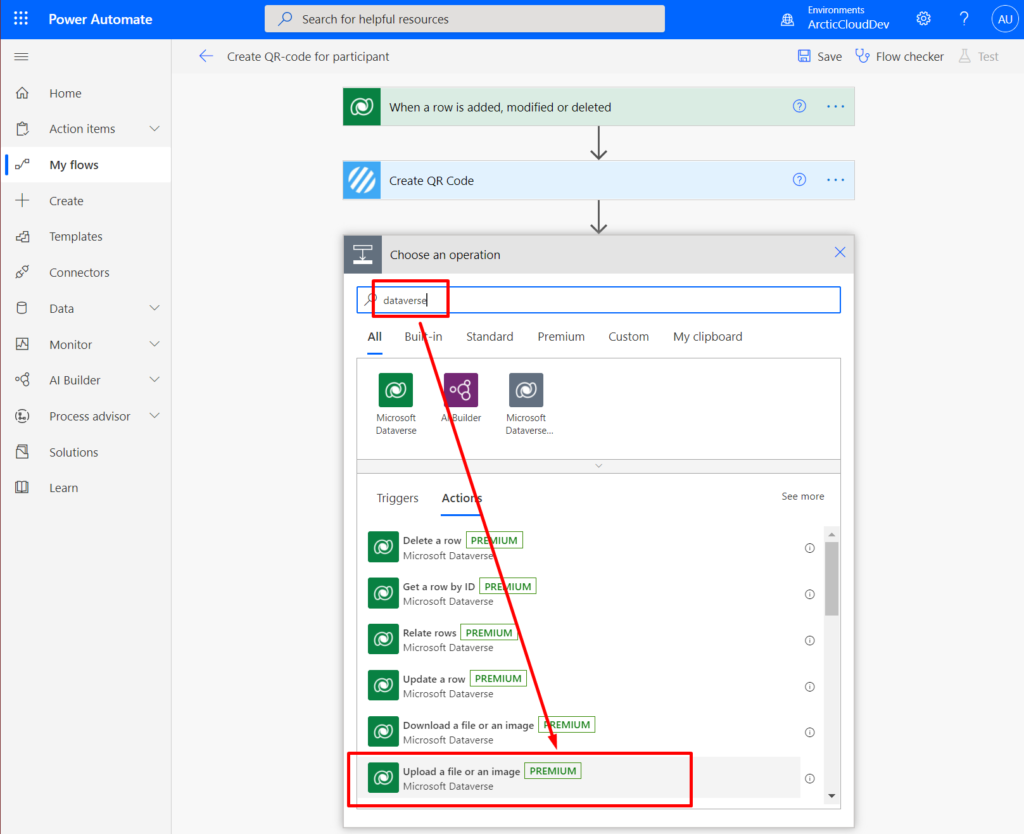
Choose the “Participation” table and select “Participant” as row ID.
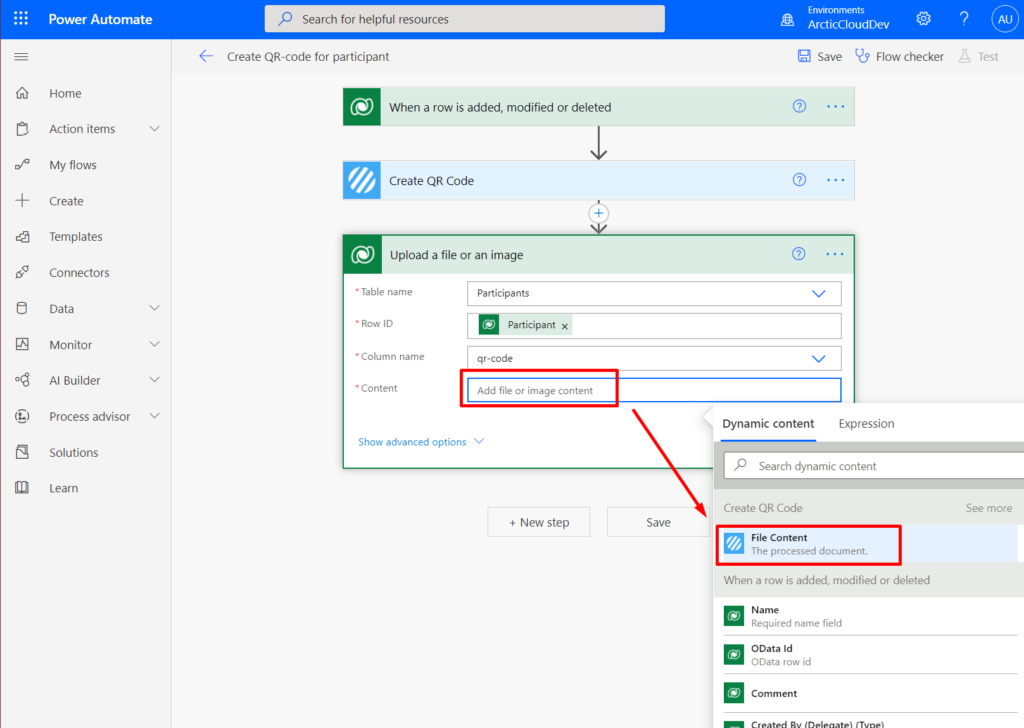
Choose “qr-code” as column name and “File Content” from the QR-code creator step as Content.
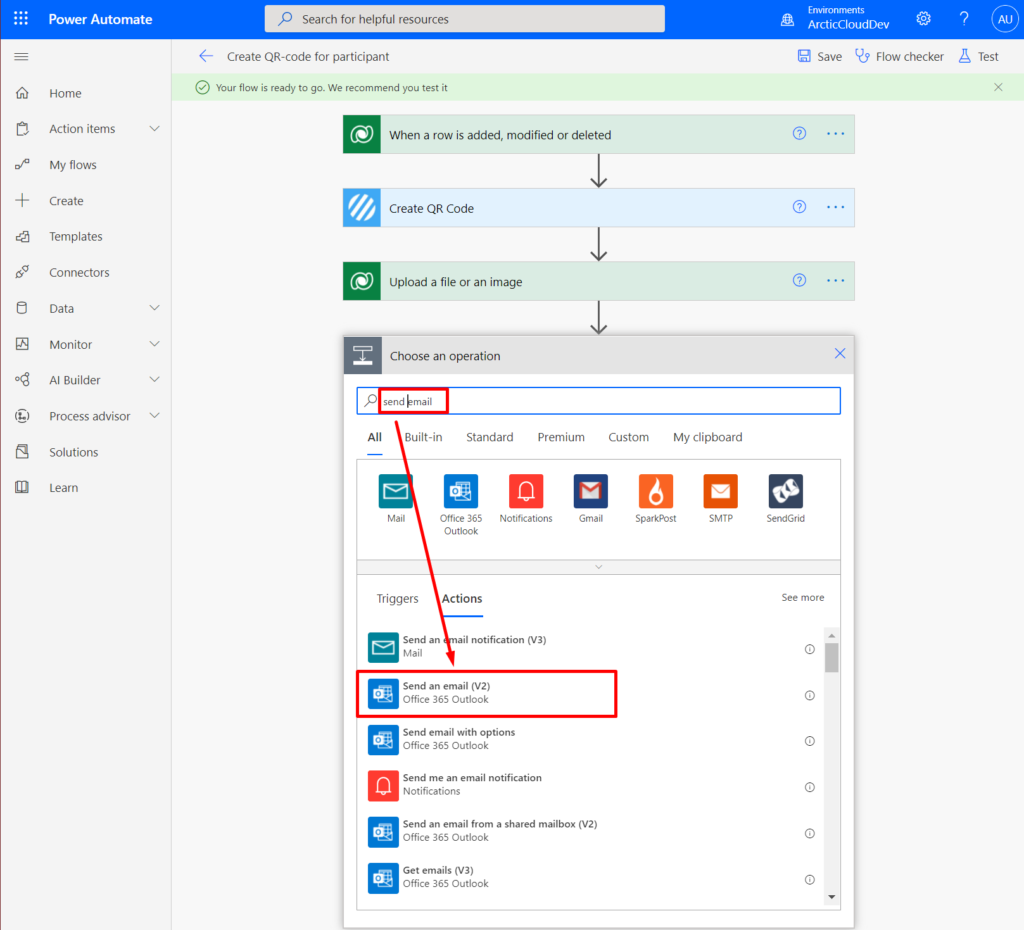
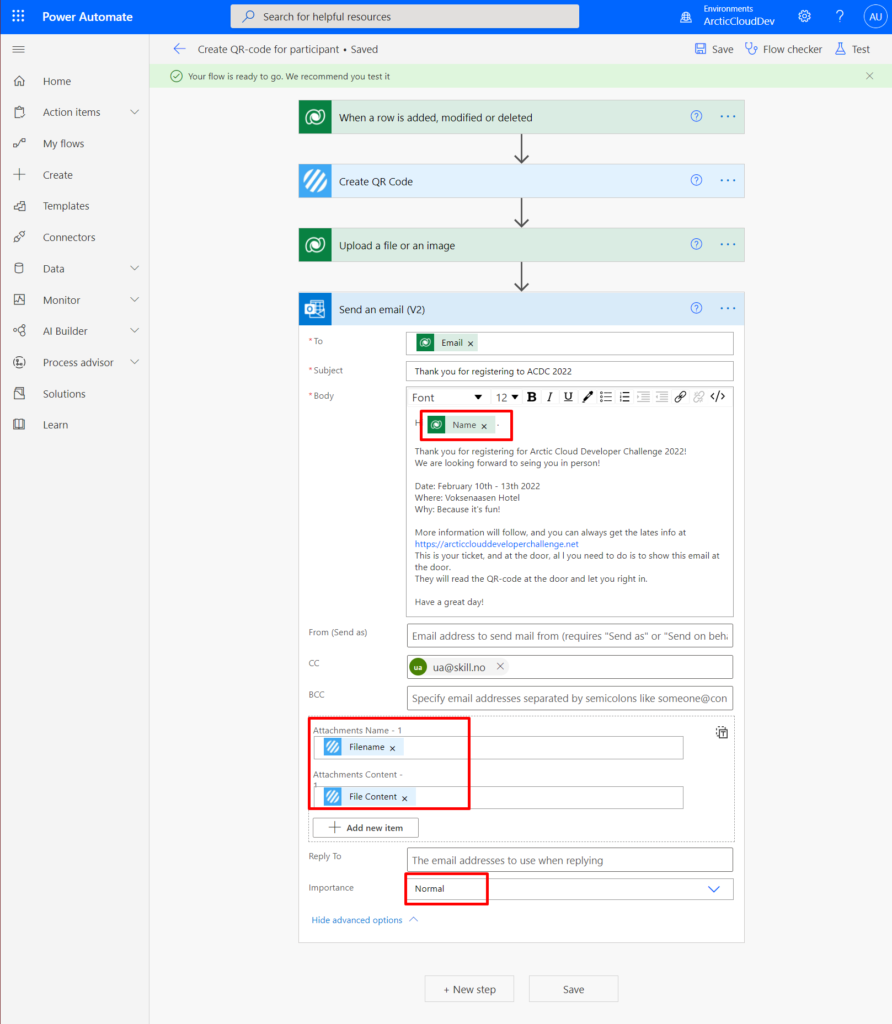
Add another step where you use the “Send an email (v2)” action for the “Office 365 Outlook” connector. You can use any other send email action from any other connector of that better suit your existing infrastructure.
Open the “dynamic content” panel to be able to add dynamic content from other action steps.
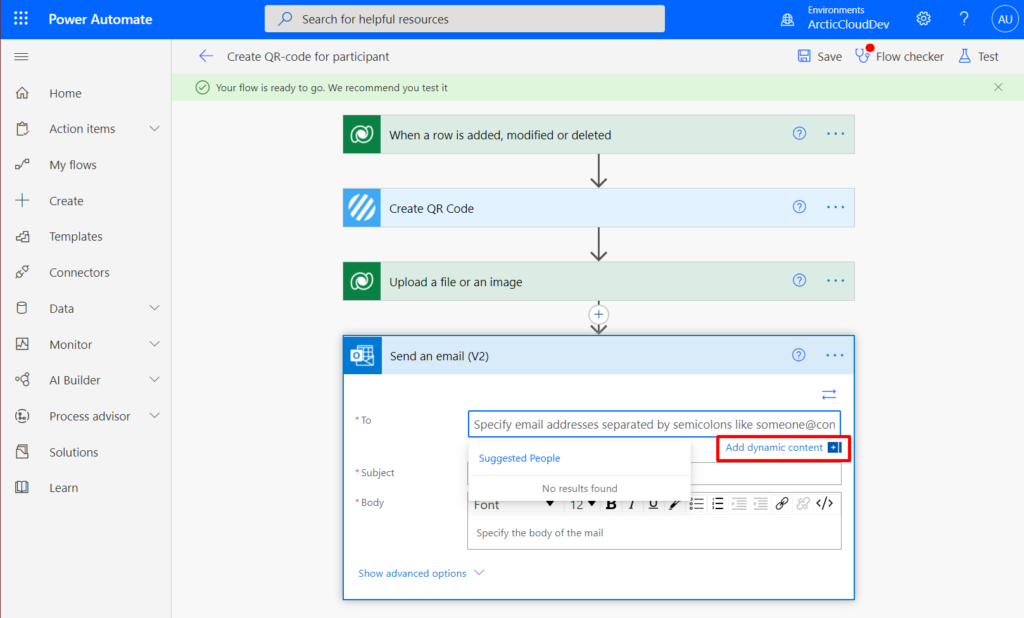
Add the “Email” from the participant table in the “To” input field. Add your subject line and content.
Expand the “Advanced options” and add “Filename” and “File Content” from the “Create QR-code” step as attachment.
Save your Flow and then navigate back to the flow overview.
To test if your flow is working you need to add a new row to the “Participant” table in dataverse. You can do that by opening up the table in make.powerapps.com and select the “data” tab and click “new to”
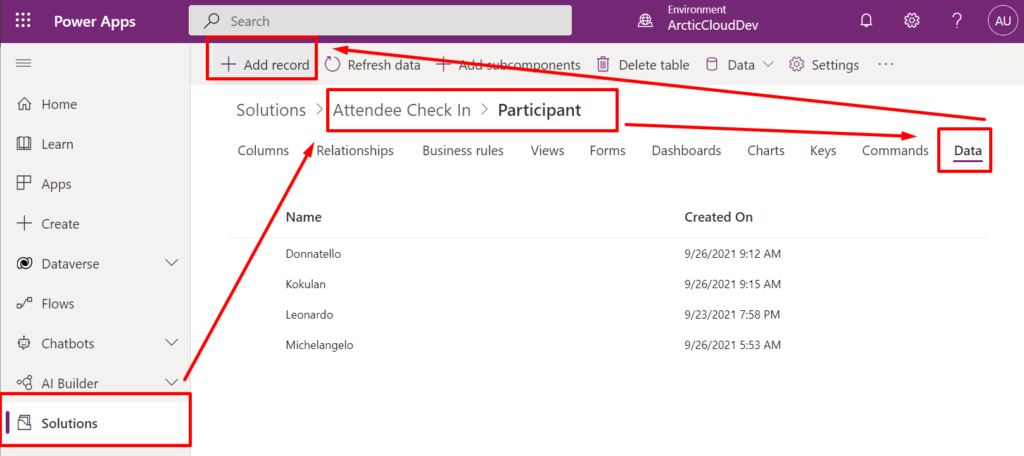
This will allow you to create a new row.
If you have a registration form on Portals or Microsoft Forms then try using that form to test your flow.
Want to know more about how to set up a registration form with Power Apps Portals? Look at
this blog post from the same series on "Attendee Check-In: Registration Form Using Portals"
When your flow has run successfully you will receive the email and the row in your Dataverse table will have an image with the QR-code.
Hope this was helpful. Good luck and have fun!
[…] Create QR-code with Flow […]
[…] Create QR-code with Flow […]