Last updated on 29/09/2021
This blog post describes how to create a form with Microsoft Forms for participation registration. Then, a Power Automate Flow automatically adds a new item to a SharePoint list. This is a part of a solution for “Attendee Check-In” using components of the low-code Power Platform and SharePoint.
Depending on the overall infrastructure and already exciting licences it might be more natural to use Dataverse for storing the participants than using a SharePoint List. If that is the case look at the blog post on how to create a registration form using Power Apps Portals and Dataverse.
This blog post is part of the “Attendee check-in” solution series
Tag: “Attendee Check-in” (See all blog posts in this series)- Storing participants in SharePoint
-
Register participants with Microsoft Forms and SharePoint
(YOU ARE HERE) - Build Canvas App for scanning QR-code
Create a Microsoft Forms registration form
We will create a form using Microsoft Forms – and use Power Automate to automatically put registrations into a SharePoint List.
Start by navigating to https://forms.office.com/ and logging in.
Make sure you open the group where you already have your SharePoint list to keep the two together. Create a new group form.

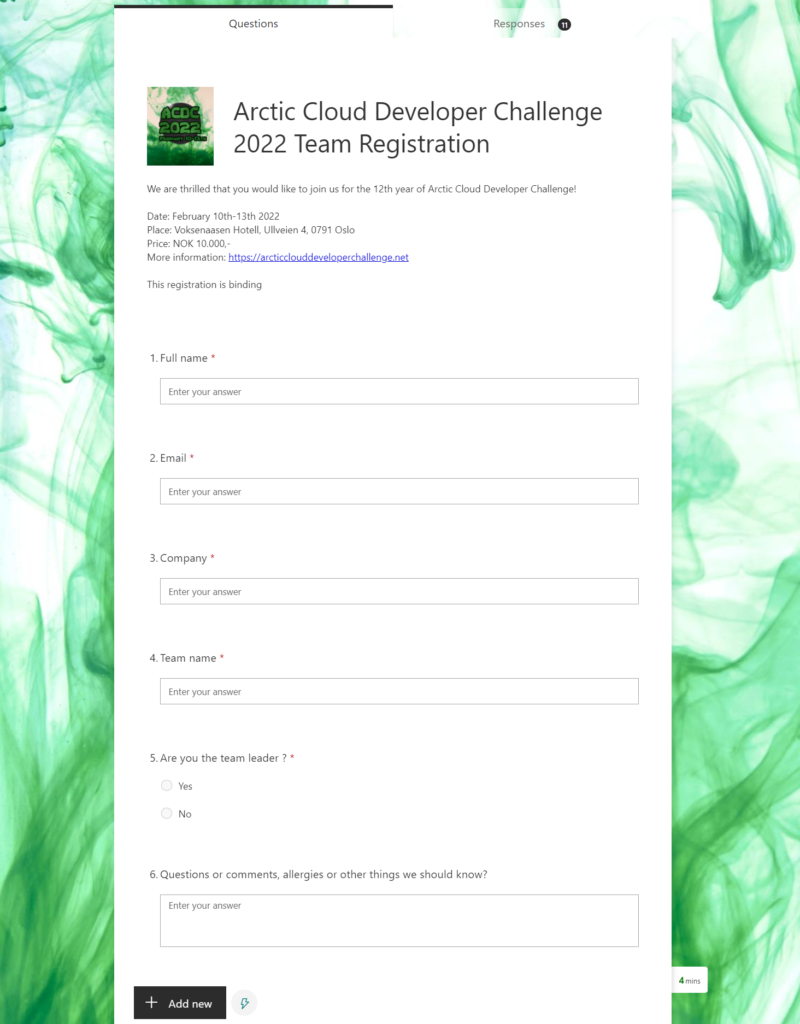
Add a header, maybe a logo and a description of your event. Then add the input fields that you need the participants to fill out when they register for your event. These should match the columns we created for the SharePoint List. They are:
- Email (Singe line of text)
- Team (Singe line of text)
- CheckInTime (date and time)
- Checked In (Yes/No)
- Has QR-code (Yes/No)
- Comments (Multiple lines of text)
- QR-code (Image)
- Team Lead (Yes/No)
When done your form might look something like this:
You could embed this form on a website or send people to this form directly if you like. Configure the experience you like in the form settings.
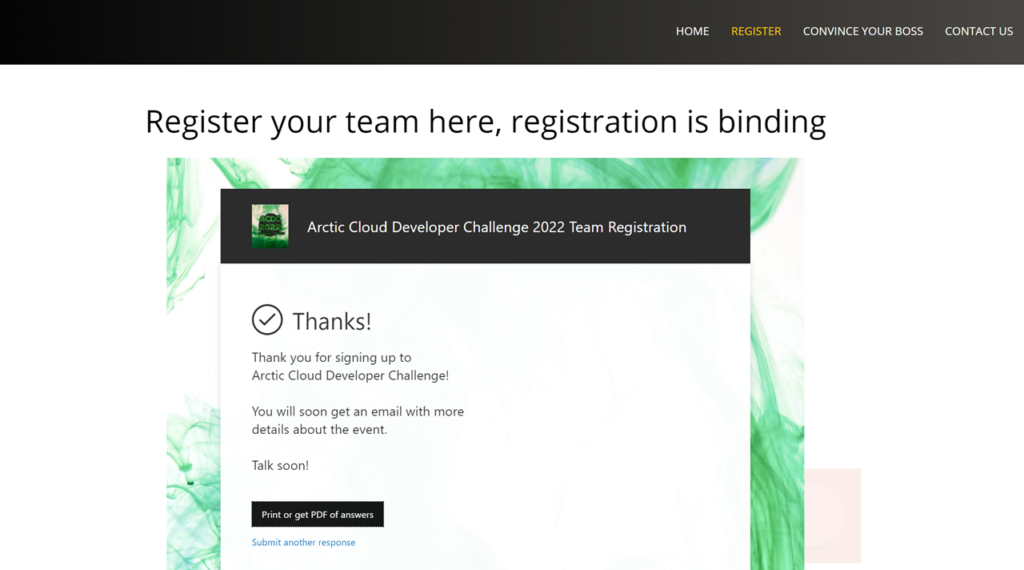
When a participant has sent in the form they see a “Thank you” message telling them what to expect. It should say that a confirmation email will be sent to their email address soon with a QR-code. They will need to display this QR-code at the door; it’s their ticket.
Power Automate Cloud Flow
When a form is submitted the data is stored in an Excel file. We need this information to be stored in our SharePoint List, and we’ll use Power Automate for that.
As you will soon see; we could send this data anywhere, really, depending on the existing services and products we have at our disposal.
Navigate to https://flow.microsoft.com and open “Templates” from the left menu.
Choose the template “Form processing to email and SharePoint”

This template will be opened up and you will need to sign in with the user account you want to use for the different connectors that are used in this flow. When you are connected click “Continue”.
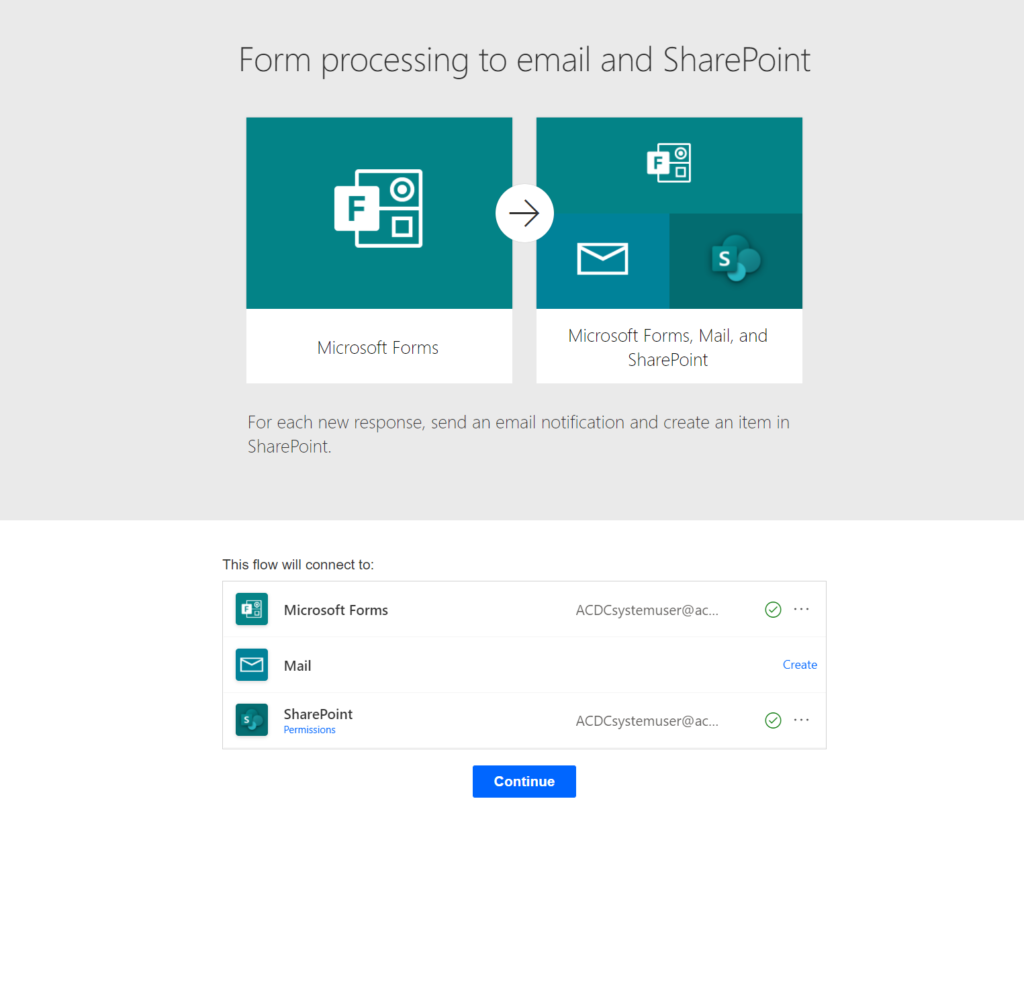
It’s smart to use the same system user for all these services and connectors. This one user should have all the required licences and security roles to create and run the apps and flows you create.
Your new flow will open up and automatically include all the steps you need.
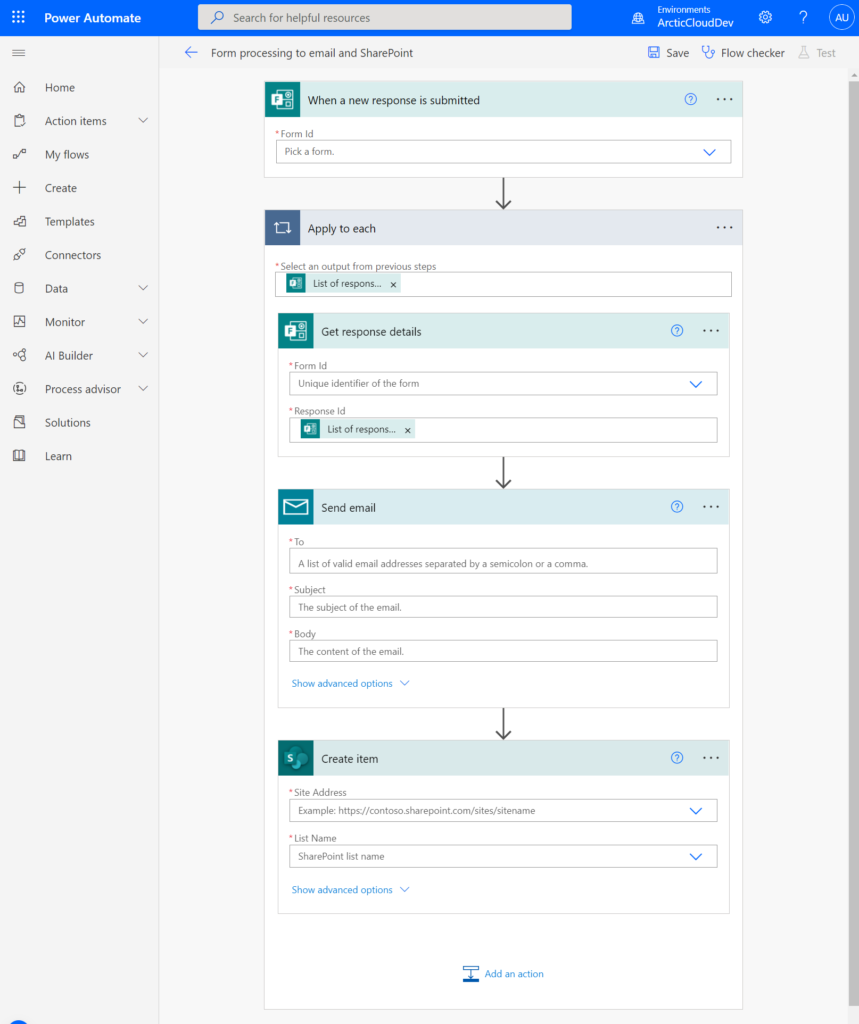
Now your job is to select the correct properties for the trigger action and the steps.
The first step is the trigger. It will trigger when a response is submitted to one particular form. We will need to provide the form ID to enable this to trigger for our form.
Get the form ID
Open the tab in your browser with the form. Select the URL and copy the last part – everything from “FormId=” to the end (Yes – include the “-” at the start) and paste it into the “Form ID” field in the flow.
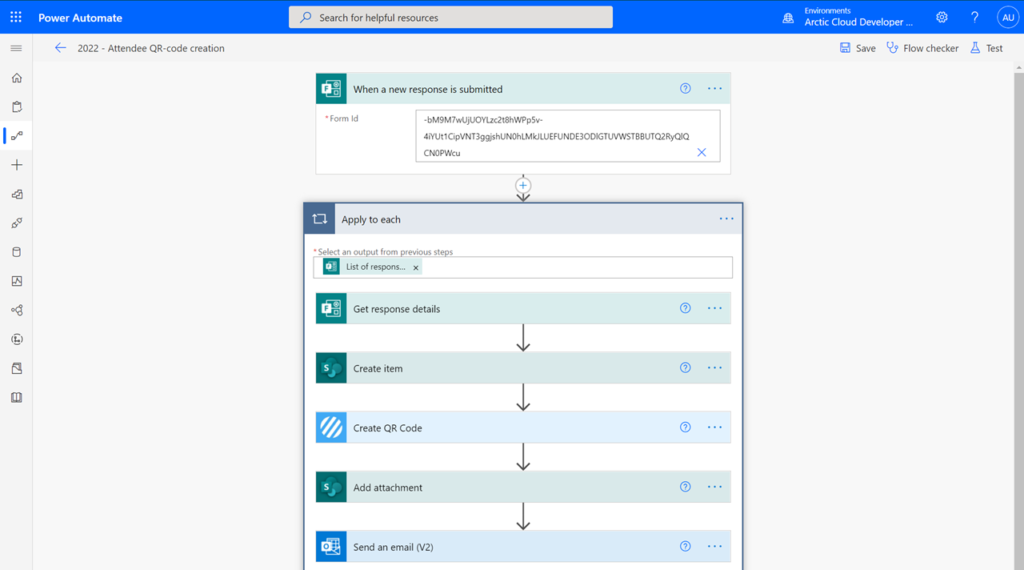
Then open the “Apply to each” and the “Get response details” step.
Paste the same Form ID as “FormID” here.

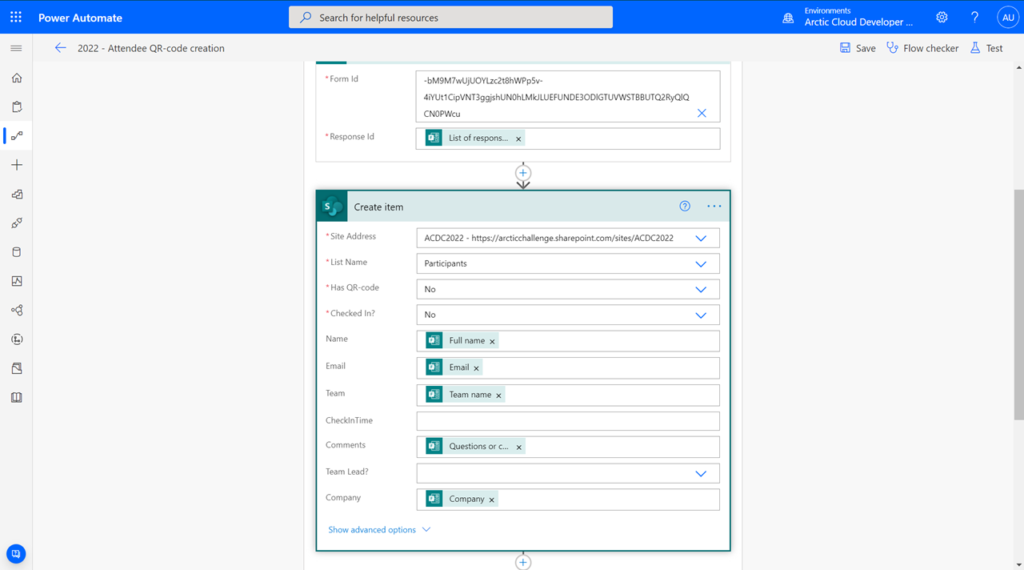
Then click, hold and drag the “Create Item” step below the “Get response Details” step.
Choose the SharePoint site where you have your list – and then your list. Click the “Show advanced option” link and then start filling out the list item with matching values from the “Get response details” step.
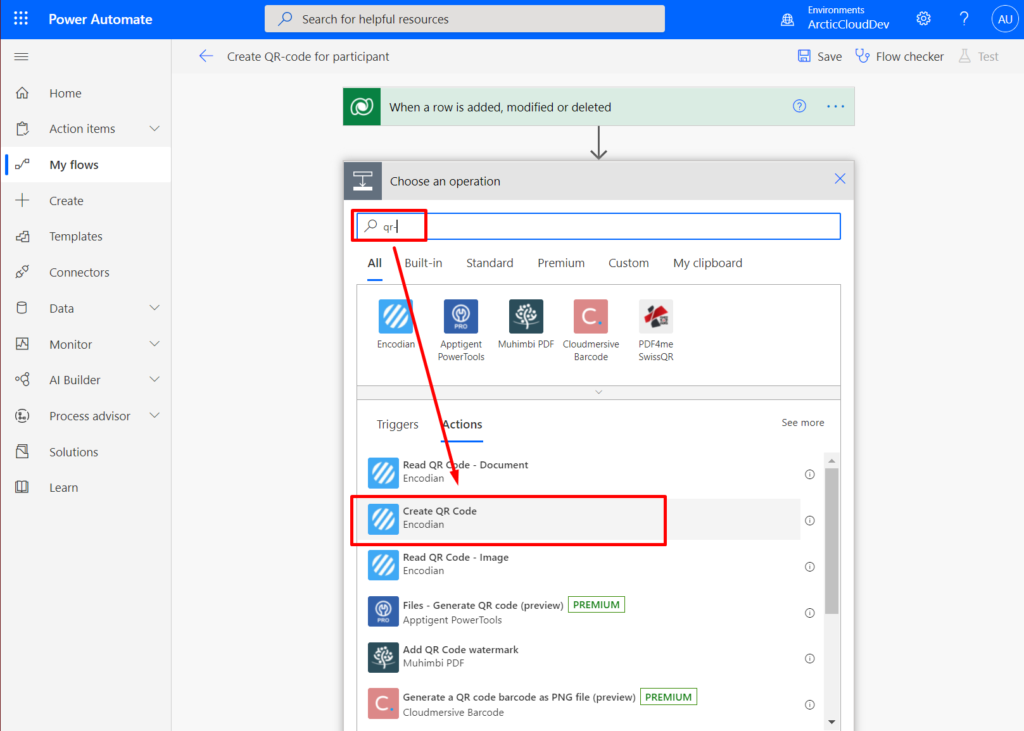
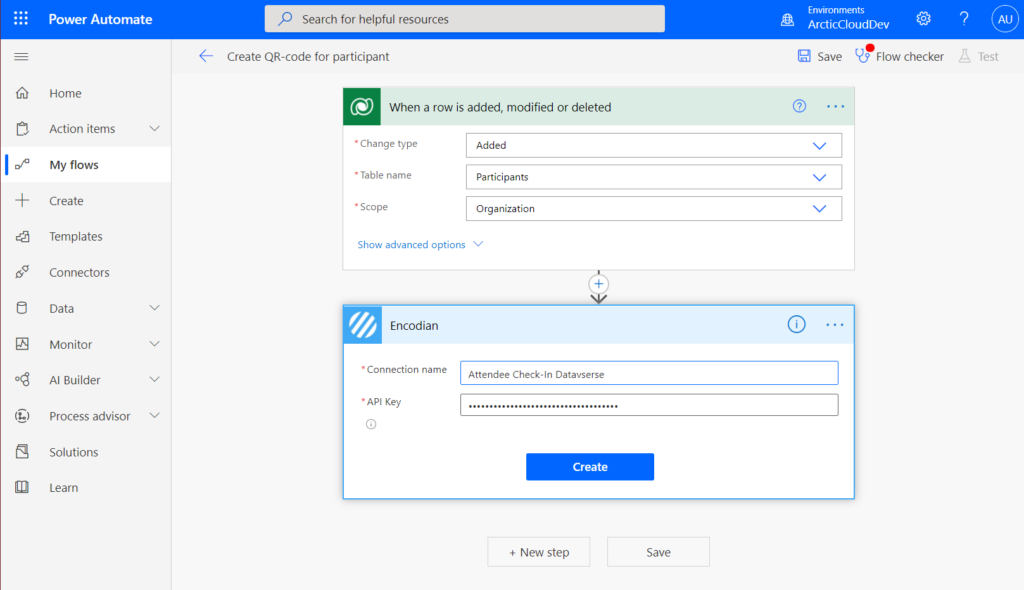
Add a new action “Create QR-code” using the “Encodian” connector.
(The following pictures are from another flow, but just follow the steps – they are the same)
The action step needs a connection name and an API key. You can get this by visiting “https://www.encodian.com/apikey” and filling out the form. Then you will get access to a trial api key for Encodian.
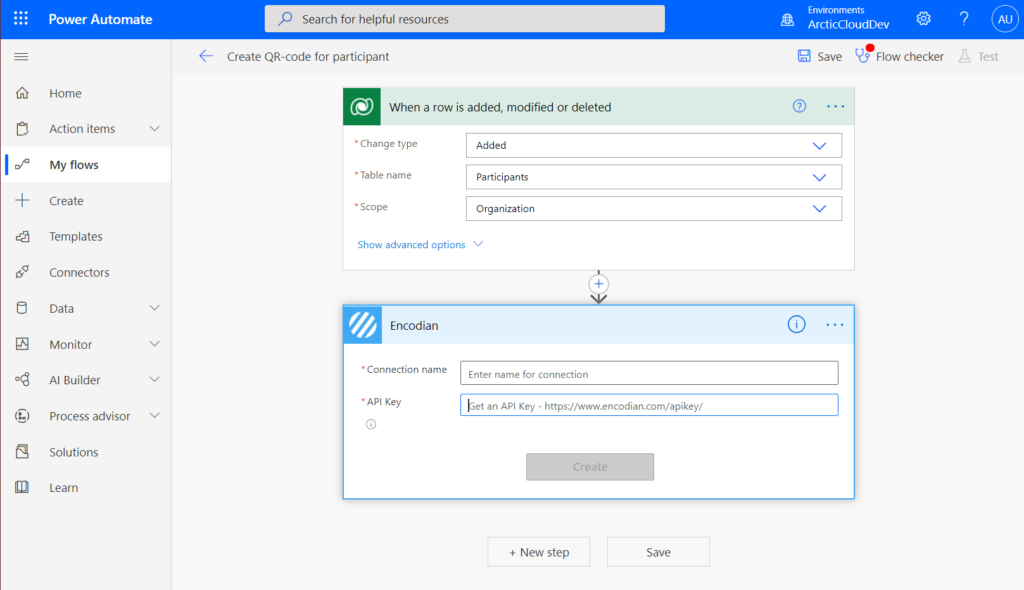
When you add your API key to the action and click “Create” the connector action form will allow you to configure this step further.
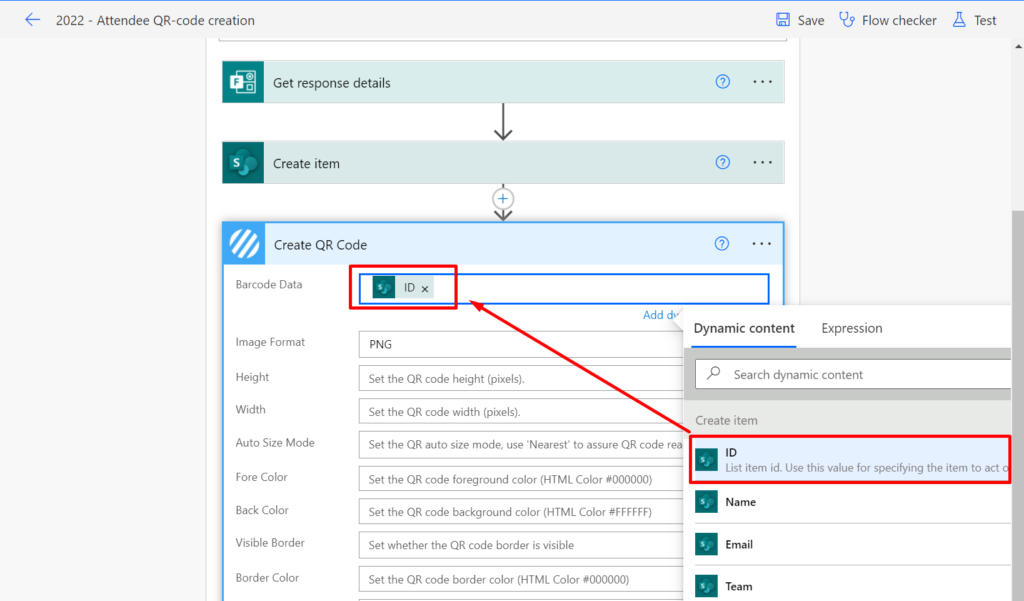
Make sure to add the “ID” as a value to the Barcode Data input field. This way the barcode scanner will get this value when scanning the code.
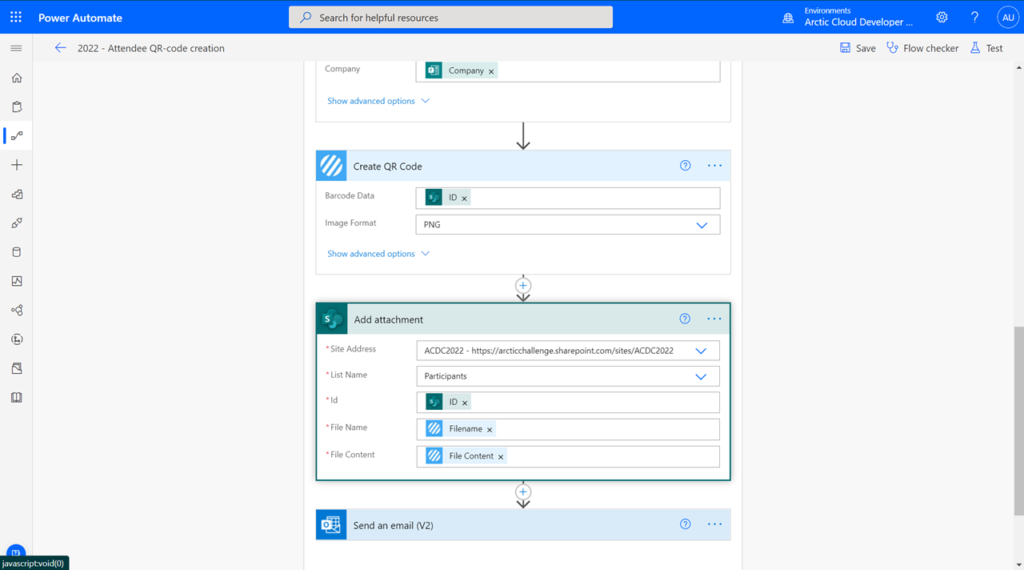
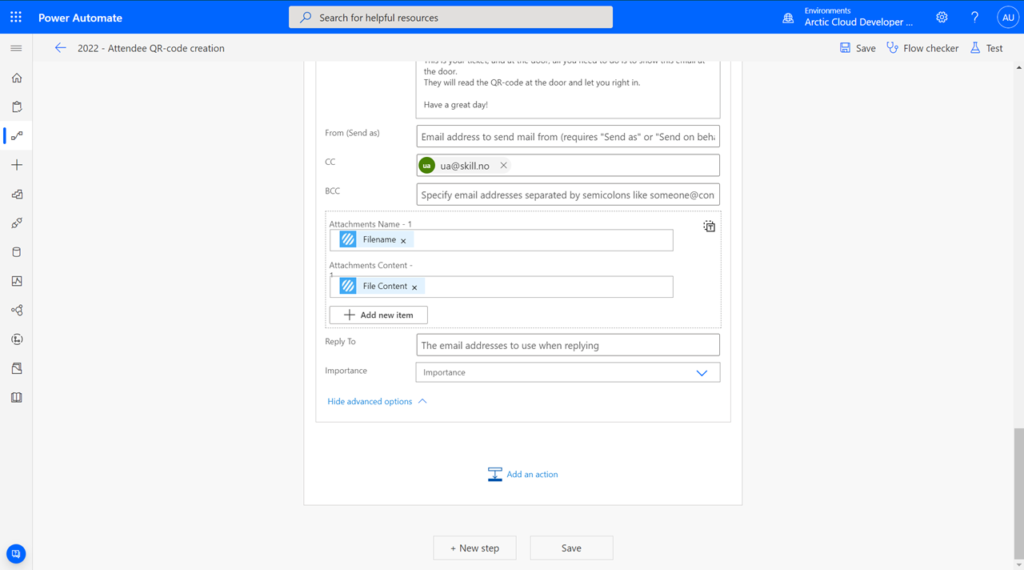
Add a new step and select the “Add attachment” action for the SharePoint connector.
Choose the correct site and list, and then set the ID as “Id” and QR-code filename and file content.
The last action is to send the email.
Add the “Email” from the participant in the “To” input field. Add your subject line and content.
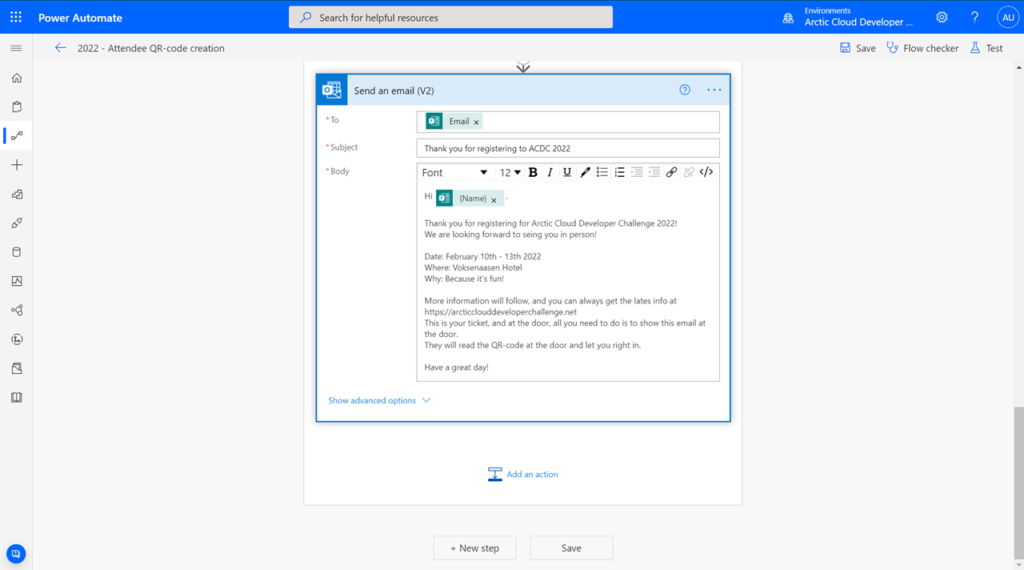
Expand the “Advanced options” and add “Filename” and “File Content” from the “Create QR-code” step as attachments
Then it’s time to test your flow. Make sure to save it first and run the Flow checker to make sure it’s good to go. Then navigate to your Microsoft Forms registrations form and submit it. Then look at your flow to see if it failed or succeeded in the “Run history”:
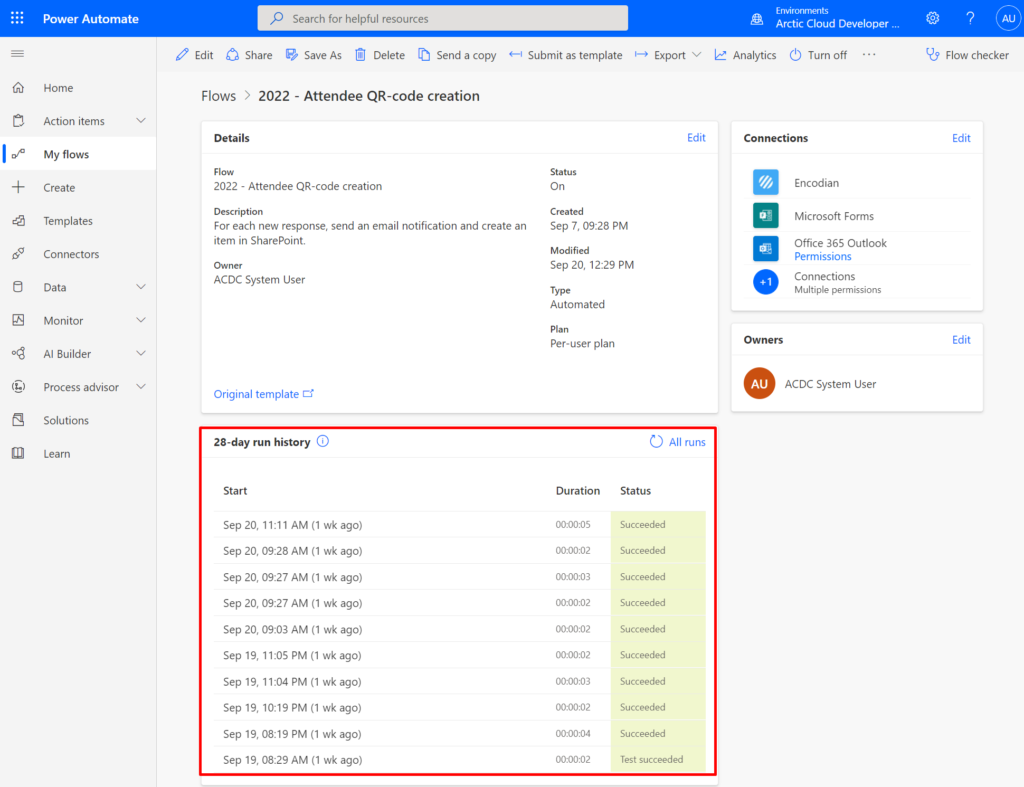
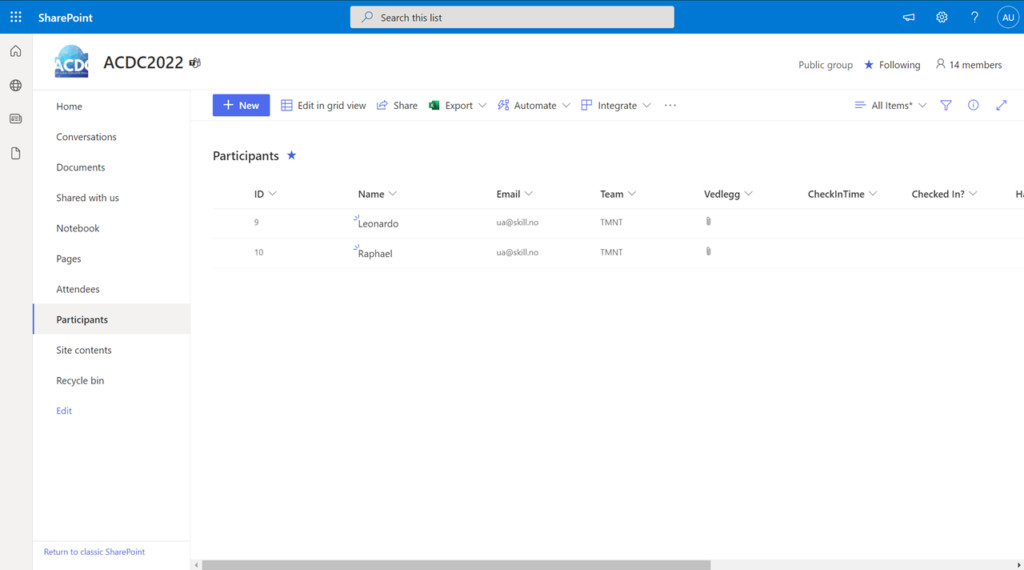
If the flow ran successfully a new row will also have been added to your SharePoint list, and you will have a new email in your inbox.
The next step is to create a Canvas App that we can use at the door on the day of the event to scan these QR-codes and automatically scan people in. Look at this blog post to see how you can build such an app. It’s low code – I promise.
[…] Storing participants in SharePoint […]
[…] Register participants with Microsoft Forms and SharePoint […]
[…] See also how to put a registration form on Power Apps Portals and store participants in Dataverse […]