Last updated on 29/09/2021
This blog post describes how to create a Canvas Power App for scanning the QR-codes to check in participants as part of a solution for “Attendee Check-In” using components of the low-code Power Platform.
The Barcode Reader component in Canvas Power Apps makes it possible to read QR-codes and get their embedded value. In this solution, the QR-code contain a number that we can use to identify individual participants.
This blog post is part of the “Attendee check-in” solution series
Tag: “Attendee Check-in” (See all blog posts in this series)- Storing participants in SharePoint
- Register participants with Microsoft Forms and SharePoint
- Build Canvas App for scanning QR-code (YOU ARE HERE)
This blog post will walk you through all the steps for building the Canvas App for scanning the QR-code and the Power Automate Flow that automatically check in the participant.
Create a connection
Building the Canvas App is much the same if you are using SharePoint List or Dataverse to store your participants. The difference lies in the connector. I will show you how to create both connectors.
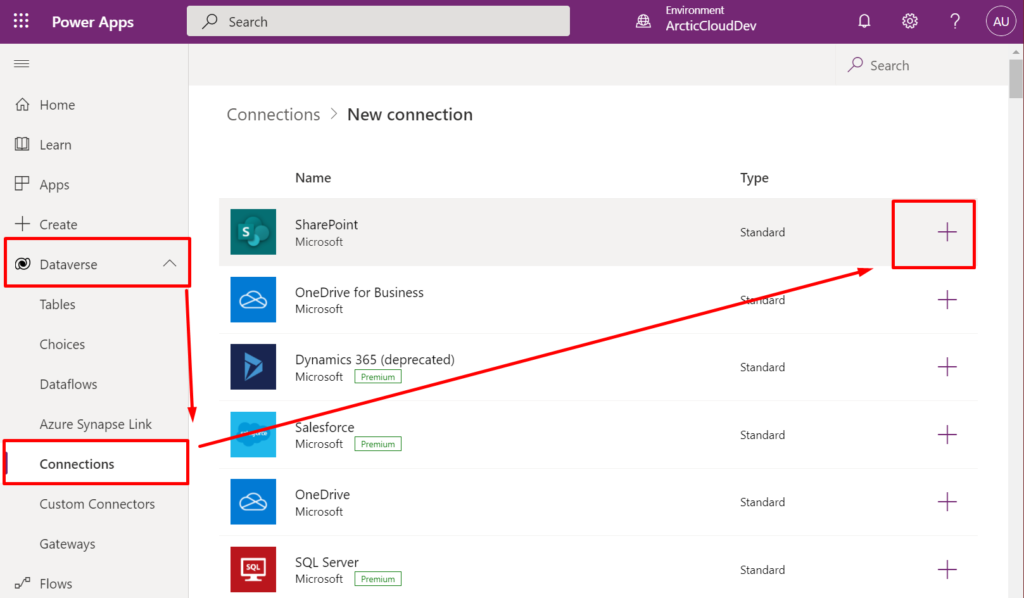
First, navigate to make.powerapps.com, make sure you are in the correct environment. Expand “Dataverse” in the left menu and select “Connections”.
SharePoint Connector
Locate “SharePoint” in the list and click the “+” button on the right side of the list item
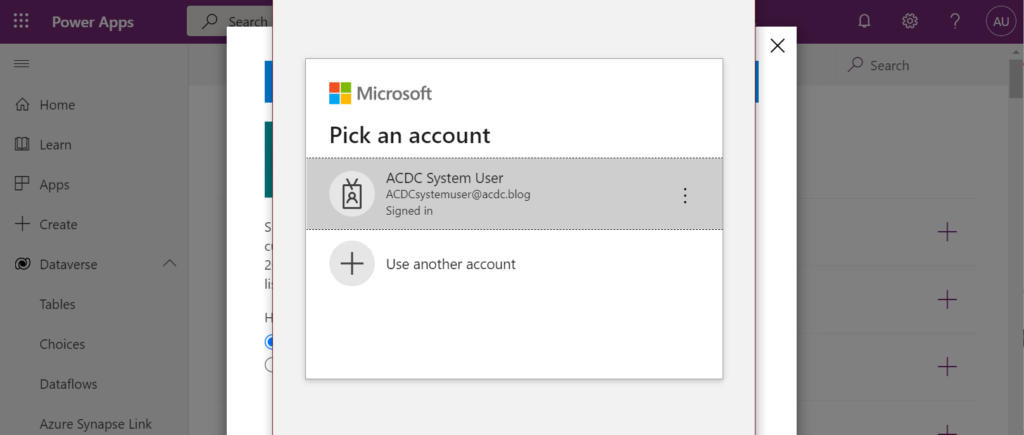
Choose the “Connect directly (cloud-services) option and click “Create”

Confirm the user you want to use for this connector. The user must have access and licence to both Canvas App and SharePoint.
Dataverse Connector
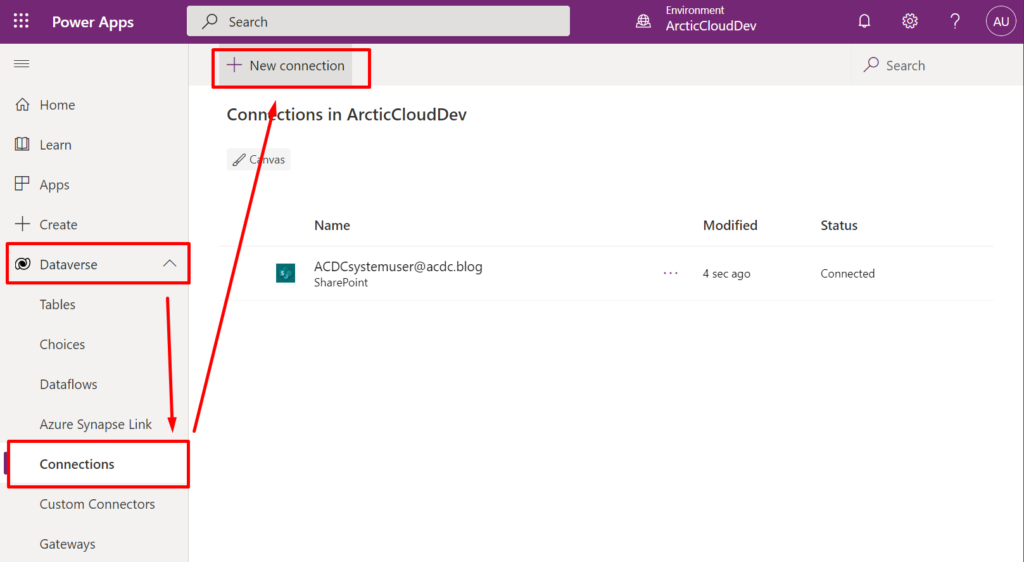
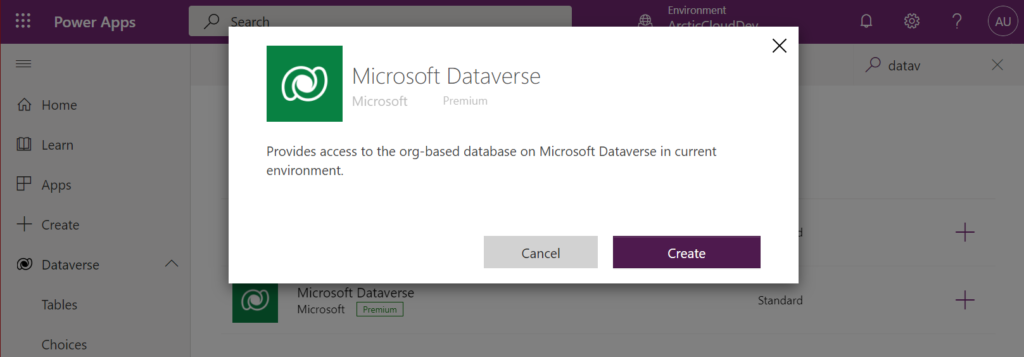
It might seem a little backwards, but you do need a connector to Dataverse in Dataverse to be able to access the Participant table from a Canvas App. Open “Dataverse” in the left menu and choose “Connections”. Select “+ New connection” from the toolbar.
Search for “Dataverse” and click the “+” button on the right side of the “Dataverse” option from the list
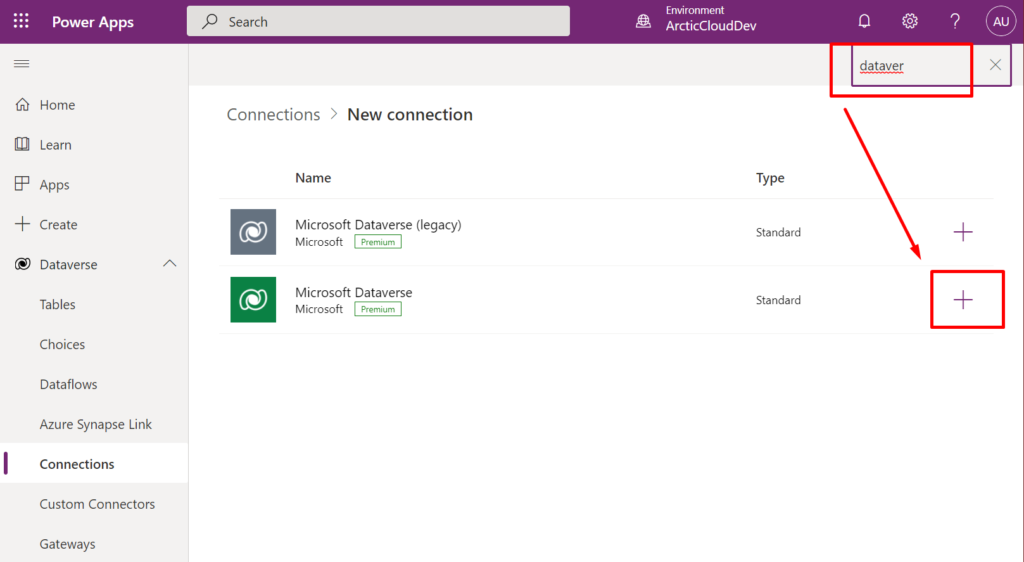
Establish a connection by clicking “Create”
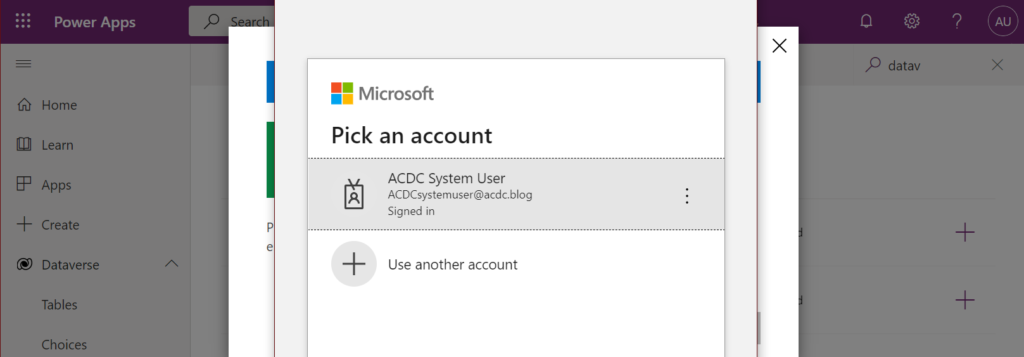
Sign in with the user that have access and licence to both Dataverse and Canvas App.
Create the Canvas App
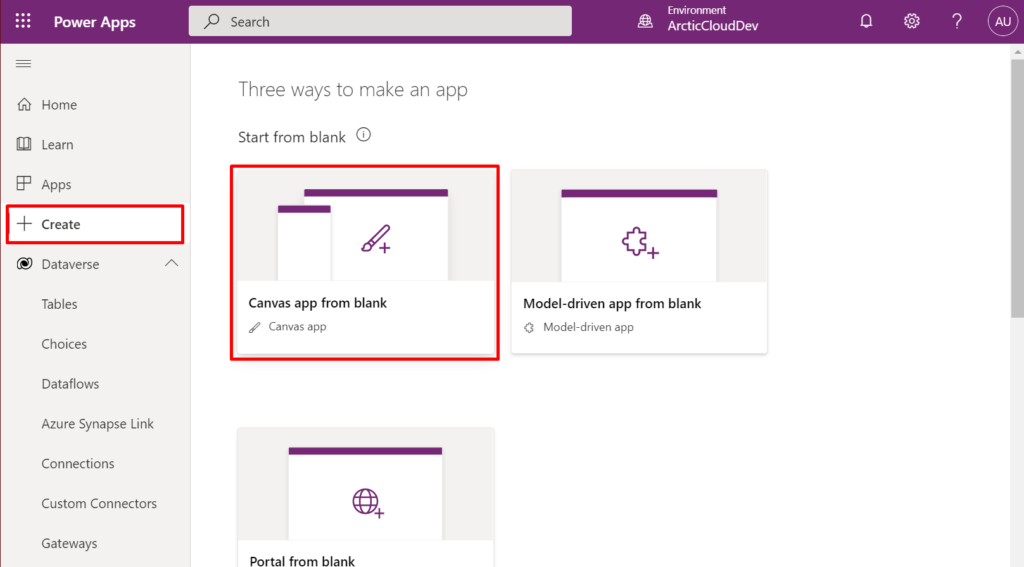
Navigate to “+ Create” in the left menu and select “Canvas App from blank”.
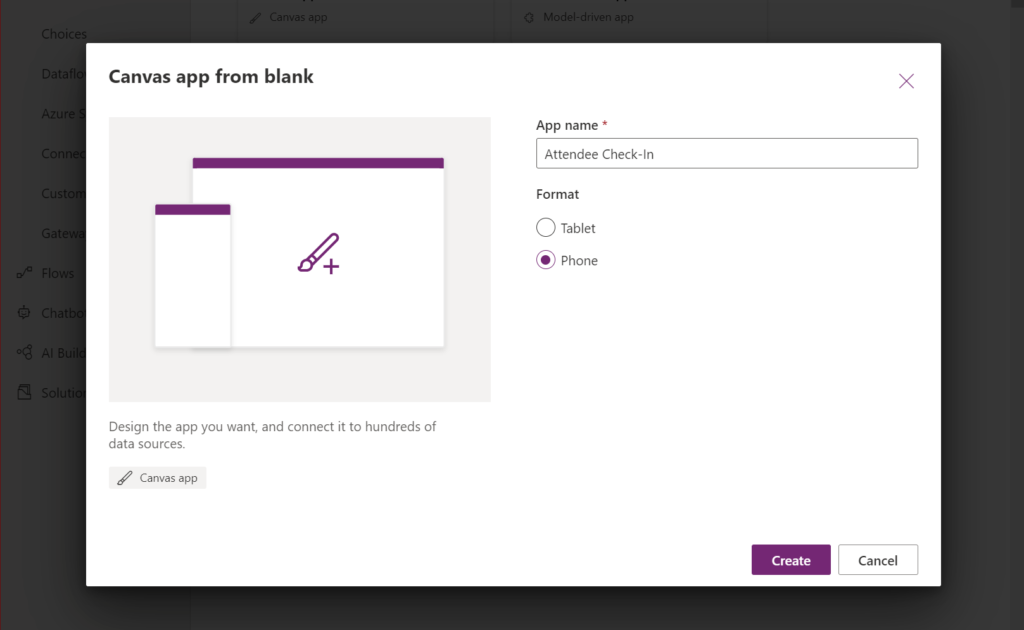
Give your Canvas App a name and choose the “phone” format.
Your app will be created and opened on the Canvas App Designer. It will be empty, so we’ll need to build it from scratch.
Build the canvas app
Lets add the elements we need on the page first, and then tie them all together.
What we need is
- variable to hold the success message
- a text label that display the success message when a participant is checked in
- a barcode scanner button
- a power automate flow to check in the participant
Add a global variable
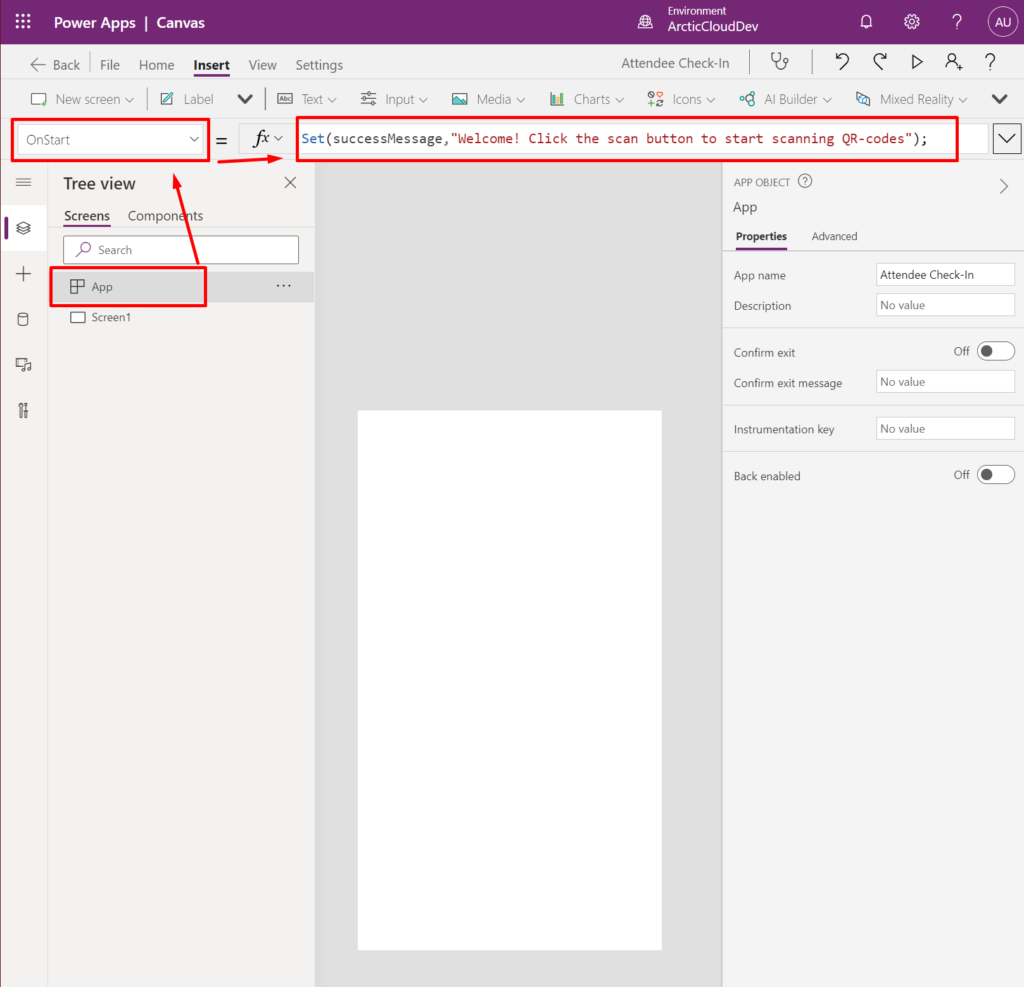
Click “Start” above the first screen, select the “OnStart” property and add this expression:
Set(successMessage,"Welcome! Click the scan button to start scanning QR-codes");
When the app starts this global variable will be initialized and set to our welcome text. Now we can add a text label to display the content of this variable. Then we can change the content of the variable and the text label will change accordingly.
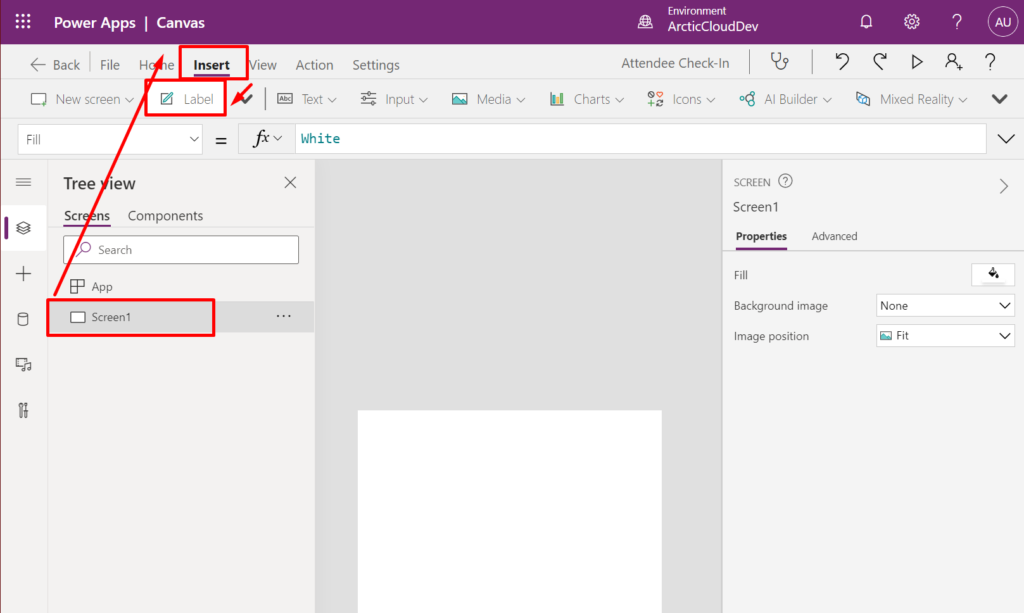
Add a text label
Insert a text label by first selecting “Screen1” and then clicking “Insert” tab in the toolbar and then “Label”.
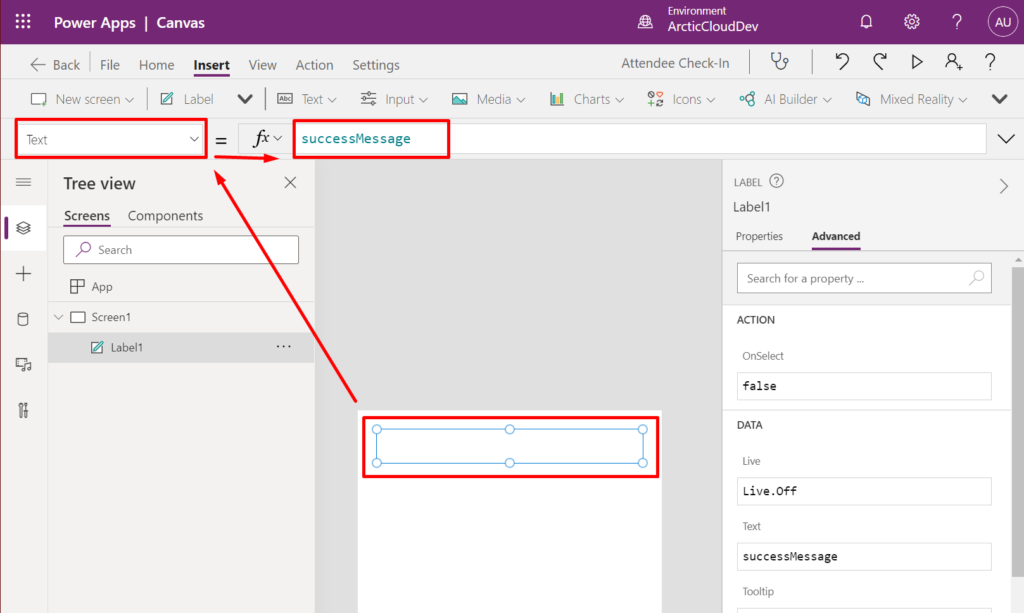
A new label is added to the screen. Select it by clicking on it, select the “Text” property and replace the value with our global variable “successMessage”. This will render the text label empty in the designer, but when we play the app it will contain the value we set on start.
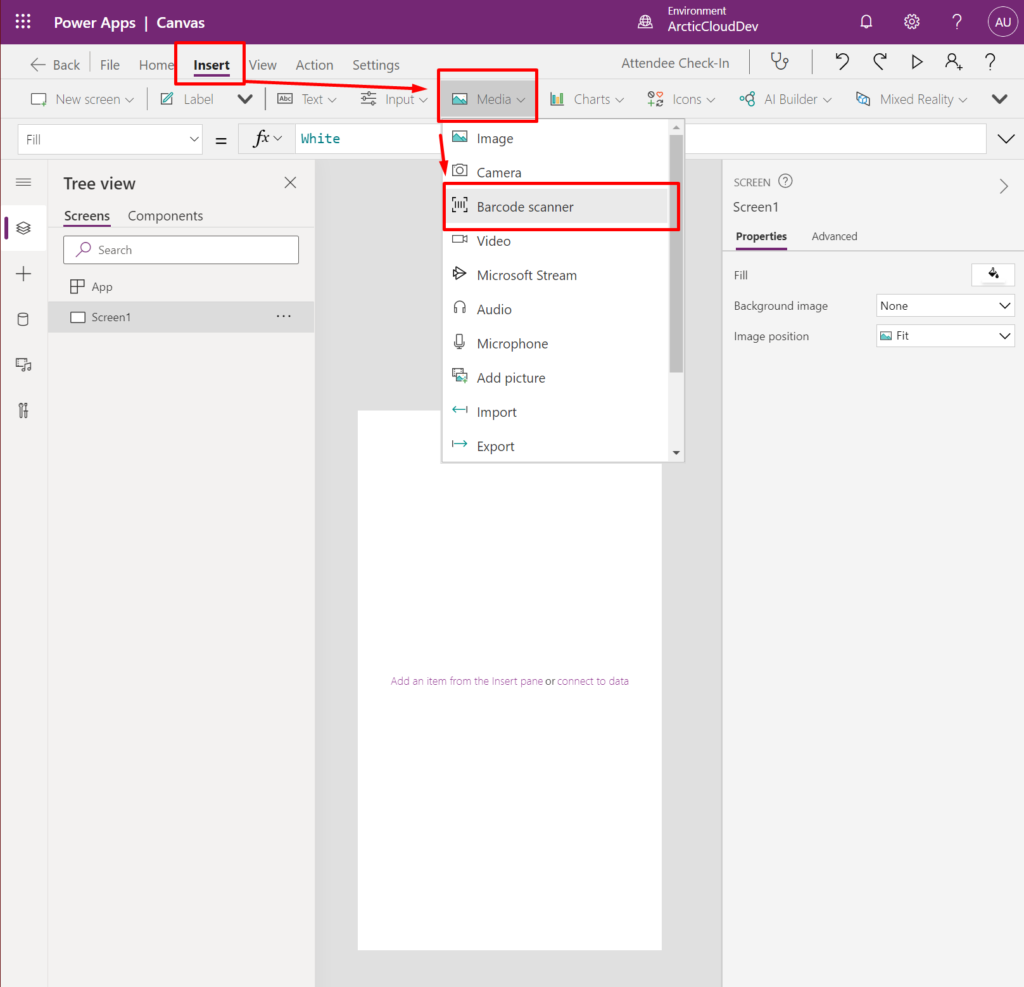
Add the barcode scanner
Open the “Insert” tab from the toolbar, open the “Media” drop-down and select “Barcode Scanner”.
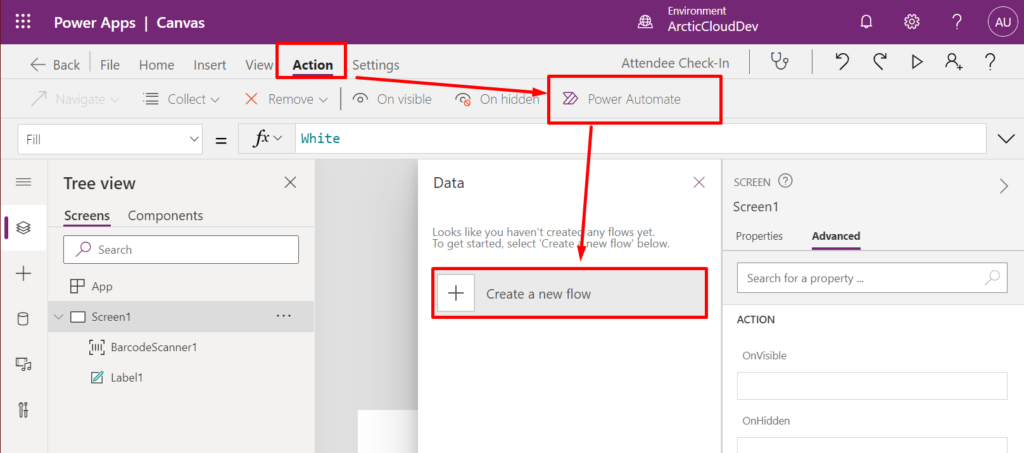
Power Automate Flow for check-in
Click “Action” from the toolbar and click “Power Automate” and then “+ Create a new flow”
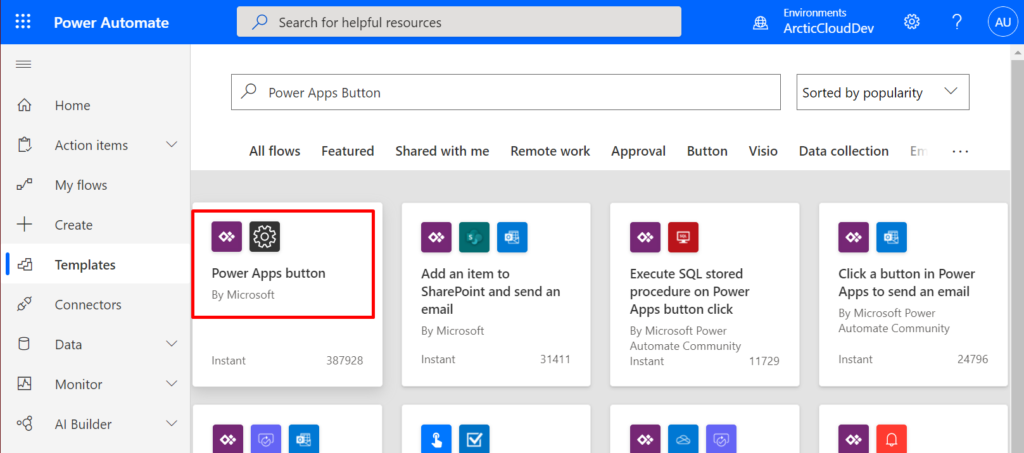
You will be presented with Power Automate Cloud Flow templates to choose from, and we need the template called “Power App button”. When you select this option a new tab will open in your browser and a flow will be created. This flow can be triggered from the Canvas App, and we can send properties to and get response back.
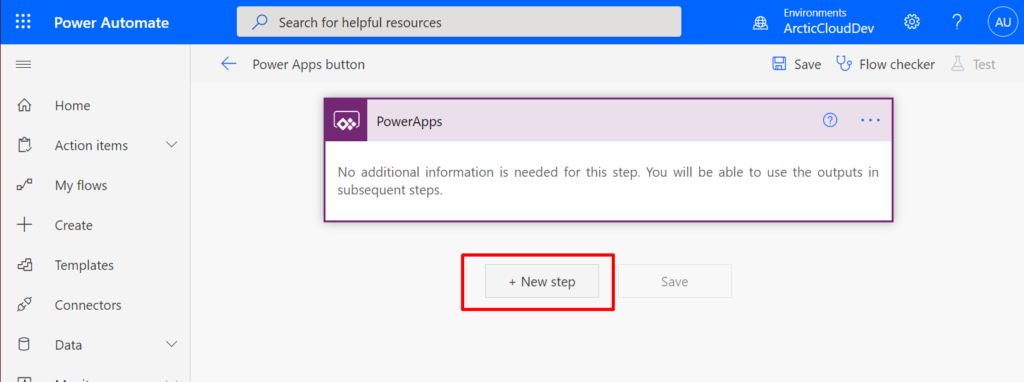
Depending on wether you are using SharePoint List or Dataverse table to store your participants you will need different action steps in this flow. The steps we need in the flow are the same.
First – click “+ New step”
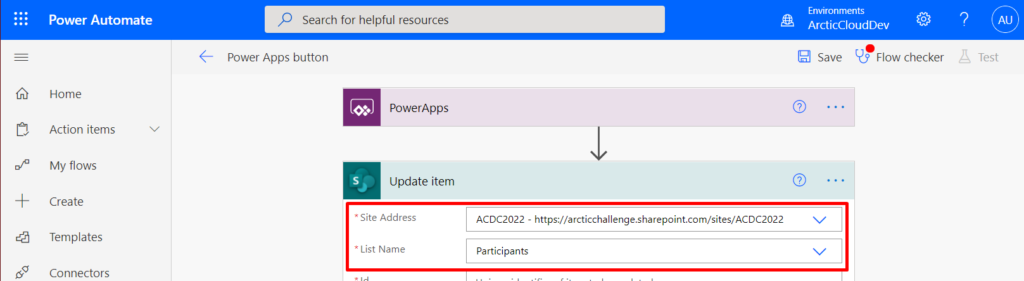
SharePoint List: Update item
Search for “SharePoint update” to easier locate the SharePoint action “Update Item”.
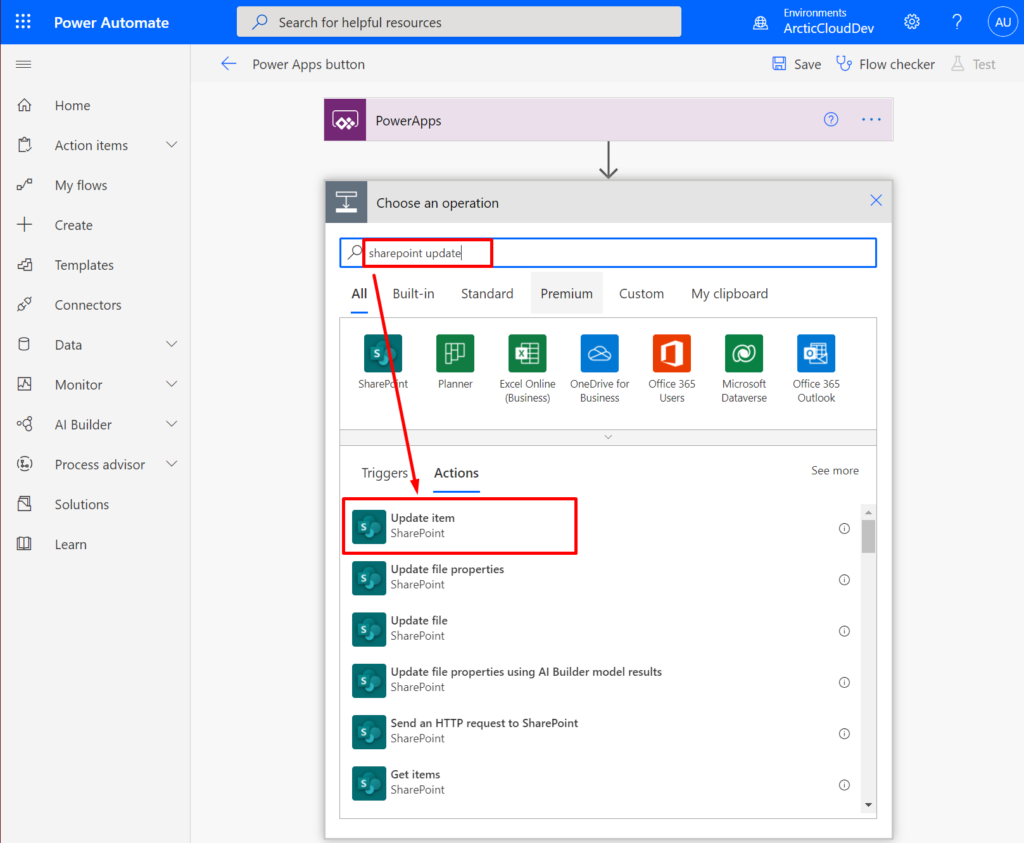
In this action step you select the SharePoint site where your list is located, and then the SharePoint List holding your participants.
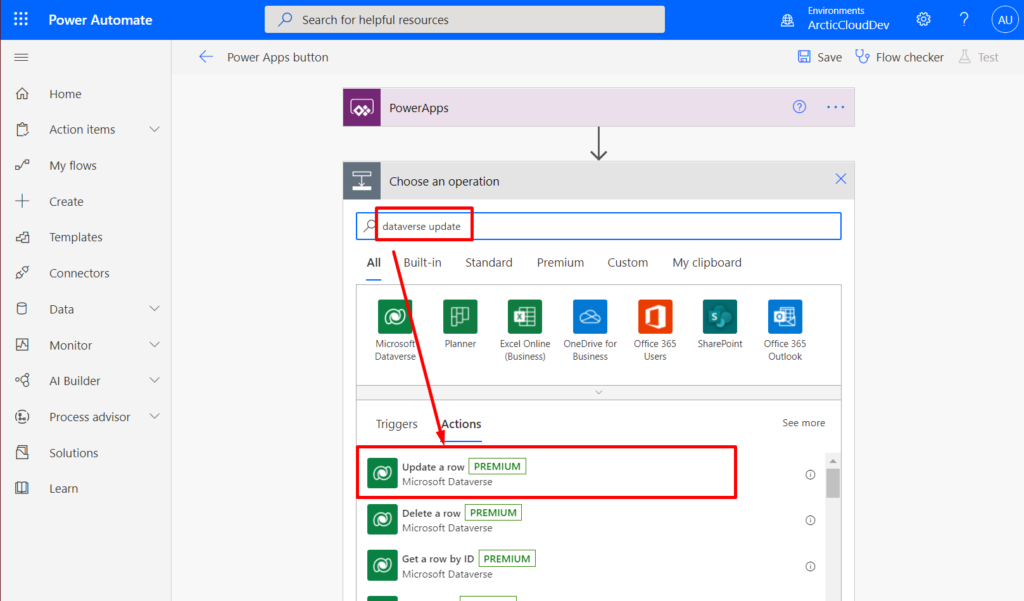
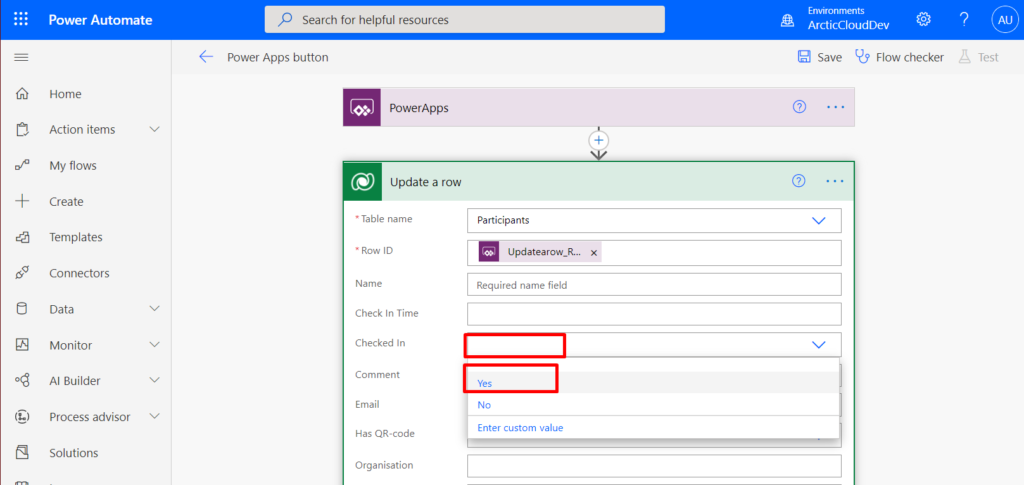
Dataverse: Update row
Search for “Dataverse update” to locate the Dataverse action “Update a row”.
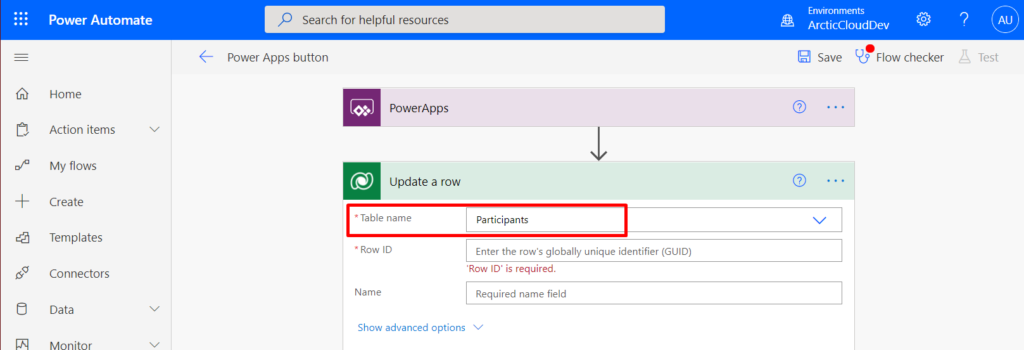
When the action is added select the “Participations” table.
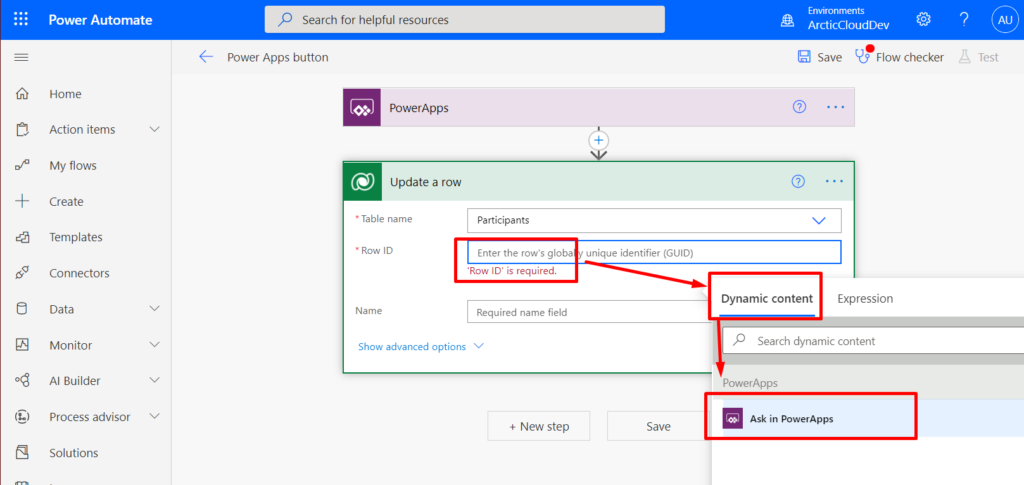
The rest is the same for both connectors
The ID we need to identify the participant we need to check in will come from the Barcode Scanner in the Canvas App. To establish a way to receive this ID we click the “id” item and select “Ask in Power App”. This will create a variable between the Canvas App and the Flow that enable us to send the participant ID through.
Then expand the “Show advanced options” and set the “Checked In” option to “Yes”.
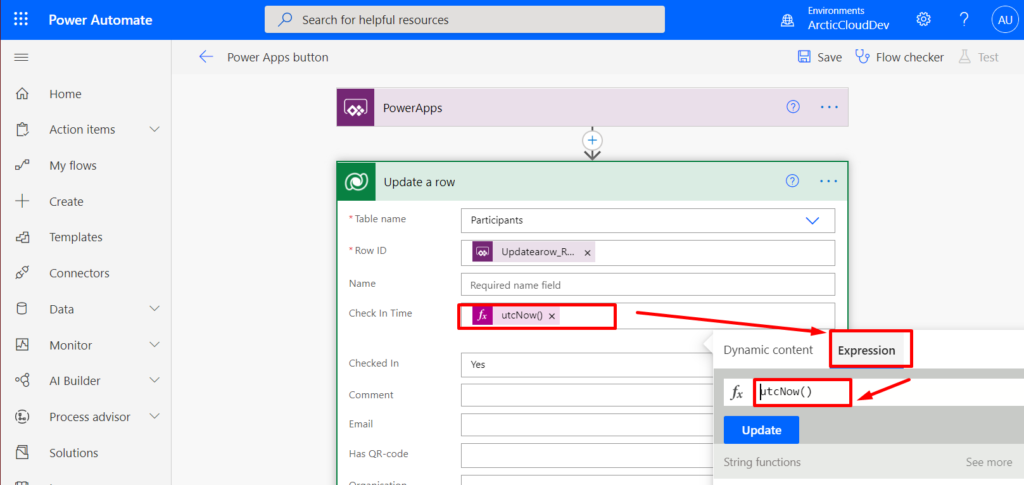
Click the input for “Check In Time” and open “Expression” option. Enter “utcNow()” as expression and hit “OK” button to add this expression to the input. Now, when this flow run it will save a timestamp in this field for when the flow was running.
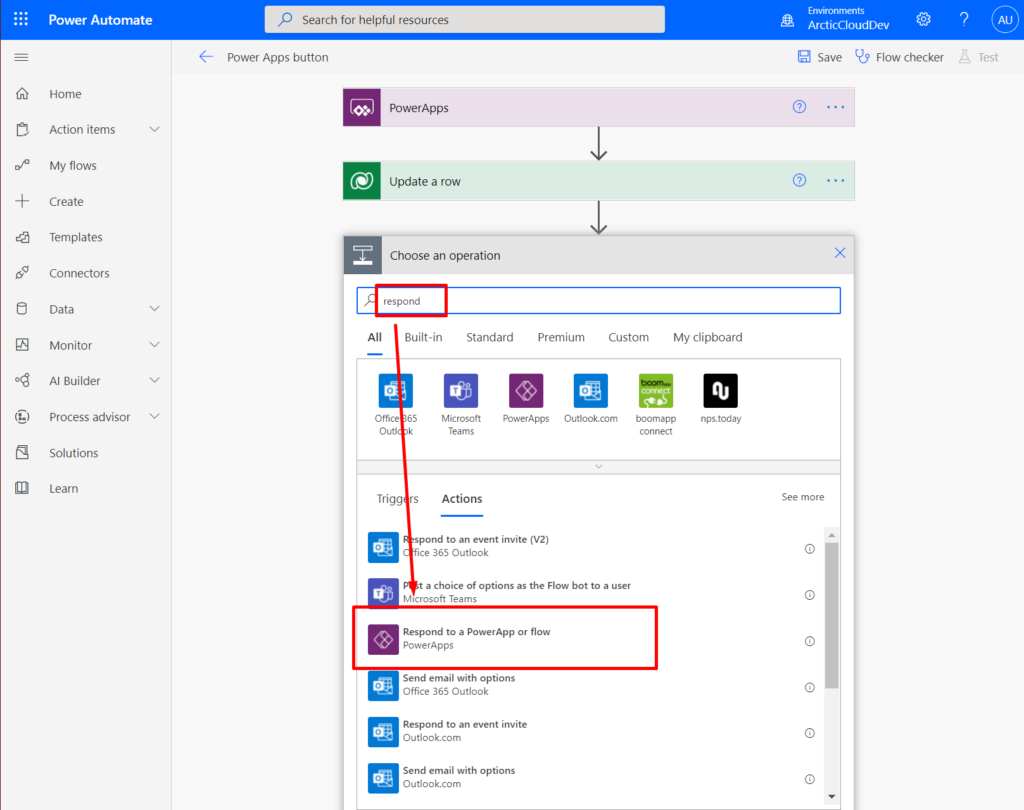
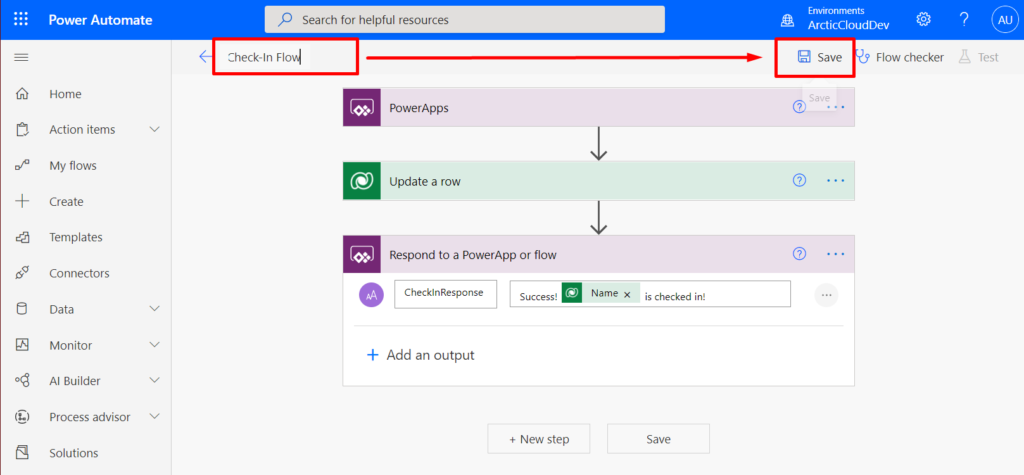
Add another action and search for “respond” to locate the “Respond to a Power App or flow” action. Select it.
The action is added to the flow and we click “+ Add an output” and choose the “Text” output type.

We give the response variable a good name and then add our value. This is the text that will be displayed in our text label inside the Canvas App, so it’s a good idea to write something informative.
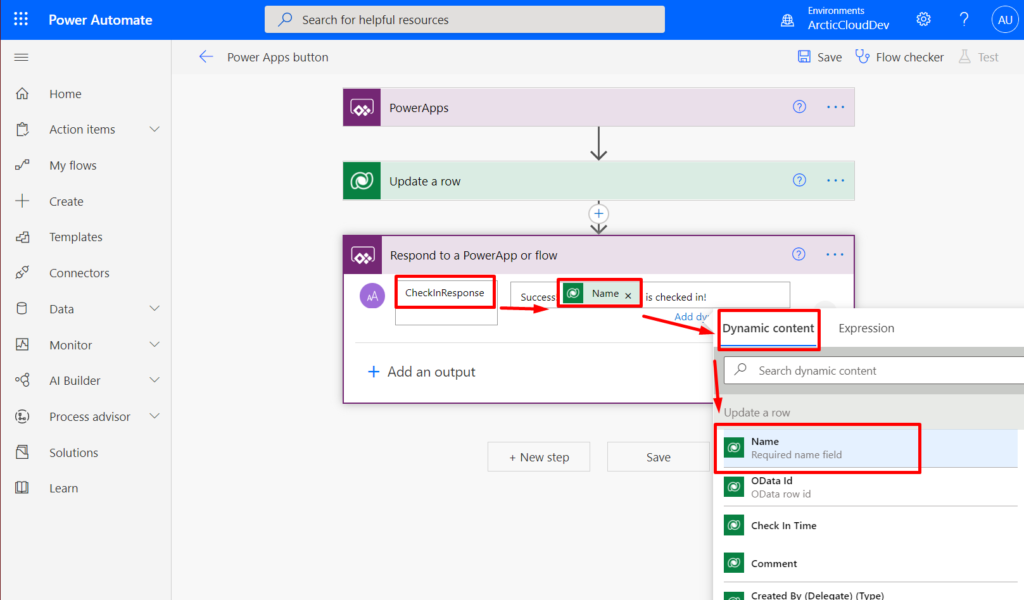
In this example I send back the name of the participant, but you can elaborate and send back more information if you like. You can add more information to this one line of text, or you can add more variables to this response with different values.
Let’ get this back to our Canvas App. First, we need to give this flow a good name and save it.
Simply click the name in the top right corner to rename the flow and then hit the “Save” button in the top right corner to save. The Flow checker will automatically run and provide feedback if there’s something wrong.
Initiate Flow from Canvas App
Locate the tab in your browser that has the Canvas App open.
Be aware: This next part is the least low-code of the whole solution.
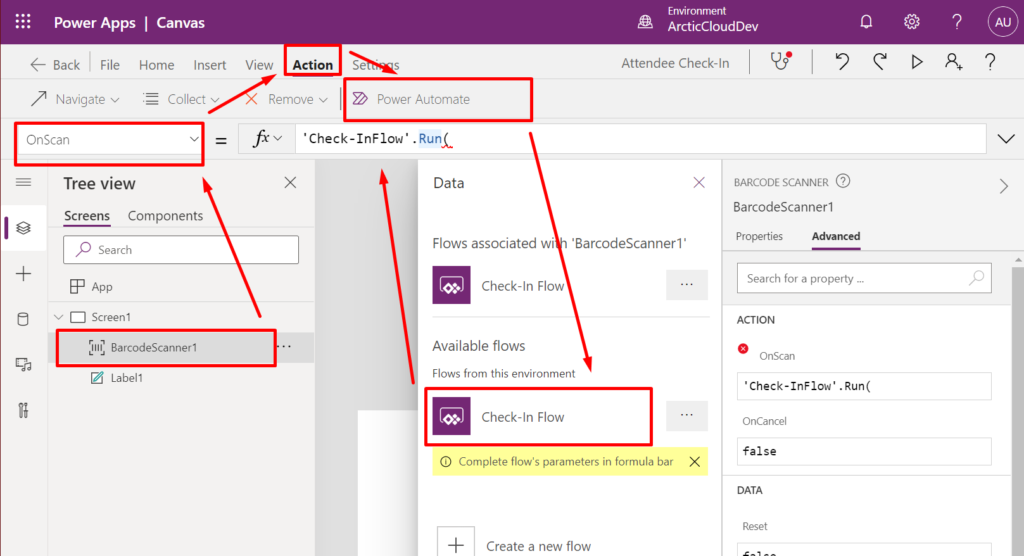
- Make sure you have the “Barcode Scanner 1” item selected on your screen.
- Select the “On Scan” option
- Set the cursor into the expression-input-field
- Open the “Action” tab
- Click the “Power Automate” button
- Select the new flow that you created
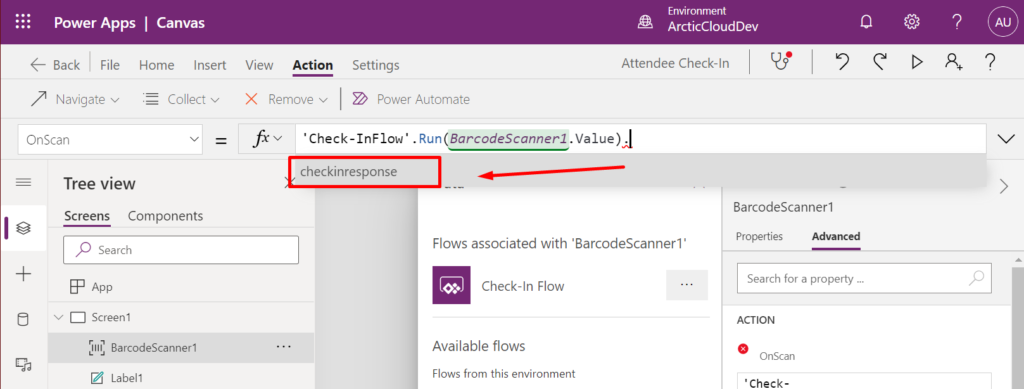
- Validate that the expression-input-field has identitied your flow and that the expression looks like this:
Click inside the expression-input-field and watch the examples that appear above the input-field. It will suggest what values and structure you should add.
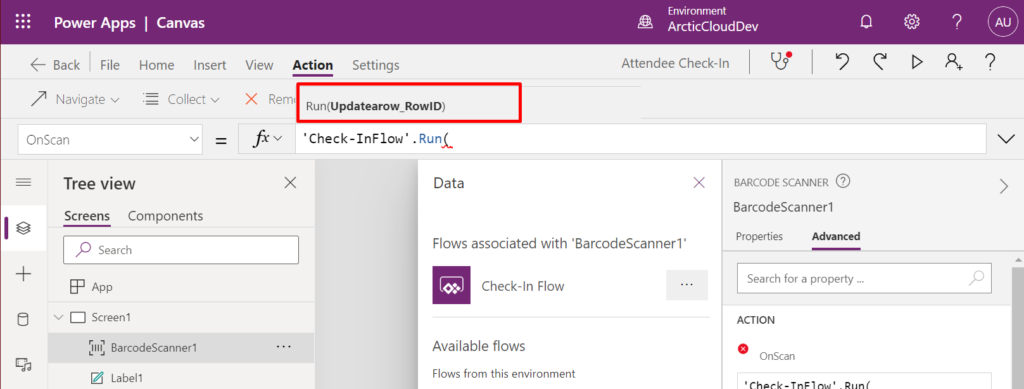
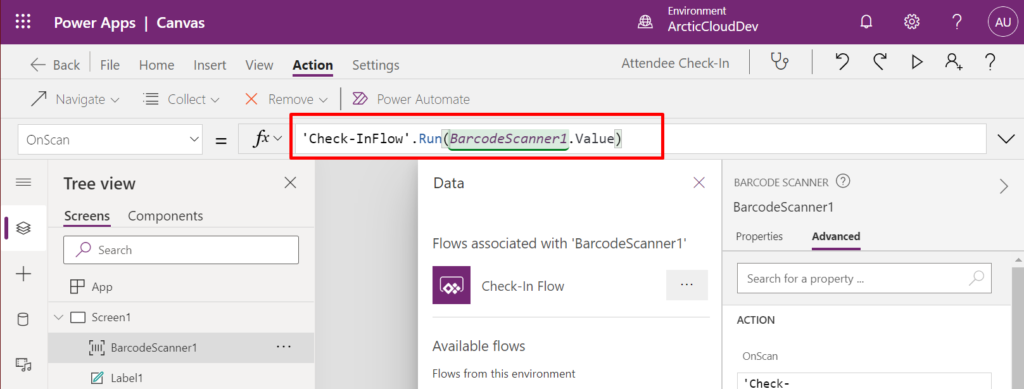
This expression needs your to provide the value that will be sent to the Flow. This is the participation ID that we will get from the Barcode Scanner. Add the value to the expression like this:
'Check-InFlow'.Run(BarcodeScanner1.Value)
To get the response back add a period “.” behind the last parentheses “)” and the IntelliSense will suggest adding the variable name of the response action from the flow. Select the variable name by clicking it or typing it into the expression.
Add response value to the global variable
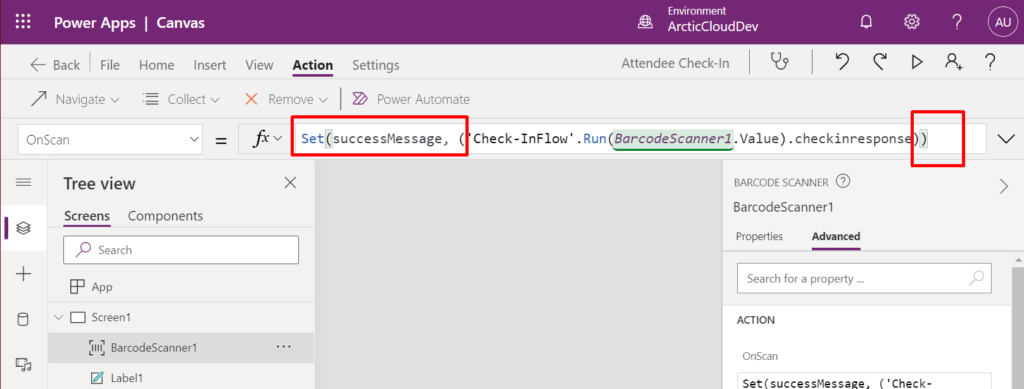
This last step will ensure that the flow response will be displayed on the Canvas App screen.
Edit your expression by adding “Set (successMessage, (” at the start and add an additional “)” at the end. The result should look like this:
Set(successMessage, ('Check-InFlow'.Run(BarcodeScanner1.Value).checkinresponse))
Done! Save and test
The Canvas App is now complete, and it’s time to save it and test it.
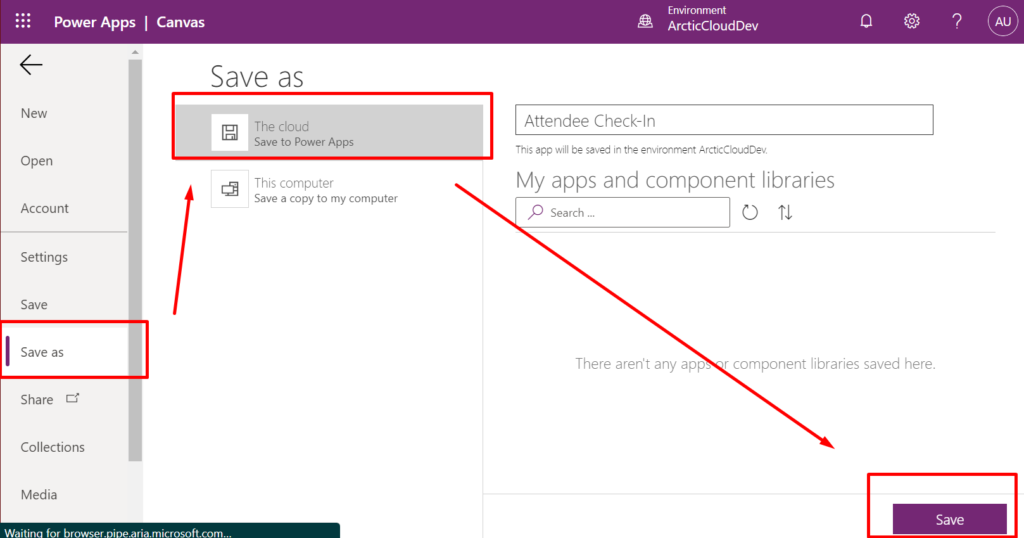
Save
Click “File” at the top left of the designer. Select “Save as” and “Save” button in the bottom right corner
Test
The Barcode Scanner doesn’t work in the browser, so it will need to be tested on a mobile device.
Open your Power Apps mobile app and sign in using the same user that you used for creating this solution. When you are successfully logged in you will see your Canvas App in the apps list.
I have branded my app with a background image and some new icons.
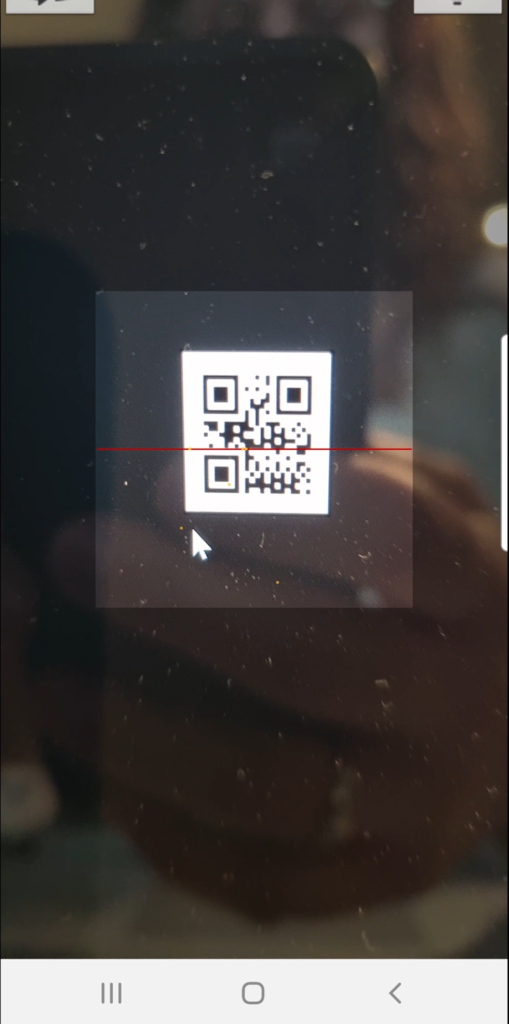
The white button is the barcode scanner button. When I tap it on my mobile device the barcode scanner uses my device camera to scan for QR-codes.
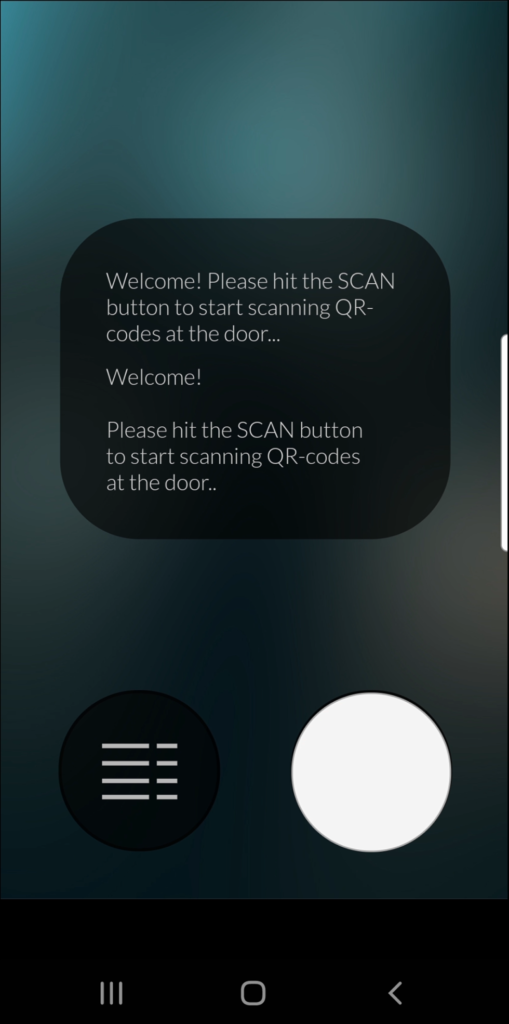
When it located an scan a QR-code the app automatically extracts the value if the QR-code (the participant ID) and run the “On Scan” expression we created.
The expression send the participation ID to the Power Automate Flow, the flow updates the participant and return the success message “Success! [Name] checked in!”
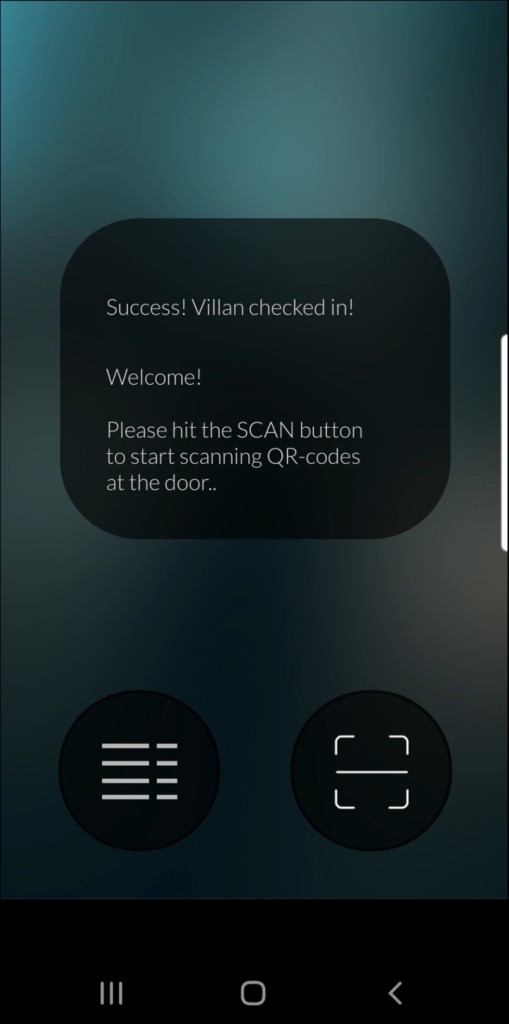
The app is now ready for a new scan. This solution is optimized for rapid scanning in the situation where there’s a long queue with eager participants waiting to attend your event.
If you are curious about how this solution was build using Dataverse and Power Apps Portals look at this blog post:
Hope this was helpful!
Good luck and have fun!
[…] Build Canvas App for scanning QR-code […]
[…] Build Canvas App for scanning QR-code […]
[…] Attendee Check-In: Build Canvas App for scanning QR-code […]
i got errors on this code
Set(successMessage, (‘Check-InFlow’.Run(BarcodeScanner1.Value).checkinresponse))
Name isn’t valid, ‘Value’ is not recognized.
Please assist.. thank in advance
Hi. I would check to make sure that you have named your elements correctly. Maybe your BarcodeScanner isnt’t called “BarcodeScanner1” like mine?