Last updated on 02/04/2022
In this blog post, you will learn four approaches to branding canvas apps. I also provide resources that will save you massive amounts of time working on bigger projects.
When you start with a blank canvas app it’s tempting to start building the components and screens first, and leave branding; colours, fonts, and styles, to the end. In fact, the opposite is more effective.
I have 4 approaches to canvas app branding:
- Copy/Paste
- Branding Screen
- Global Variable
- Branding template
1. Copy/Paste
If you style components as you add them to your screen, then you can simply make copies of them when you need another component. This approach will not help you if the client wants to change the font, the primary colour or the styling of buttons.
2. Branding Screen
This works well for small apps with a limited budget and few components. You create a screen called “Branding” and add the components you need. Apply branding to the screen and style the components.
For one of my simple apps the branding screen looks like this:
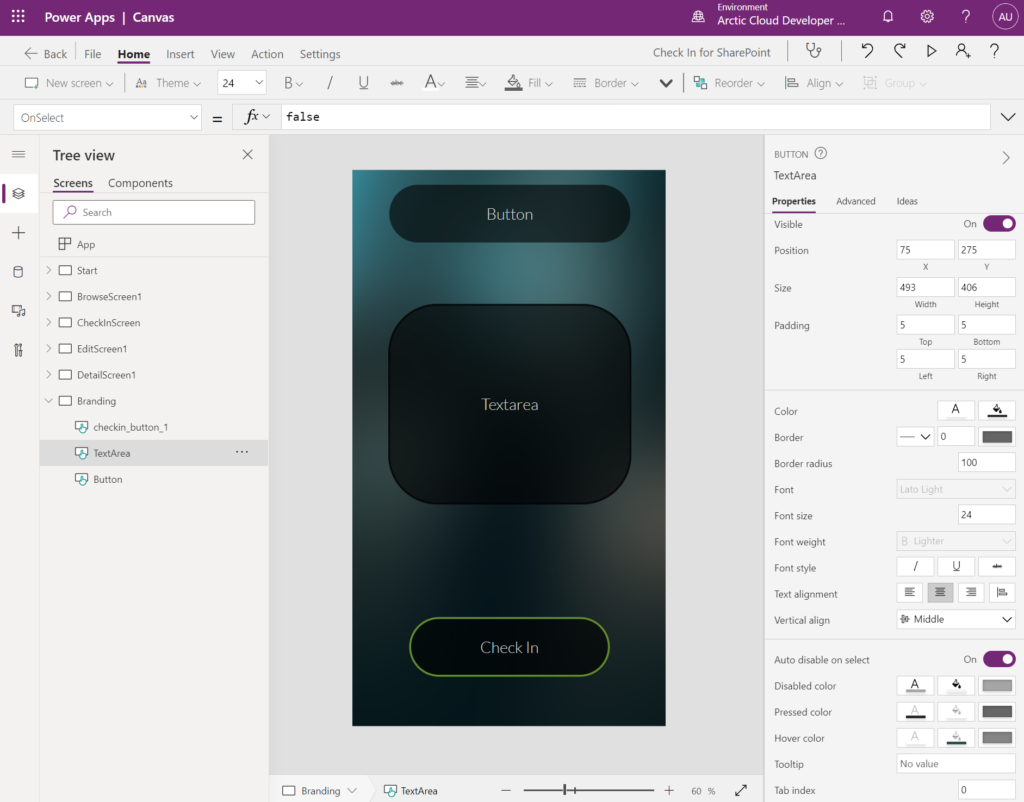
Then – when I add screens and components, I reference the branding screen components styles on the new components. For example, all buttons on all screens will have properties that reference styling from the button on the branding screen:
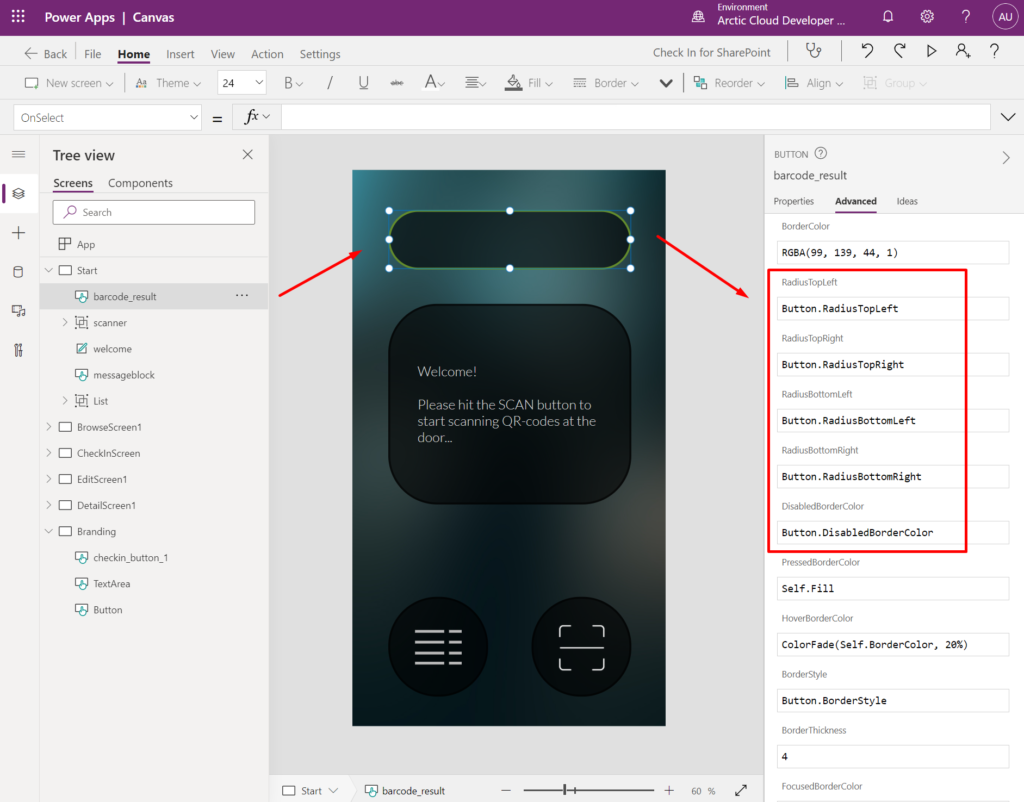
If I change the styling of the button on the branding screen, then styles will change for all the other buttons too.
This approach is what I used when branding the app that is used for reading QR-codes when checking in participants at events.
3. Global Variables
Global variables are set in the Start-screen Onstart-property:
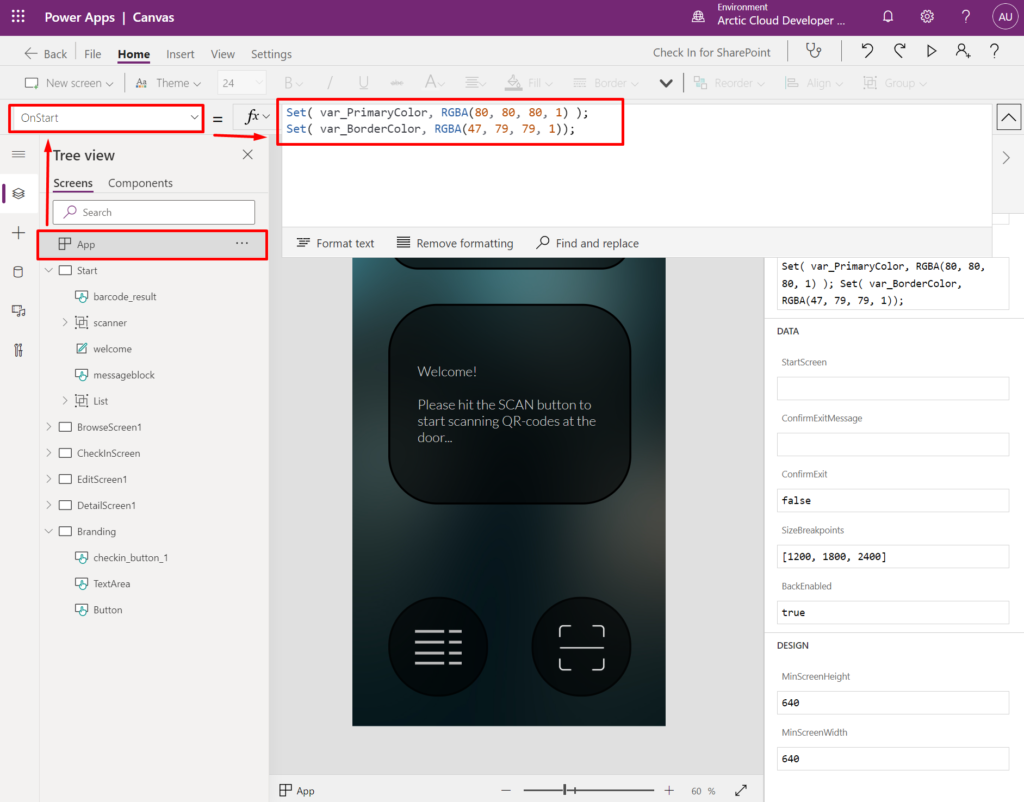
Then, you reference these global variables in styling properties on components.
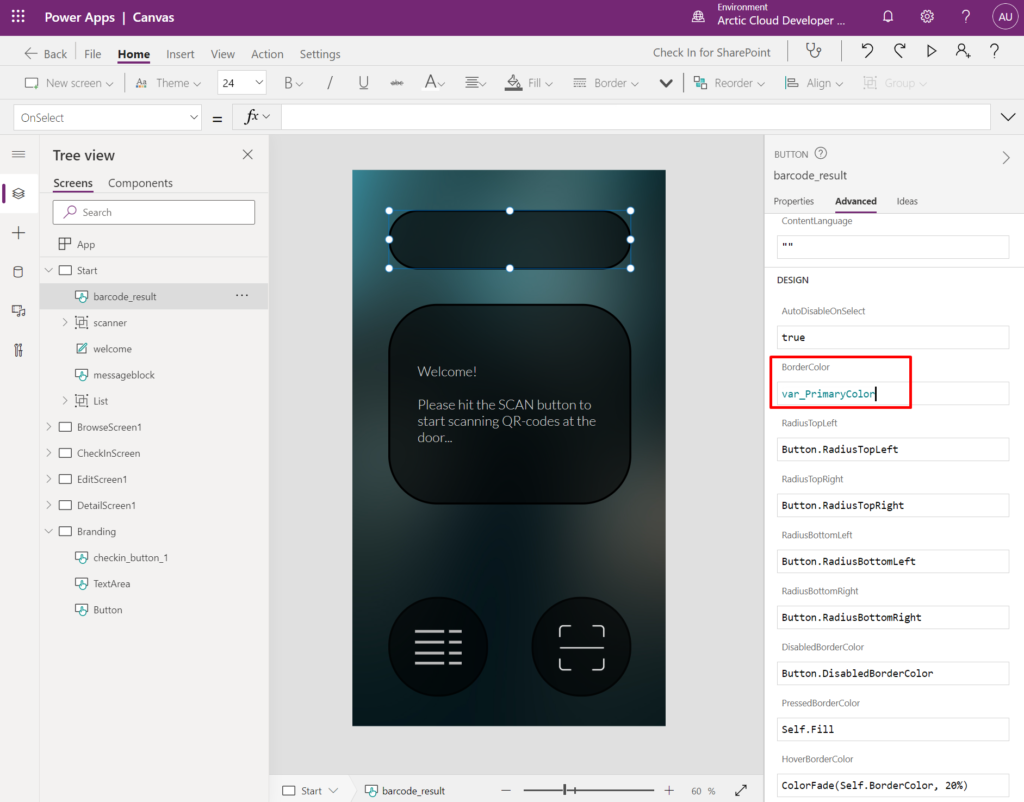
When you change the global variable, all components will be updated accordingly.
Matthew Devaney shares how he approaches getting a colour theme together, how he finds fonts and icons, and how to put it all together in the "OnStart" property as global variables in this blog post: https://www.matthewdevaney.com/create-a-power-apps-custom-theme-colors-fonts-icons-controls/
4. Branding Template
Sancho Harker (@iAm_ManCat) created a solution that uses all of the previous three approaches to save us a lot of time; he created a branding template for canvas apps.
This template is a Canvas App you import into your environment and use as a starting point.
IMPORTANT: You cannot apply this to existing apps – you need to use this template from the start
This approach allows you to set a theme for the app that goes deep into the fabric of your app, and every new component you add will automatically be themed – always.
Read more about this third version here: https://www.iammancat.dev/2022/01/power-apps-branding-template-v3/
Download the “Branding Template V3” from here: https://powerusers.microsoft.com/t5/Community-App-Samples/Branding-Template-App-V3/td-p/363582
Visit create.powerapps.com, select the correct environment and open the file you downloaded.
Once you have the file open you click the “App” above the loading screen and select the property “OnStart”. Expand the functions editor window and scroll down to the theming variables. The changes you make here will apply to all elements you add to the app.
Please read the documentation on how to use the branding template from the source:
Summary
These are the four approaches that I use when creating Canvas Apps. Choose the approach that is appropriate to the size of your project and that fits your skillset.
Hope you find an approach that suits you and your project
[…] Branding Canvas Apps Branding can take many forms and it's not always easy to know where to start. Follow my blog post to learn more about the different approaches to branding Canvas Apps: https://ulrikke.akerbak.com/2022/02/06/branding-canvas-power-apps/ […]
[…] Branding Canvas Power Apps […]