Last updated on 29/06/2022
This blog post describes how to use Power Apps Portals as host for the registration form as part of a solution for “Attendee Check-In” using components of the low-code Power Platform.
In the original solution, we used Microsoft Forms a registration form for new participants. Then we used Power Automate Cloud Flow to trigger when a form was submitted and put data about the participants as an item in a SharePoint List. If you already have Dataverse and possibly one or more Dynamics 365 Apps, Model-Driven Apps or Power Apps Portals in their system will probably like to have these participants in Dataverse instead of SharePoint.
This blog post is part of the “Attendee check-in” solution series
Tag: “Attendee Check-in” (See all blog posts in this series)- Storing participants in Dataverse
- Registration form using Power Apps Portals (YOU ARE HERE)
- Create QR-code with Flow
- Build Canvas App for scanning QR-code
When we have established the table with the needed columns in Dataverse we are ready to create a form for participant registrations.
Create a form
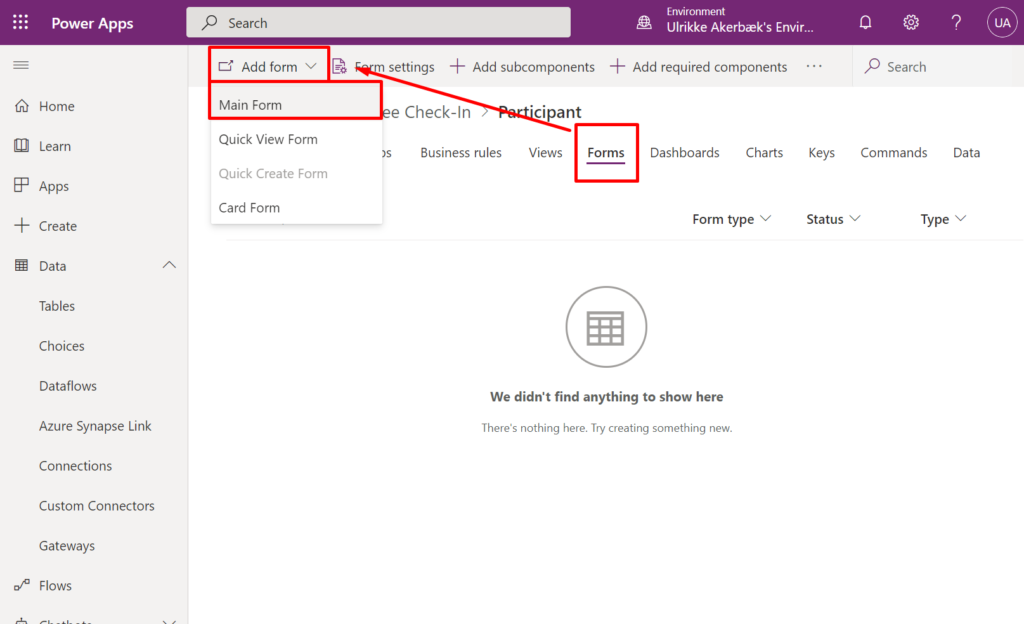
Open Dataverse through make.powerapps.com, and open the solution where you have your “Participant” table. Then navigate to the “Forms” tab and click “New” in the toolbar and select “Main Form”.
This is where we create the form to be displayed as the participation registration form.
Drag all the desired columns from the left navigation into the form and arrange them in a logical order. Give the form a good name and a description.
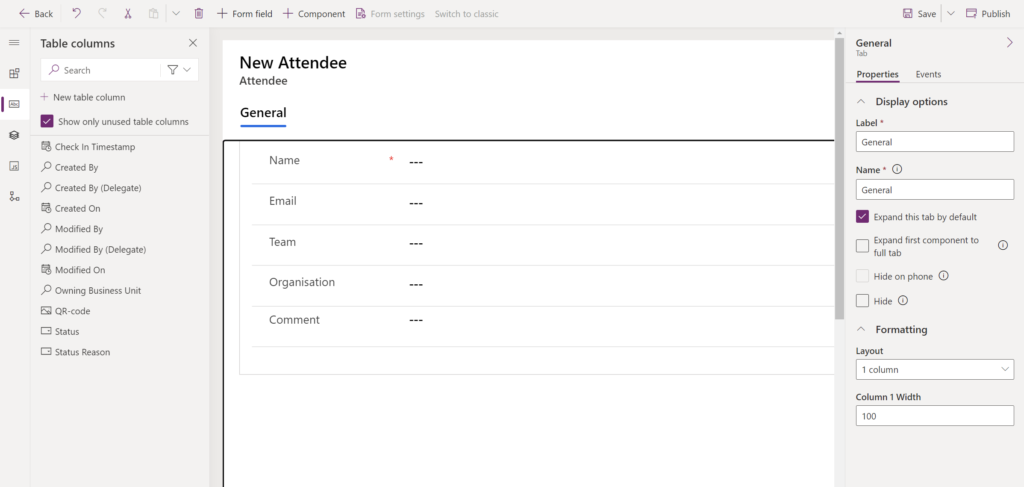
Save and hit the “Back” button in the far left top corner.
Navigate back to the solution and click “Publish all customizations”
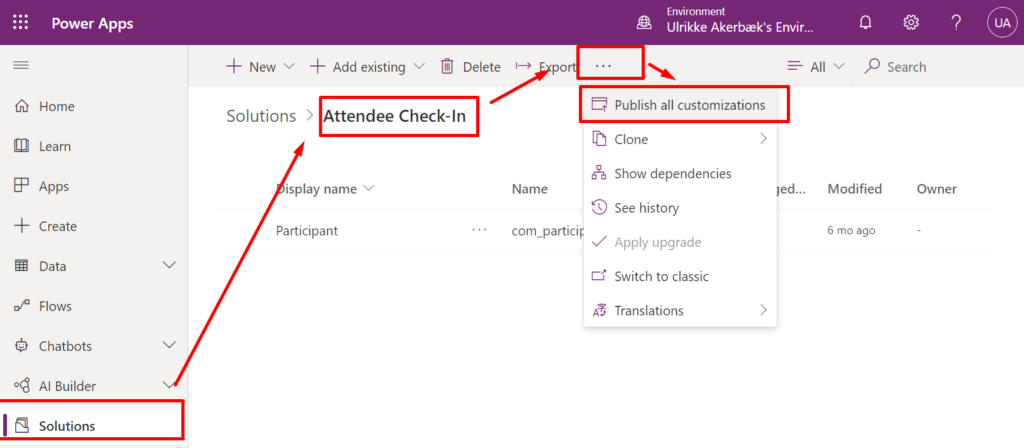
You are now done with the Dataverse part of the setup.
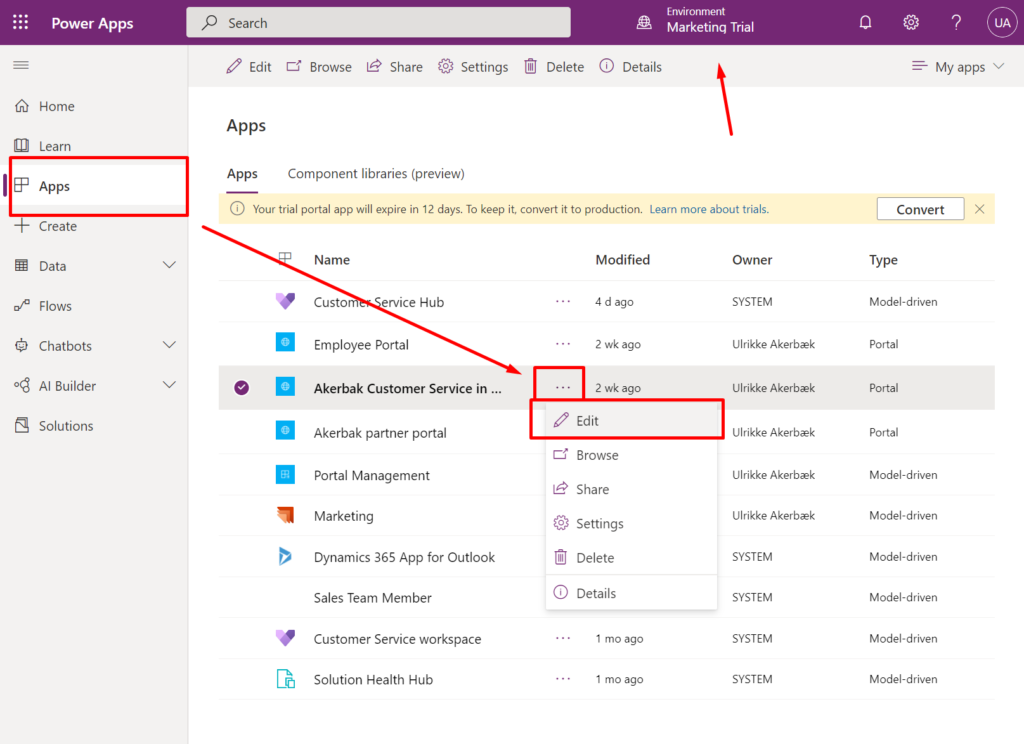
From here you will configure the Power Apps Portals Web Page. If you don’t have a Portal already and need to know how to get started, please look at this blog post on Resources for how to get started with Power Apps Portals.
Open make.powerapps.com and navigate to “Apps” in the left menu.
Locate your Portal, open the item menu and click “Edit”. If you can’t find the Portal, make sure you are in the correct environment.
If you are confused about all the different administration and configuration interfaces for Power Apps Portals look to this blog post where I provide a Map For Configuring Power Apps Portal.
Create a new web page
Depending on your Portal Template you will have different types of templates available. The template you choose is not important as long as you’re able to add a form to it.
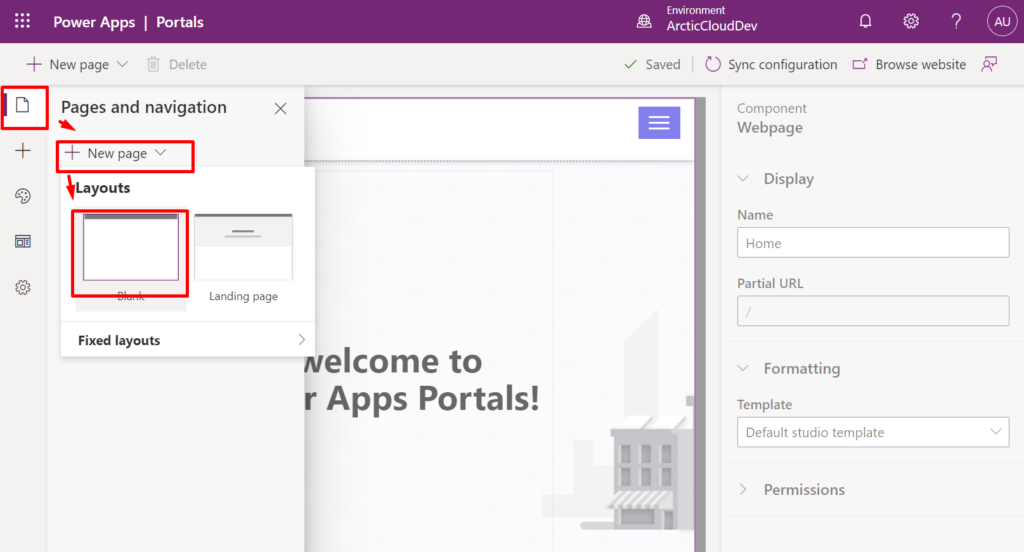
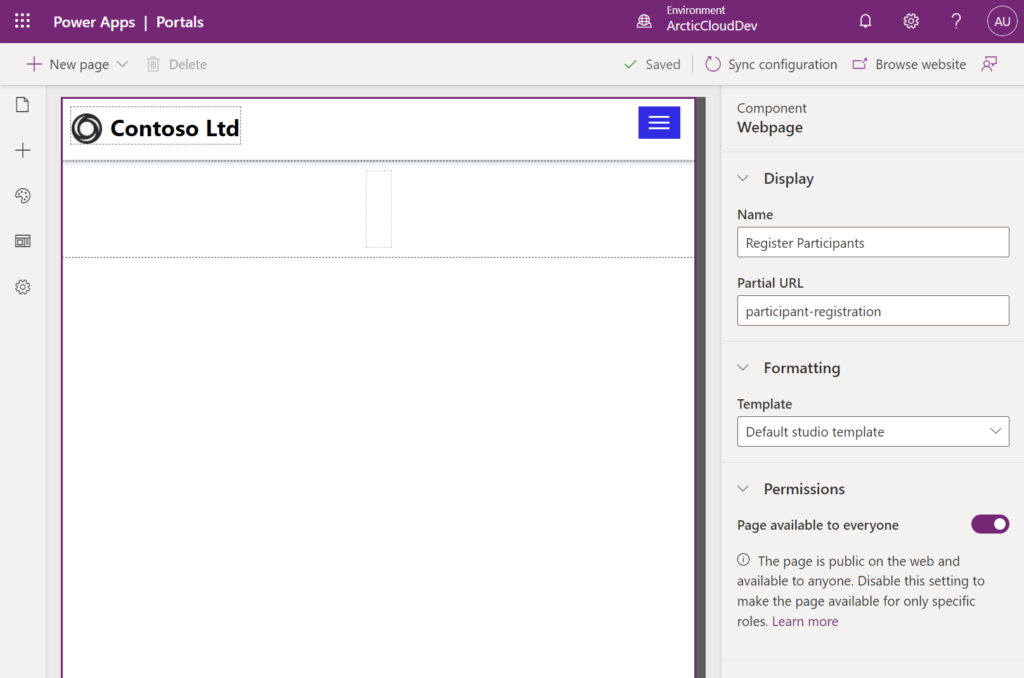
Your new page will be available in the page overview and load into your designer. Click the right panel to edit the name, and URL and set the page to be available to everyone
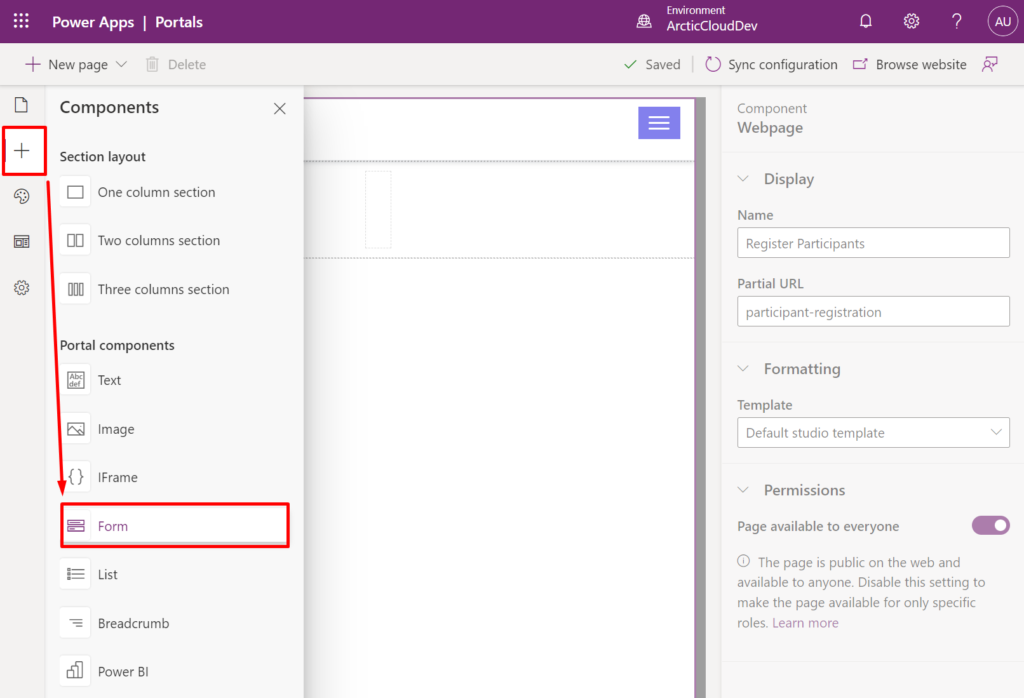
Navigate to “Components” in the left side menu and click “Forms”
Create a new form for the Participant table and choose the form we created in Dataverse. Make sure the form is in “Insert”-mode and add a success message.
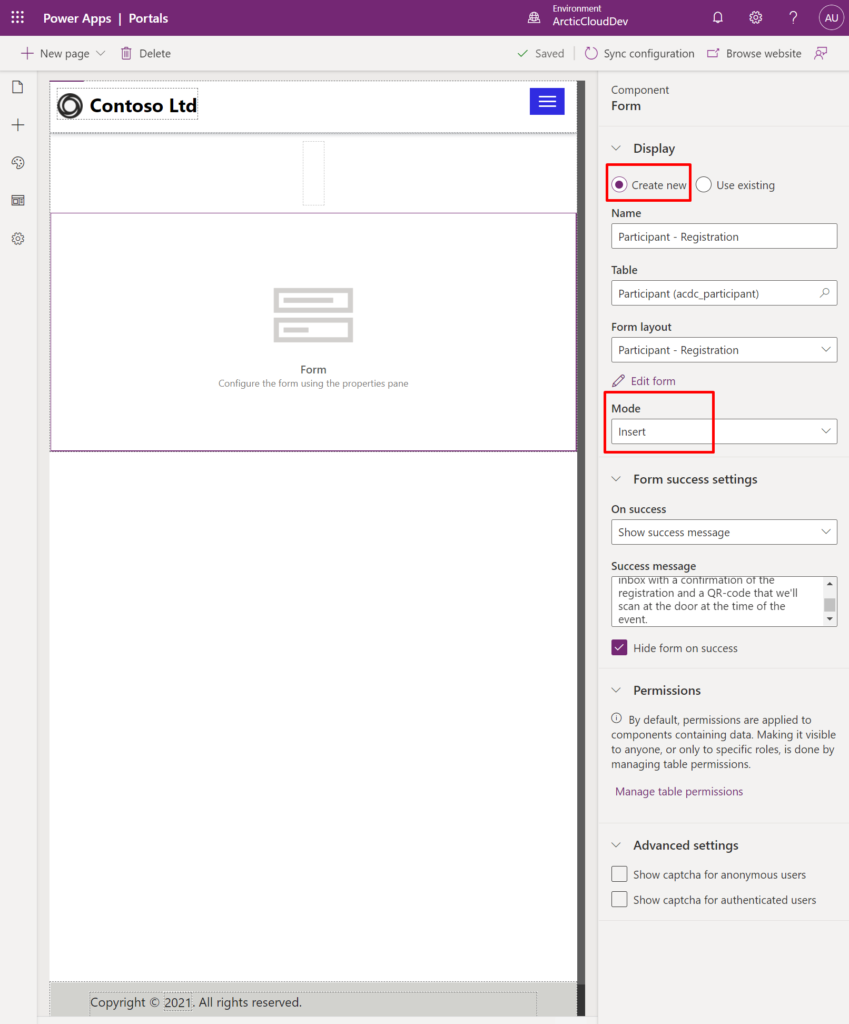
Table Permissions
Now we have a page with the form on the Portal, and the last piece of the puzzle is to make this page accessible to anonymous users. That’s done by creating a new Table Permission for our new table and adding it to the out-of-the-box “Anonymous Users” web role.
Navigate to the “Settings” in the left side menu and click “Table permissions”.
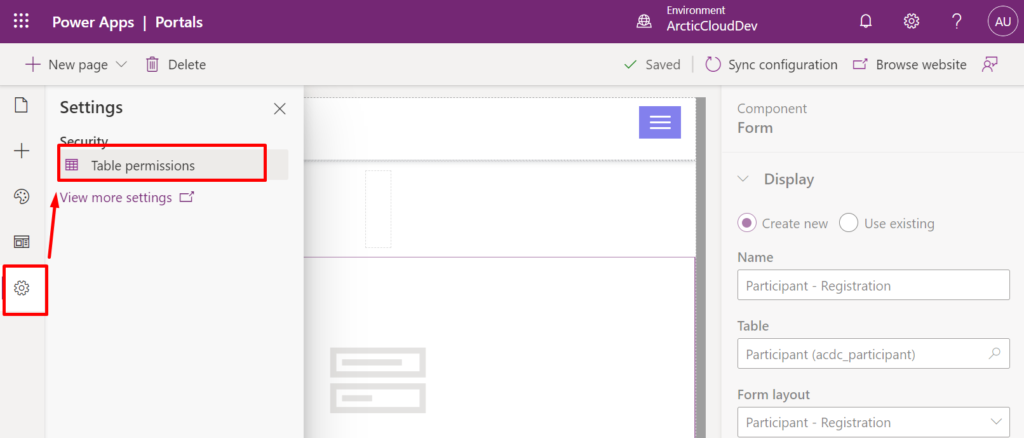
Click the “+ New Permission” at the top

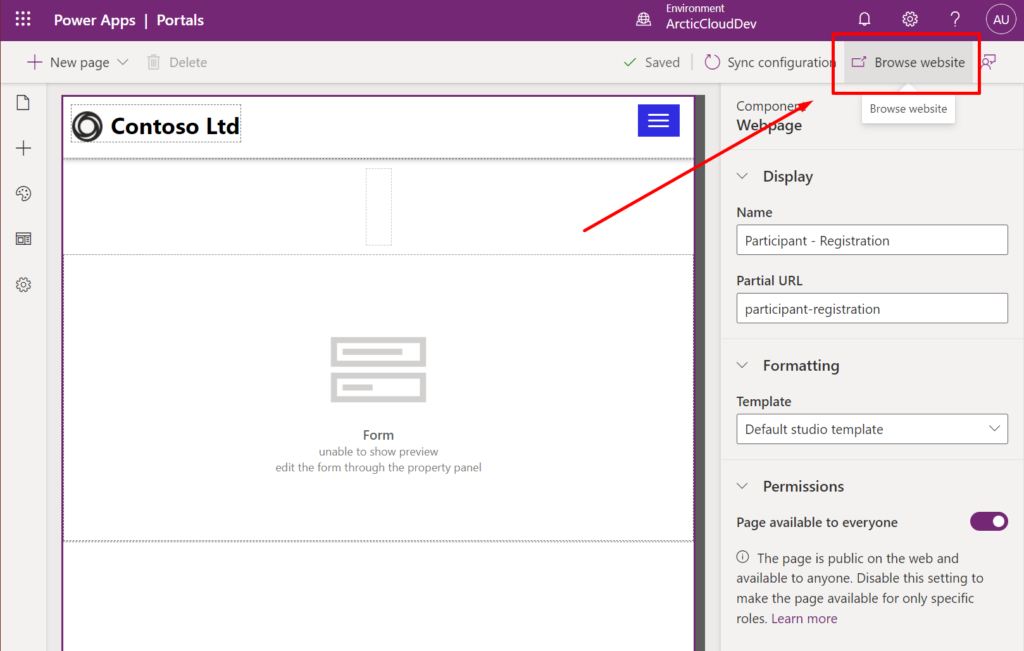
Look at your result!
Navigate back to your web page in the Portal Design Studio and click the “Browse Website”. This will save your changes and open a new tab with the portal page
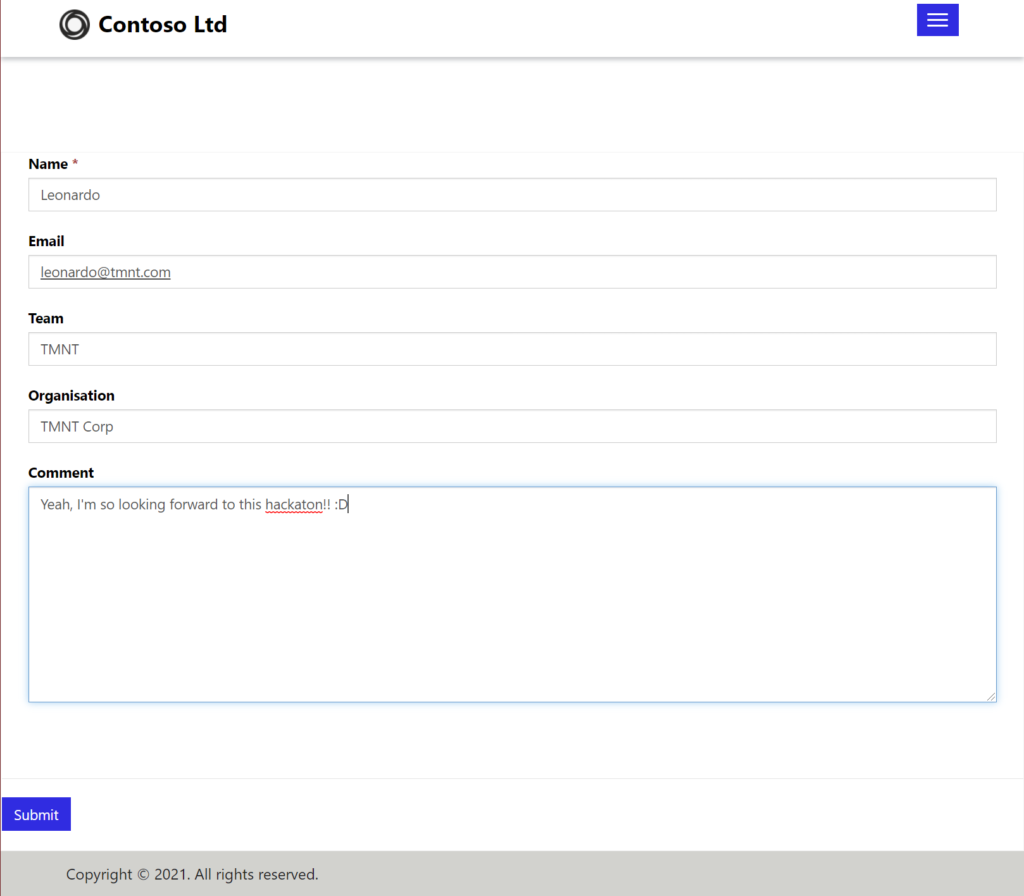
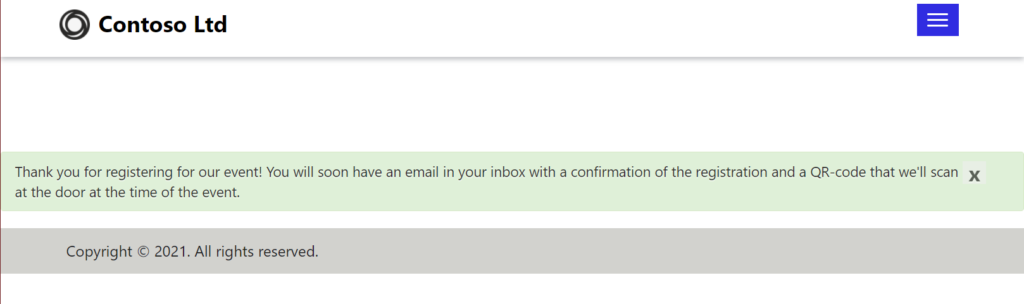
Enter some demo data and submit the form. Your success message will appear:
Now let’s look at the data from Dataverse.
Navigate back to your solution and open the “Participant” table. Click the “Data” tab at the far right:
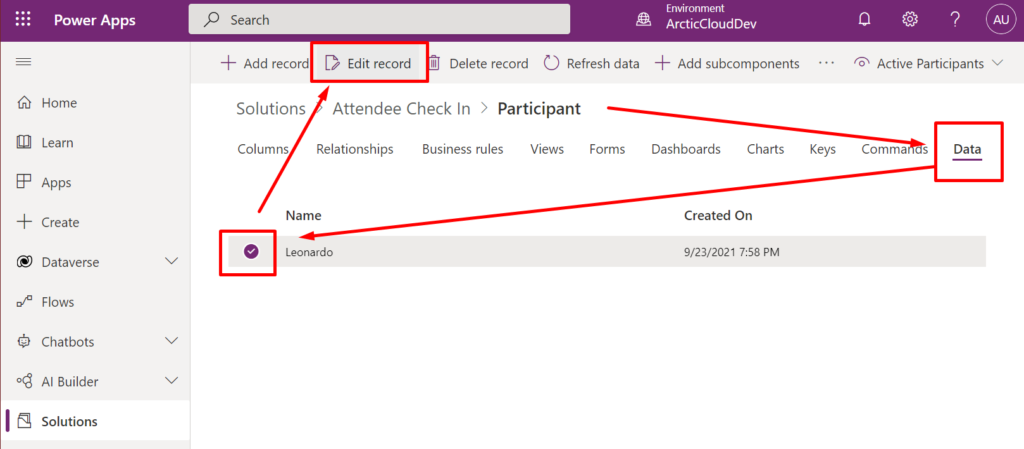
Select the check box to select the item and click the “Edit Record” button in the toolbar.
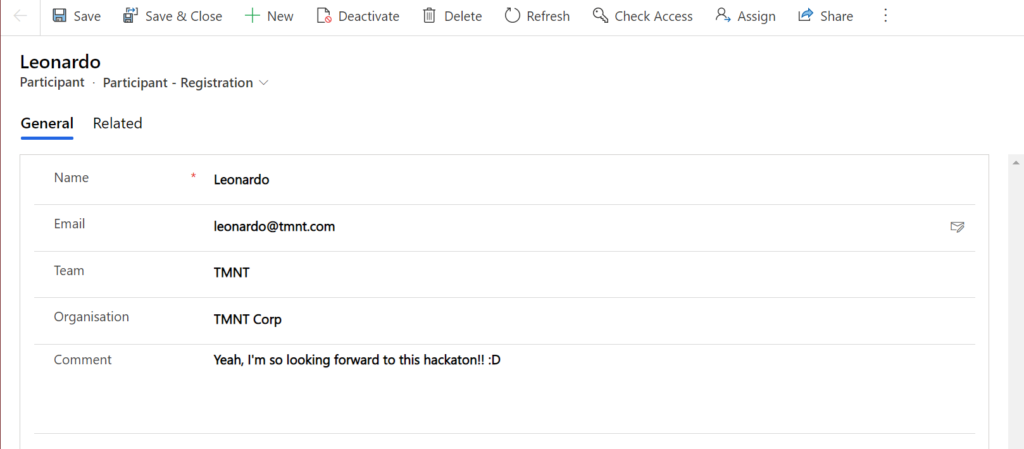
A new tab opens with the form displaying the data:
Now – we still haven’t connected this to any magic sending of emails – yet! What we need is a Power Automate Cloud Flow that triggers when a new row is added to the Participation table and sends an email to the registered participant. This flow is the same if you are using SharePoint or Dataverse to store your participants; the trigger and some of the steps have different connectors – but the structure is identical.
Let’s look at how that’s done in the next blog post in this series about “Attendee Check-In”.
Security
Please make sure you apply some security measures to this form – unless you should be prepared to have your Dataverse littered with unserious registrations.
Email Required
Make the email field required in Dataverse (directly on the column) or by adding “Basic Form Metadata” on the Basic Form in Portals Management App. If this is completely greek to you please read the documentation here: https://docs.microsoft.com/en-us/powerapps/maker/portals/configure/configure-web-form-metadata#validation
Email Validation
It’s also a good idea to validate the email column content on the way into your system to validate that it fits the criteria of being an email. You can find Regexp that you can use in Basic Form Metadata on the Email attribute, or you can create a client-side validation script on your form like described in Microsoft Docs: https://docs.microsoft.com/en-us/powerapps/maker/portals/configure/add-custom-javascript#additional-client-side-field-validation
Captcha
When adding the form to our page we had the option to add Captcha for both anonymous users and authenticated users. It’s a good idea to enable for anonymous users to o distinguish human from machine input.
Branding
Can’t believe I put branding last! 🙂 There are some obvious improvements to be made in terms of branding and user experience.
Form width
Edit the Page Template and/or the CSS to make sure the form isn’t presented in full width on desktop and high-resolution screens. It might be as simple as adding an inline style to a wrapping div-tag and adding max-width. It can look something like this:
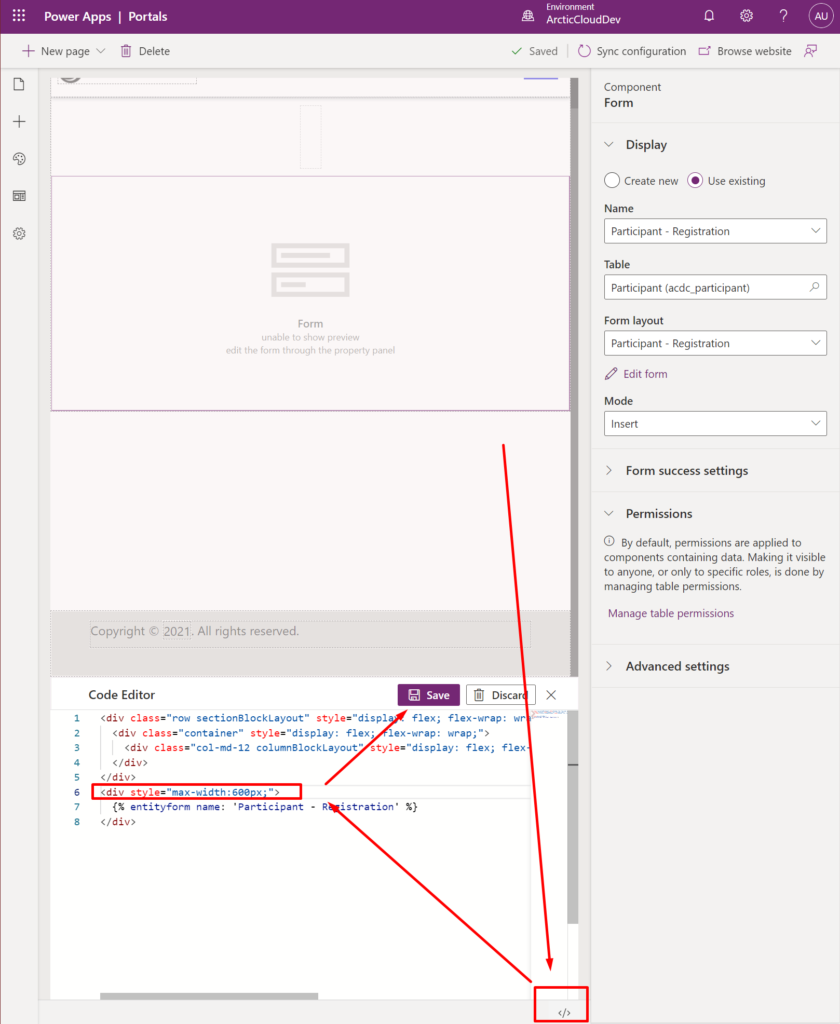
The result will be a form that isn’t that wide and it’s more comfortable for the users to use it.
Now, the next step is to create a QR code using Power Automate Flow and send it to the participant in a registration confirmation email. Let’s look at the next step in this blog post series:
Hope this was helpful and that you find the rest of this series inspirational.
Good luck and have fun!
Featured image from my talk at Power Portals Bootcamp. Read more about previous and future events here: https://ulrikke.akerbak.com/events/
[…] An alternative to using Microsoft Forms for the registration form would be to use Power Apps Portals. The Portal will surface a form created for this “Participant” table we just created – where participants can register. Lets look into how you can build this registration form using Portals: […]
[…] Want to know more about how to set up a registration form with Power Apps Portals? Look at this blog post from the same series on "Attendee Check-In: Registration Form Using Portals" […]
[…] Register participants with Power Apps Portals (Dataverse) […]
[…] Registration form using Power Apps Portals […]