Last updated on 14/09/2024
This blog post is similar to my other blog post on how to style Power Pages. This updated version accompanies my “How to style Power Pages” session that I present all around the world.
I have worked with branding intranets and websites since I was 14 years old. The process for me has always looked something like this.
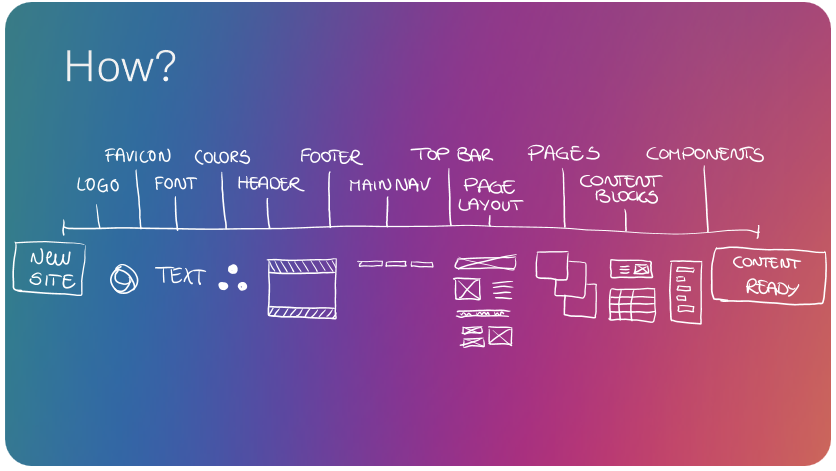
This is just my way of working. A timeline that I follow. I did not set out to work this way – I drew this last week in an attempt to sum up all the parts I need to style Power Pages.
Note! These are not all the steps required to make a complete website. This just represents the steps I take to brand the site. There is a lot more to cover from start to finish in a Power Pages project.
In this blog post, we’ll cover
- Get off to a good start
- Add Identity Markers
- Adjust the frame
- Content is king
- Customize
- Extend
Get off to a good start
Before you even have a site, you will make the first decision about branding. You will choose a template. You can select one of the starter templates that are cross-industry. They all have different CSS classes in the HTML and a CSS file controlling their look and feel. Make sure you choose the one closest to the end result you are looking for.
There are also industry-specific templates, and if you have one of the Dynamics 365 Business Apps installed in your environment you can use one of those templates as well.
You can read more about the templates in my blog post here:
Once you know the template you want you can create your site by following the wizard.
Add identity markers
I chose the “Blank Site” template for my site, and it’s looking pretty bland.
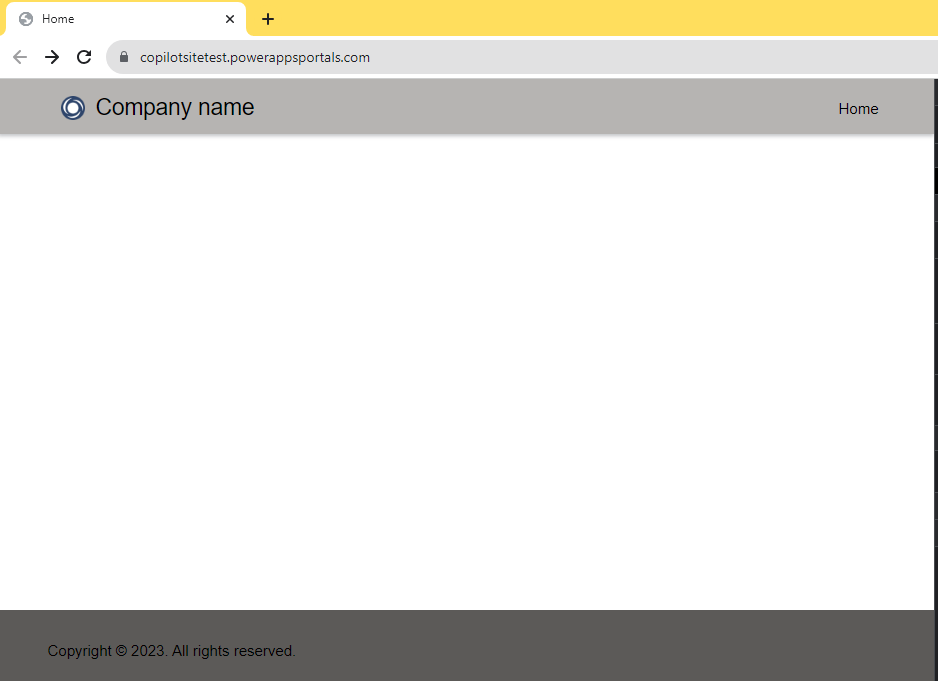
It’s time to spice things up!
You need four pillars of identity:
- Logo
- Favicon
- Font
- Colors
These identity markers can be provided by a marketing or communication department from the company that owns the site, or you might go out to find it yourself in a Brand Handbook or an existing website.
1. Logo
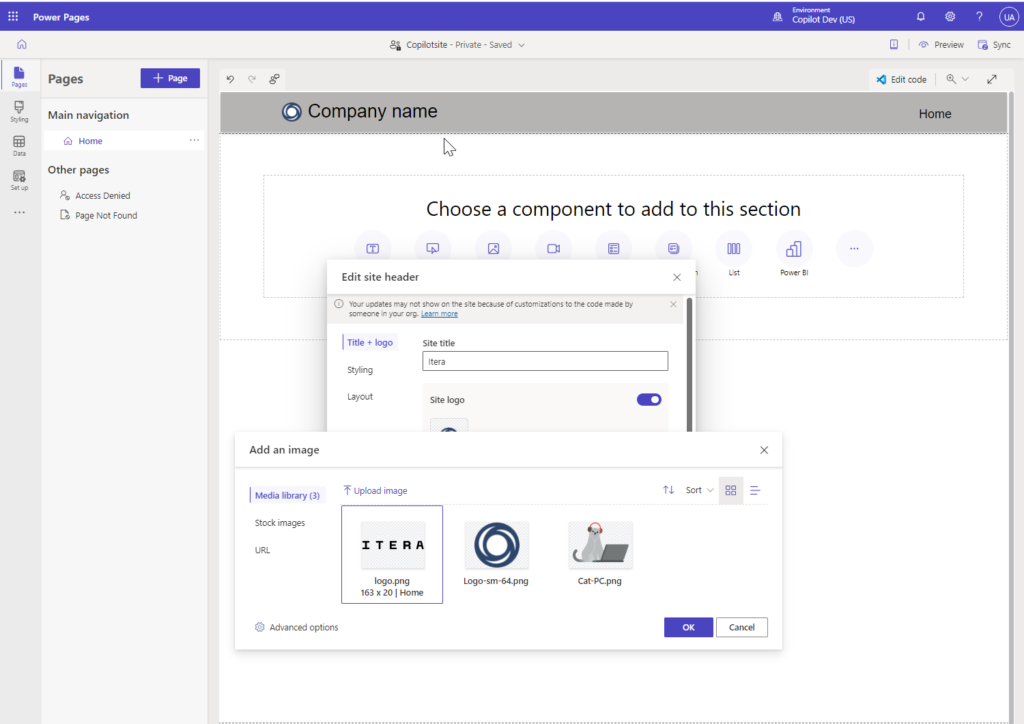
Hover over the header in the Pages workspace in the Power Pages Studio. Click the button “Edit site heading” that appears. You will be allowed to upload a new logo and set the site title.
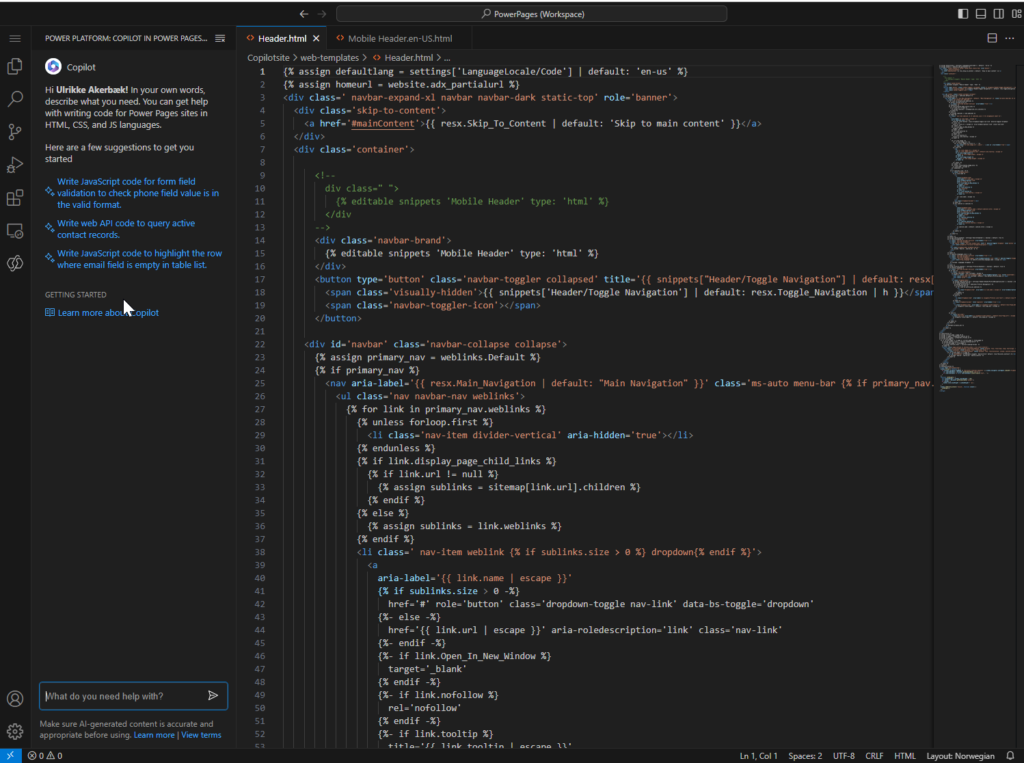
If you want to start customizing the header now – you can! Just hit the “Edit code” button from the Edit Header modal and VS Code for the browser will open the “Header” web template for you.
You can also get the Copilot experience in the browser now.
Save the file, sync your changes, close all modals, and refresh your site to see your changes.
2. Favicon
Favicons are browser icons that appear in the browser tab. It’s a nice touch and makes your site look and feel like any other professional site.
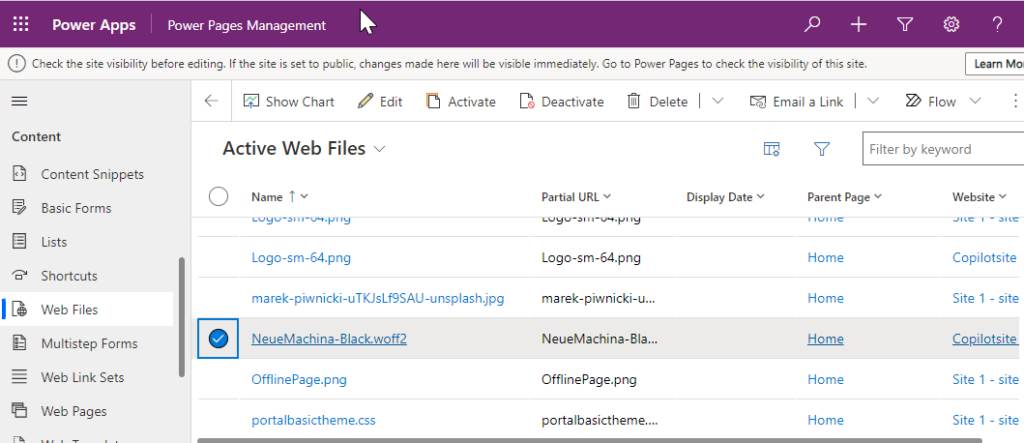
The browser will automatically add this icon to your site if you simply upload a file named favicon.ico at the top directory on your site. Now – the design studio will not allow us to do this, so we need to upload the file by creating a new Web File in the good old Power Pages Management Studio (yes, the Model Driven App we all know and love).
Follow these steps, and you will have a favicon on your site:
3. Fonts
This just in! You will soon be able to use Google fonts with your Power Pages site! In a couple of weeks, there will be a curated list of Google fonts available to choose from within the styling workspace of Power Pages Design Studio.
But – until such time – we can still use Google Fonts by adding it the old way.
Identify the font you like on Google Fonts, and follow the descriptions found here:
https://ulrikke.akerbak.com/2022/09/23/how-to-style-power-pages/#fonts
(The link will take you directly to the section about fonts)
Custom Fonts
We use a custom font at Itera that cannot be found on Google Maps, To be able to apply this font, I upload the files as Web Files the same way as I did with the favicon.
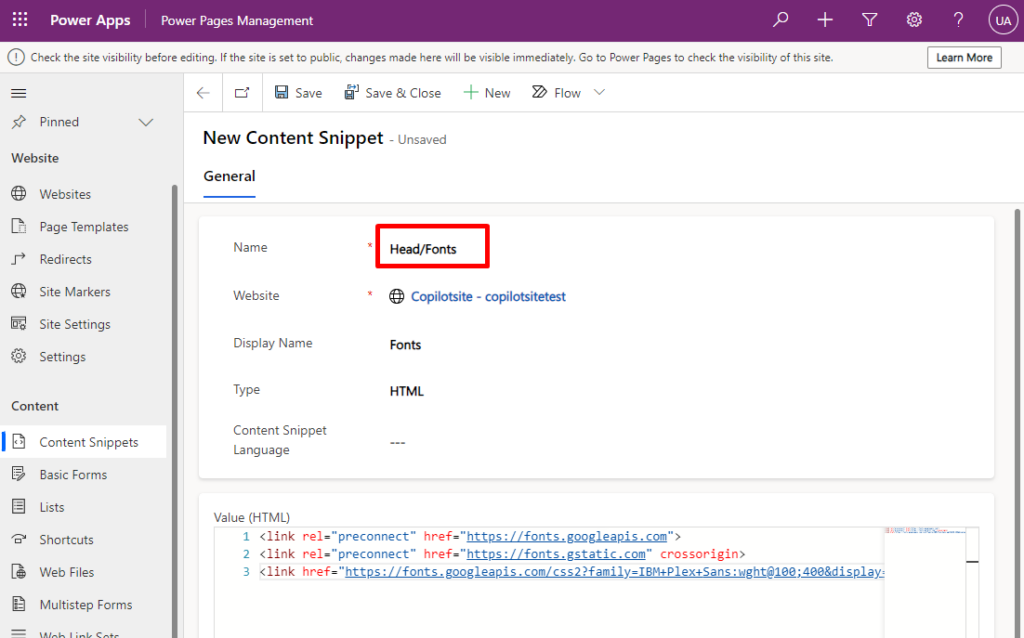
Content Snippet “Head/Fonts”
Wouldn’t it be nice if Power Pages automatically detected that I had added fonts to the system, and added them to the Styling Workspace for me to choose from? Well, unfortunately, it doesn’t.
This is where we need Content Snippets and a little bit of custom CSS.
I created the new Content snippet first, also from the Power Pages Management App.
There are over 600 content snippets that you can use to configure Power Pages. They are not documented in one place, but you can find them spread across documentation. You can find them all here:
https://top10powerpagestips.powerappsportals.com/nordic/Content-Snippets
Apply Fonts – Custom CSS
To apply fonts we need a new CSS file that we upload to Power Pages through the Styling workspace in the Power Pages Designer.
I create a new CSS file with VSCode that looks like this:
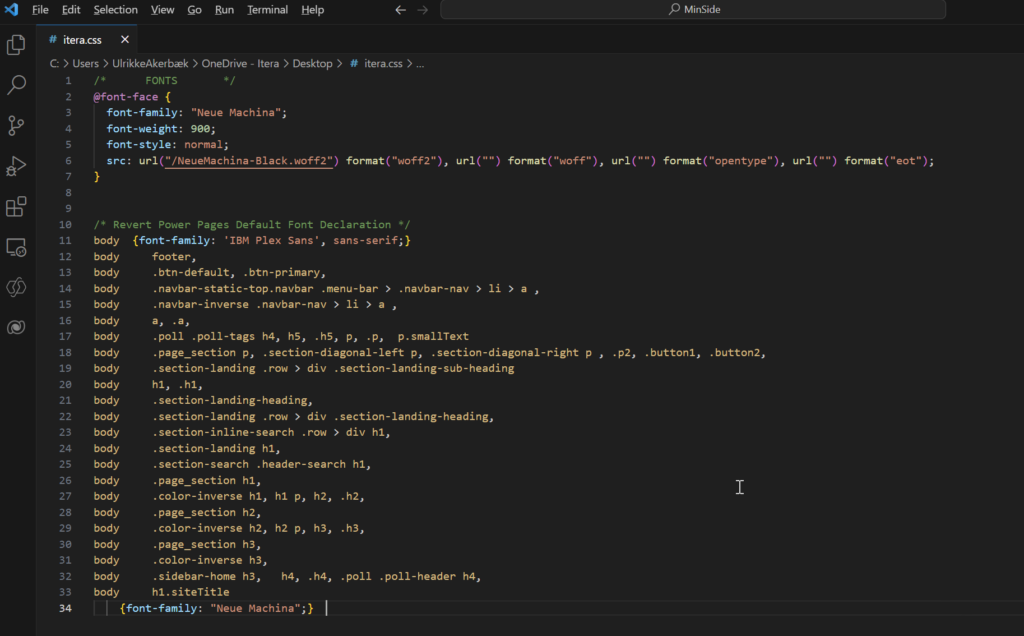
This is the code:
/* 			FONTS 			*/
@font-face {
  font-family: "Neue Machina";
  font-weight: 900;
  font-style: normal;
  src: url("/NeueMachina-Black.woff2") format("woff2"), url("") format("woff"), url("") format("opentype"), url("") format("eot");
}


/* Revert Power Pages Default Font Declaration */
body 	{font-family: 'IBM Plex Sans', sans-serif;}
body     footer,
body     .btn-default, .btn-primary,
body     .navbar-static-top.navbar .menu-bar > .navbar-nav > li > a ,
body     .navbar-inverse .navbar-nav > li > a ,
body     a, .a,
body     .poll .poll-tags h4, h5, .h5, p, .p,  p.smallText
body     .page_section p, .section-diagonal-left p, .section-diagonal-right p , .p2, .button1, .button2,
body     .section-landing .row > div .section-landing-sub-heading
body     h1, .h1,
body     .section-landing-heading,
body     .section-landing .row > div .section-landing-heading,
body     .section-inline-search .row > div h1,
body     .section-landing h1,
body     .section-search .header-search h1,
body     .page_section h1,
body     .color-inverse h1, h1 p, h2, .h2,
body     .page_section h2,
body     .color-inverse h2, h2 p, h3, .h3,
body     .page_section h3,
body     .color-inverse h3,
body     .sidebar-home h3,   h4, .h4, .poll .poll-header h4,
body     h1.siteTitle
		{font-family: "Neue Machina";}	Code language: CSS (css)
The first section links the Web Files to the font declaration. The second part overrides the default font declaration that comes from Power Pages default CSS.
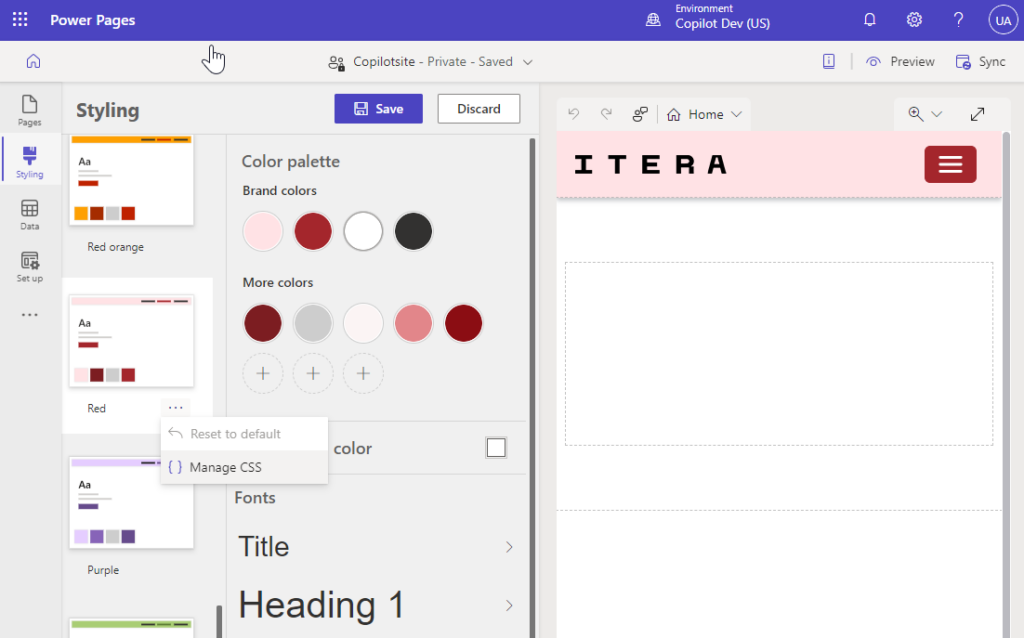
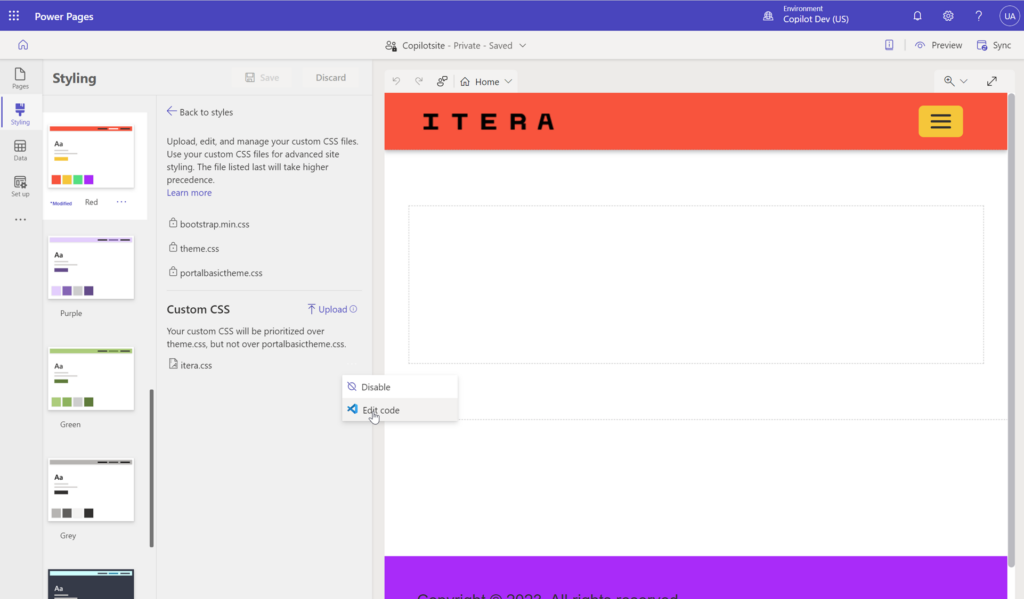
Choose the theme that is the closest match to your end result. Click the theme to mark it, click the ellipse, and click “Manage CSS”.
Upload your CSS. This is the only time you need to do this. Later we will be able to edit the CSS through the “Edit Code” in VSCode in the browser.
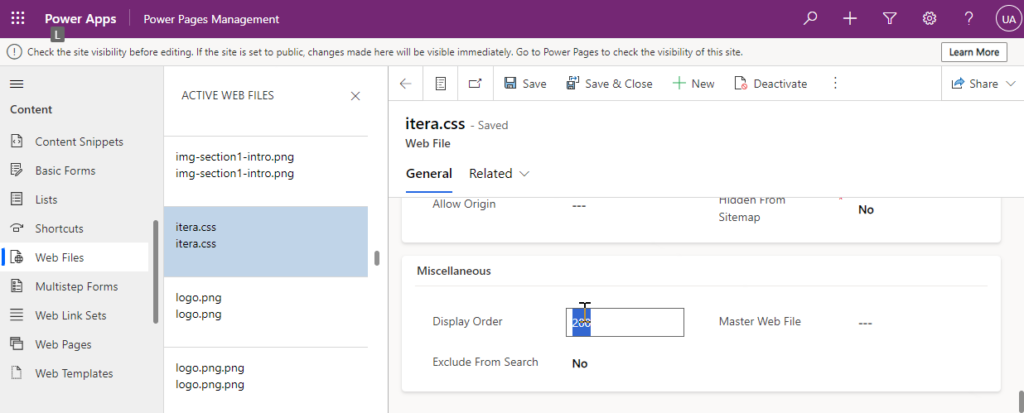
#LIFEHACK! Go into the Power Pages Management App, locate the file in “Web Files”, open it, and scroll all the way down until you find “Order”. Change it to “200” to make sure your CSS file is rendered last – and after all the out-of-the-box ones:
Now you should be able to see that the fonts are applied if you – first Sync – and then Preview your site from the Design Studio.
All the site templates have different CSS styles. (Yes, I know). So, you might have to adjust the CSS styles that you add in order to get your styles across. Remember, with CSS, the last and most specific style wins.
4. Colours
Even after you have added your CSS you can choose to work with the theme engine on the Styling workspace. Choose the theme that is most similar to the end result that you want.
I added the Itera brand colors as brand colors to the theme that I am modifying.
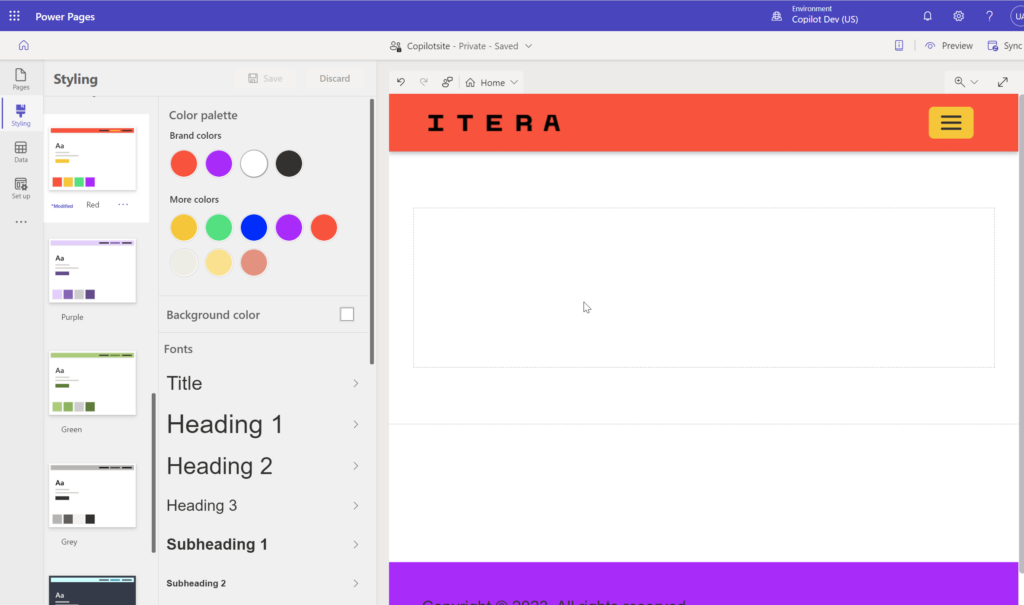
You can also scroll down and set how the different colors are applied across your site.
Adjust the frame
Now that we have set the colors and the fonts, we need to start adjusting the frame. The frame is the header and the footer, and the overall main areas. These are the elements that are the same no matter which page or content you are on.
Header
To adjust the header and footer, you can add styling to the custom CSS file. Go into the styling workspace to access the CSS field from VSCode in the browser.
This is where I use Developer Mode in the browser, Check this blog post for more details on how to use that:
https://ulrikke.akerbak.com/2022/06/11/my-method-for-learning-about-new-power-pages/#browser-devtool
Using the dev tool to adjust the header to what I want it to look and adding the code to my custom CSS file. These are the specific changes that I made:
- Set the navigation collapsing to “lg” instead of “xl”
- Set the height to a dynamic height
- Remove all the division markers between menu elements
- Replacing the hamburger menu with a “+” plus icon
- Adding logos for mobile
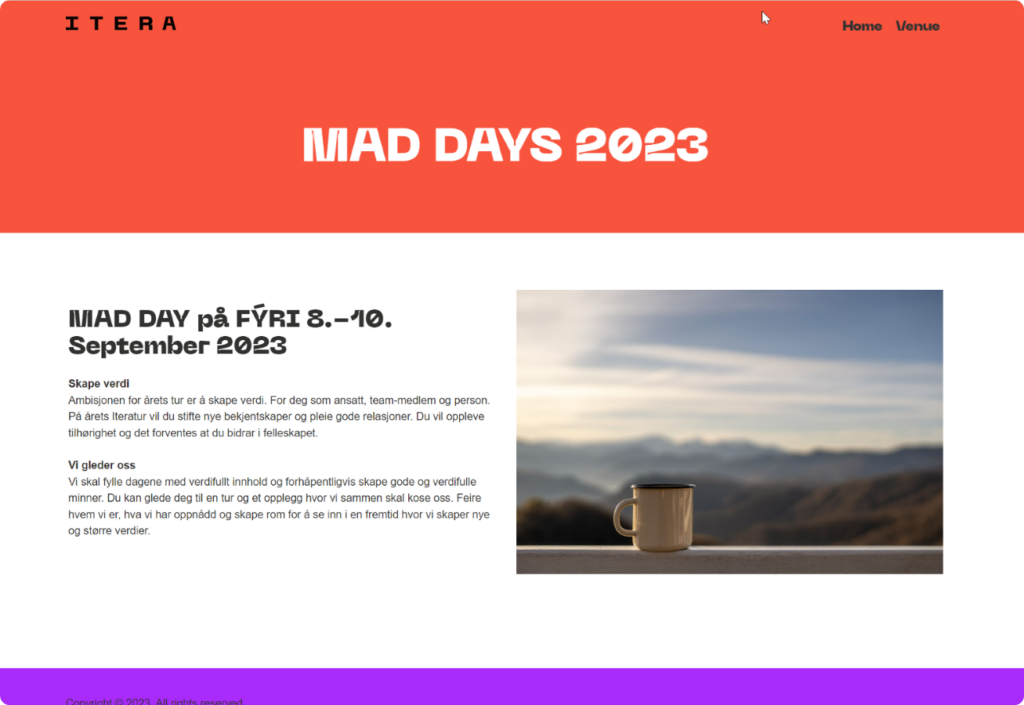
I suddenly have something that looks like this:

Content is king
At this point you have a blank canvas. We cannot get further without adding pages with content.
Now that the colours and fonts are in place the new pages and content that you add should carry the theme you set out of the box.
Now it’s up to you to make sure the content you add also follows the same rules.
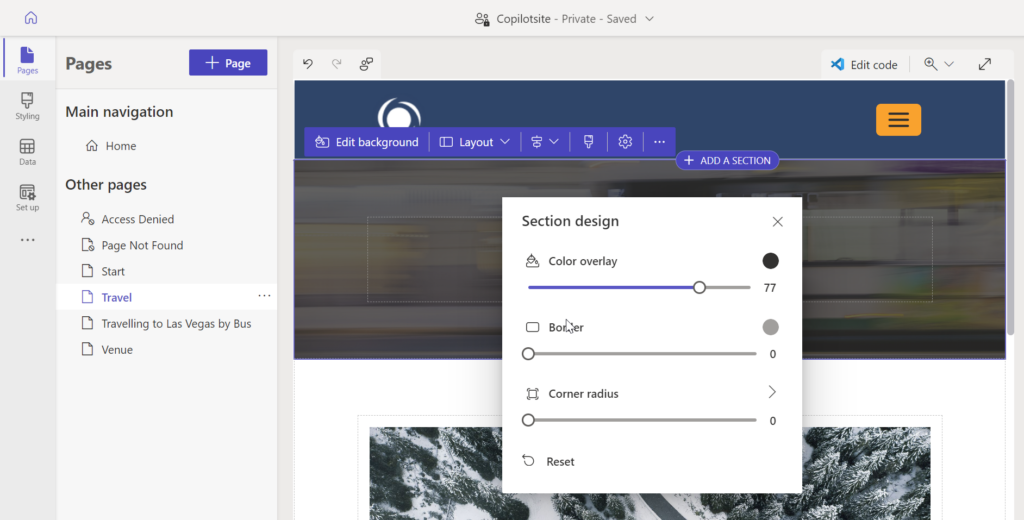
Sections
You can add background images to sections and use the “brush” icon to add additional styling, like overlay colors, border and corner radius.
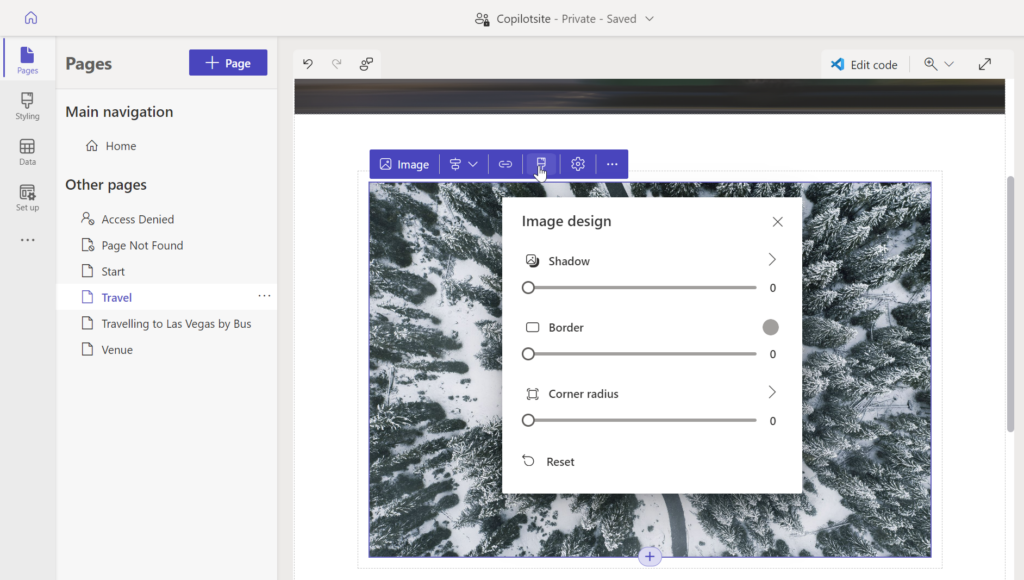
Images
Add images from the library or upload your own. You can add custom styling to these images as well:
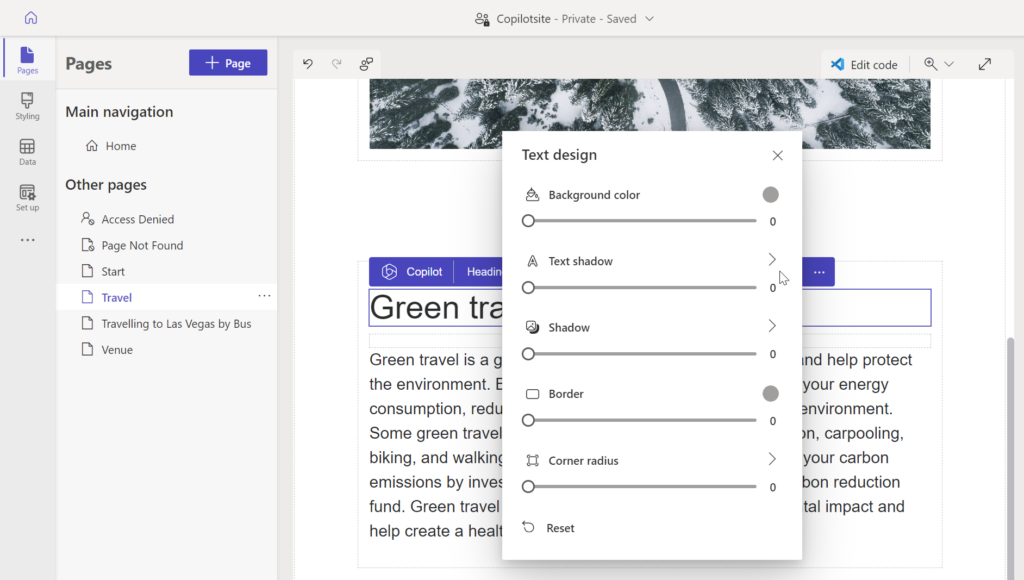
Text
We can also manipulate how text blocks appear:
Customize
All of the pages, elements and styling you add to content from the designer is added as inline styling on the page. This means that you will need to style all the elements from scratch each time.
That is not the most efficient way of creating content. Maybe you want to set certain rules for how all sections look, and then when you add a new section it automatically have the same styling across all pages?
This is how we work with professional web development. And you can do that with Power Pages too by adding styles to the Custom CSS. You can take it even one step further by downloading the Power Pages site with CLI and work with it using VS Code. This way you are free to develop for Power Pages the same way you would on any other web project.
Amazing session, I attended your first session, and I loved the energy and the way you talk about power pages, so I had to attend the second session.
Thank you so much for that positive feedback. Glad you liked it.